A user-friendly and powerfully hosted PBX
- Introduction
- Create and Manage Users
- Provision Devices
- Manage User Features
- Create and Manage User Groups
- Main Number
- Voicemail Boxes
- Feature Codes
- Call Logs
Introduction
The SmartPBX App combines the most common PBX functionality with a beautiful user interface. 2600Hz offers a true unified telecom solution, providing voice, video, SMS and mobile that can be deployed by anyone, anywhere. All services are controlled via API’s, allowing you to extend the App functionality as needed. Within the interface, create, manage, and remove services for your users. You can quickly create new client accounts and specify what access you want to provide. Features such as individual fax-to-email boxes, call forwarding and hot-desking are easy to understand and implement.
Track and Manage Everything
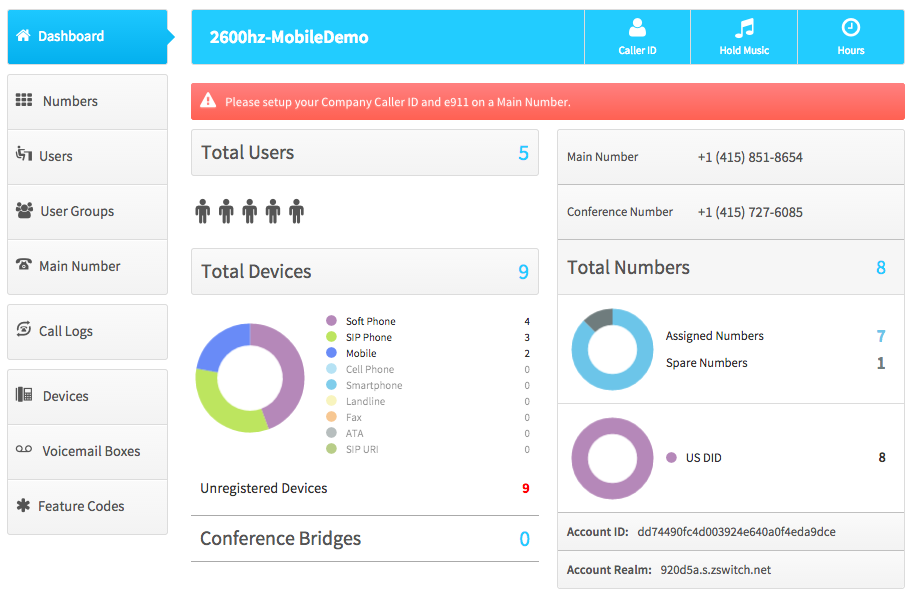
The SmartPBX dashboard provides a comprehensive overview of your entire product offering. Within this dashboard, review the total users, devices and associated phone types, conference bridges, main numbers and conference numbers. Also view the total amount of spare numbers and assigned numbers.

Create and Manage Users
Create users and manage their settings all within the interface. Once you have created users, you can now create user groups. Stay organized when you create multiple users groups, while simultaneously adding new users.
To create a new user:
- Click on the “Users” tab, just left of the dashboard.
- Within the “Users” tab, click on the “Add Users” button.
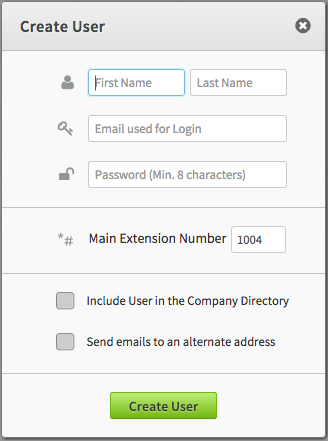
- Provide your user’s first and last name, email address for login, and create a password. You can also create a custom extension number and a Voicemail Box number.
Numbers - Purchase, Port and Assign
Provide each user with their unique direct-dial phone and extension number. Assign a spare number within the Interface, or buy or port numbers and then assign the number. When a number is ported or purchased, it will populate the Spare Numbers tab. You can also set office hours strategy, office holidays, and select the way callers reach clients.
To Purchase a Phone Number (Optional)
- Click on the “Users” tab of SmartPBX, just left of the dashboard.
- Within the “Users” dashboard, click on the “Phone Numbers” button for the specific user.
- Click on to the “Buy Numbers” button.
- To purchase a new number, decide whether you would like a local, toll-free, or a vanity number.
- Search for an available number by city or area code. You can then decide what and how many numbers to purchase.
- Add one number or multiple and then click “Buy Numbers.”
- The number will be added to the “Spare Numbers” tab, which you will need to assign a number to a user.
To Port a Phone Number (Optional)
- Click on the “Numbers” tab of SmartPBX, just left of the dashboard.
- Within the “Numbers” dashboard, click on the “Spare Numbers” button for the specific user.
- Click on to the “Port” button. You can also buy a number as well.
- To port a number, click on the “Start New Transfer (port)” button
- Type in one number or paste multiple numbers and select “Add.”
- After you add the numbers you would like to port, you can now view the numbers to be ported, which will be split according to carrier. You will need to collect the user’s bill to show that they are the rightful owner of the number and download the “Letter of Authorization.” Upload the “Phone Bill” and the “Letter of Authorization” signed by your user.
- Read and agree with the following and select “Next.”
- Select the email address to notify when the transfer is complete, the date you would like number transferred, and complete the order. Add temporary numbers for users in case they would like to have an active line during the porting process.
- The number will be added to the “Spare Numbers” tab, which you will need to assign a number to a user.
Assign Numbers to a User (Required)
- Click on the “Users” tab of SmartPBX, just left of the dashboard.
- Within the “Users” tab, click on the “Phone Numbers” button for the specific user.
- Click on the “Add from Spare Numbers” button.
- Select what Spare Number you would like assigned to the user. Once you have chosen a spare number click “Add Selected Numbers.” This will link the number with the user in a few seconds.
Provision Devices
With provisioning in SmartPBX, you can handle a large number of devices from multiple manufactures. The UI comes pre-populated with supported manufacturers and devices. If you had purchased a device through a certified manufacturer, you can provision a supported device by entering the Mac address and creating a name. If you did not, you will have to perform a few additional steps. If you do not have a supported device, you will have to manually provision your device.
To Autoprovision a device:
- Click on the “Add Device” button within the “Devices” section of SmartPBX
- Decide what type of device you would like to add. In this instance we will add a SIP phone. For instructions to provision another type of device, such as a SIP Device, Softphone or Mobile Softphone.
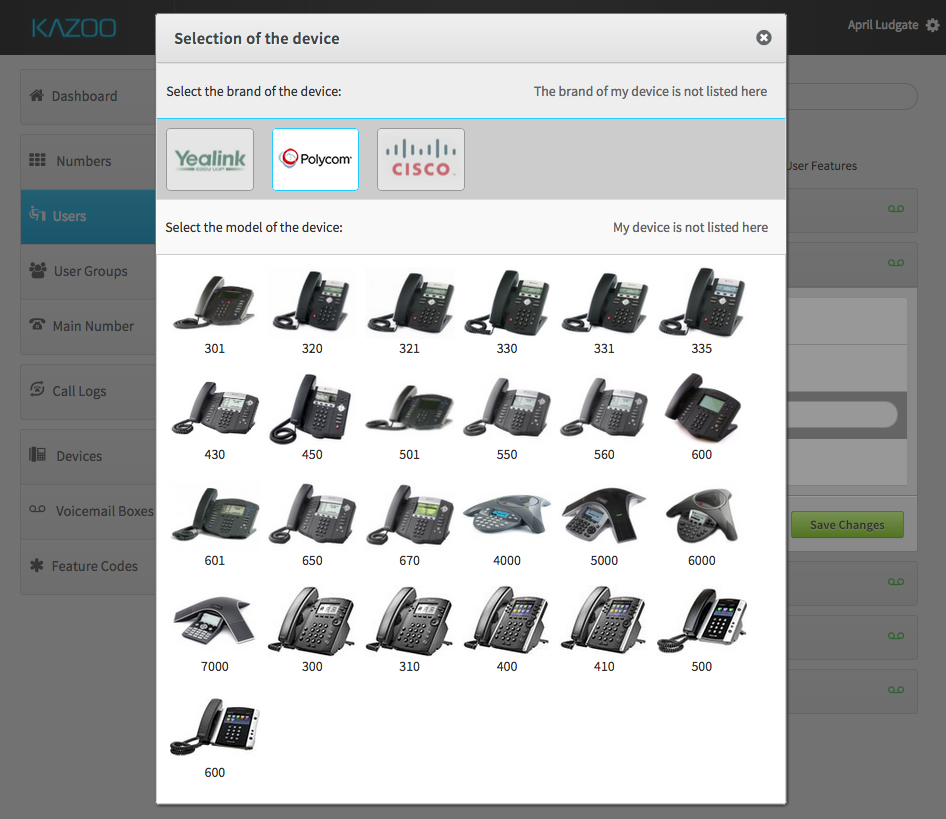
- Select the logo of the manufacturer for the device
- Select the model, which will be displayed along with a picture for easy identification. If you do not see your manufacturer or model, you will need to manually provision your device.
- Enter the MAC address and create a name for your device. The MAC address is on the back of your SIP device.
Based on your device, Manufacturer you’ll need to do one of three things:
If you have purchased a supported device through a 2600Hz supplier, your device should be ready to use right away.
Auto-Provision Devices using a non 2600Hz Supplier varies among manufacturers, so you need to go into the manufacturers website to auto-provision each device. To do this, turn on your SIP device and enter the IP Address into your web browser. Included in the link are the step-by-step instructions to auto-provision a 2600Hz-supported device based on the underlying manufacturer.
Manage User Features
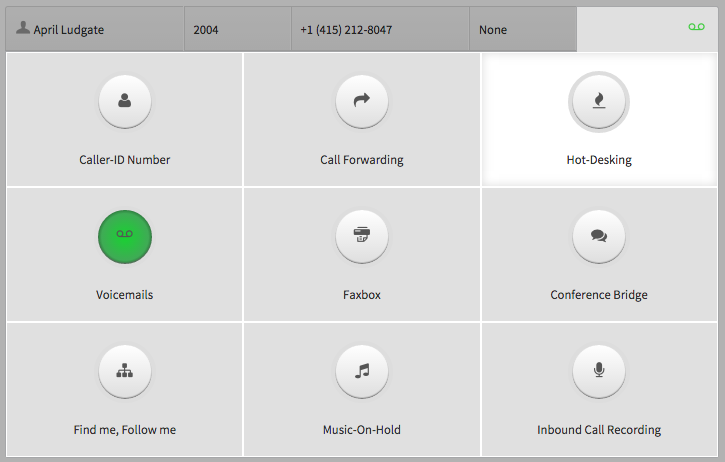
Manage what features your users can access. Turn on/ off and manage Caller ID, Call Forwarding, Hot Desking, Voicemails, Faxbox, Conference Bridge, Find Me, Follow Me, Music-On-Hold and Inbound Call Recording.
To Access User Features:
- Click on the “Users” tab of SmartPBX, just left of the dashboard.
- Within the “Users” tab, click on the “User Features” button for the specific user.
- This will show all available User Features, click on a specific feature and enable. For instructions on Caller-ID, Call Forwarding,Hot-Desking, Voicemails, Faxbox, Conference Bridge, Find Me, Follow Me, Music-On-Hold, or Inbound Call Recording.
- Within the “Users” tab, click on the “User Features” button for the specific user.
- This will show all available User Features, click on a specific feature and enable. Instructions for features:
Create and Manage User Groups
Once you have created enough users, you can begin creating user groups. This is extremely useful if you have users that work in the same department, such as a sales or marketing team. Stay organized by creating multiple groups, while simultaneously adding new users.
- Click on the “User Groups” tab of SmartPBX, just left of the dashboard.
- Within the “User Groups” dashboard, click on the “Add Group” button.
- The interface has a handy drag and drop. Drag the available users over to selected users, create a name for your new group, and add a number and if possible an extension.
- Once you have created a User Group, manage the group name, members, extensions, phone numbers, and group features in the interface. Manage members, numbers, extensions and group features.
Main Number
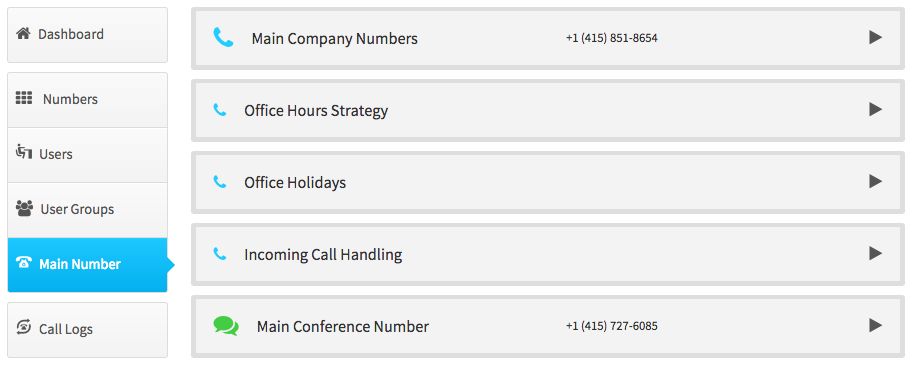
Set up your own office Main Number within SmartPBX. Once you've added a number, set up an office hours strategy, set office holidays, manage incoming call handling, and even set a Main Conference Number.
Create a Main Number
- Go to the dashboard in SmartPBX and click "Main Number."
- Click "Main Company Numbers" and add a spare number or buy numbers.
Create Office Hours Strategy and set Office Holidays
- Go to the dashboard in SmartPBX and click "Main Number."
- Click "Main Company Numbers" and add a spare number or buy numbers.
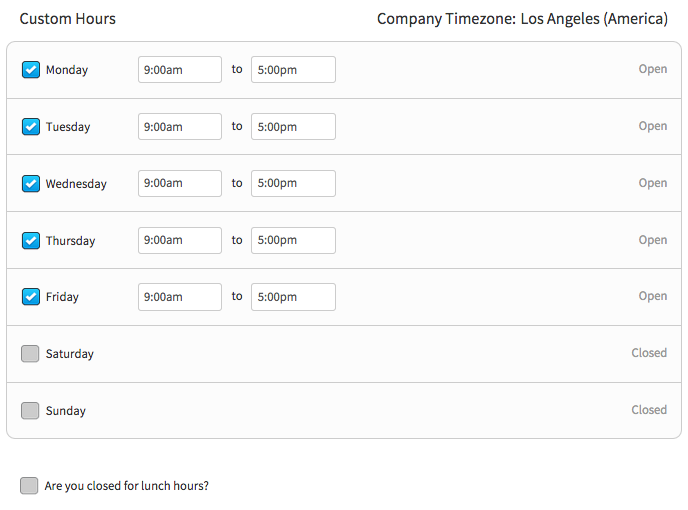
- You have the option to set a 24 hours Open Office or Custom Office Hours. If you want to customize, set the times during the week that your office will be open. Save changes.
- Click on "Office Holidays" within the Main Number tab.
- Add a specific holiday date, select a date range or select an advanced function. Add dates and save changes.
Incoming Call Handling
- Go to the dashboard in SmartPBX and click "Main Number."
-
Click "Incoming Call Handling" and select how you would like to be reached during "Open Hours" and "After Hours."
- Note that the "Users" dropdown has other options other than Users to choose from like devices, groups, media, etc.
-
Select whether you would like incoming calls to go straight to a Virtual Receptionist, a User and then a Virtual Receptionist, a User and then a Voicemail Box, or Advanced Callflows (see Advanced Incoming Call Handling )
- If using a Virtual Receptionist, see .Virtual Receptionist.
- If using an option with a dropdown, use the dropdown to select the desired option.
Virtual Receptionist
VIrtual Receptionist, (AKA IVR, auto attendant, or menus), will let you play an audio file, "Greeting", letting the caller know their options. The editor will allow you to create the greeting and configure the actions that should be associated with the digits you tell the user they can press in the "Greeting" you provide.
- The caller can also dial an extension.
- If no option is selected within 10 seconds by a caller or what they enter is invalid, the greeting will be repeated.
- If after 3 errors and/or timeouts the default action route will be used. If there is no default action configured, the call will be hung up.
- Those settings are configurable by going to Advanced Callflows, Menus, "MainOpenHoursMenu" (or whichever is appropriate for the call handling you are working on), Advanced, Options.
- Click the "Virtual Receptionist" link in the "Incoming Call Handling" option you selected.
-
Click "Add Routes" to add what should be done when a user presses a digit or the default action (if nothing is chosen by the user).
- Choose a digit for the "route".
- Choose an action for the "route". It has the same options as the "Users" field in Incoming Call Handling: devices, users, groups, media, SmartPBX enabled Advanced Callflow's, etc.
- Use one of the options under "Greeting" to create the message that will be played to the caller that will let them know what options they have matching what you just set up.
- Click Save for the Virtual Receptionist editor.
Advanced Incoming Call Handling
If the call handling in Incoming Call Handling is not adequate for the needs of the account, there is vastly more functionality and flexability that can be tapped into with Advanced Callflows app ( the app is sometimes just called Callflows ) and tied into SmartPBX Incoming Call Handling.
This guild will not go into the details of the functionality and flexibility of Advanced Callflows, only how to make a callflow available in SmartPBX.
- Goto Advanced Callfows, Callflows.
- Create a new callflow or edit an existing one.
-
Click the Edit icon in the blue title bar of the callflow just below the "Save Changes" button.
- Give it a name. That is what will show up in the dropdowns in SmartPBX. So keep it short but descriptive.
-
Make the checkbox for "List this callflow in Main Number" checked. That is what determines it the callflow will show up in SmartPBX.
- Note a callflow must be assigned a DID number or an extension. However the extension "number" doesn't have to be a number, it can be something that would not be dialed as an "extension". So the value of an "extension" can be something like "superincomingcallhandling".
- Save
- Go back to SmartPBX and now Incoming Call Handling will have a new option for "Advanced Callflows" and the Advanced Callflow you created will be available in dropdowns like the Users dropdown and the action list in the routing rules of the Virtual Receptionist as well as other places in SmartPBX.
Voicemail Boxes
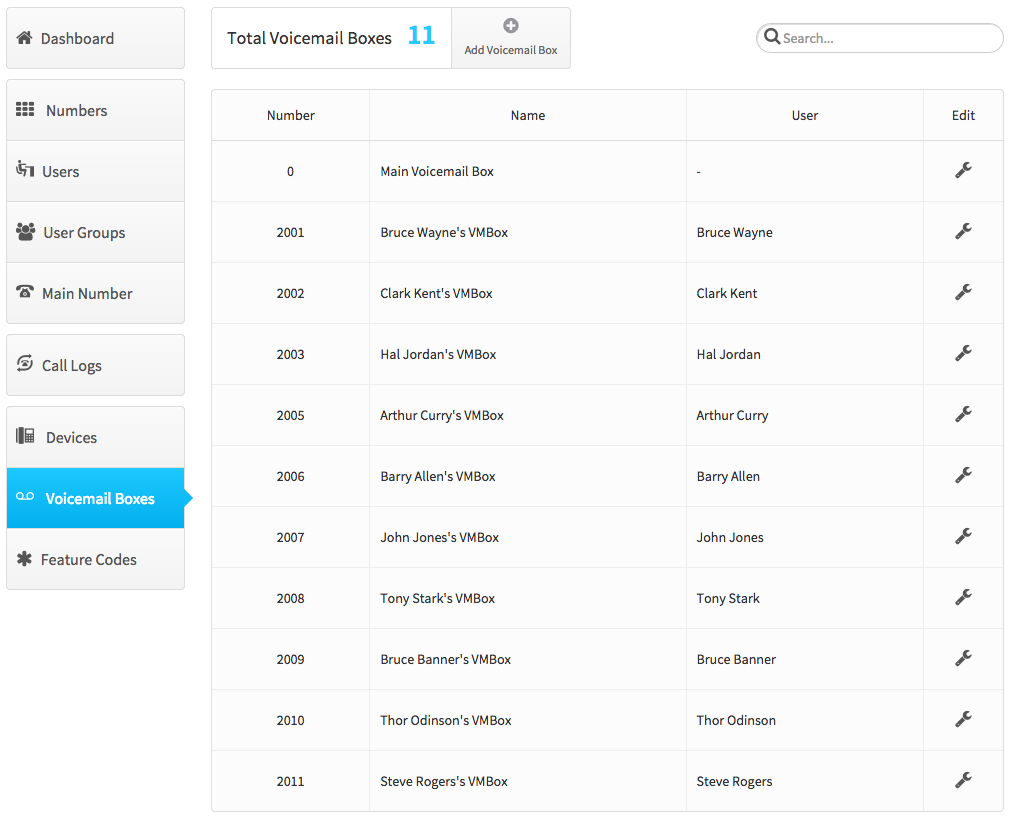
Voicemail Boxes can be created and managed within the SmartPBX UI. Voicemail Boxes will be populated in the "Voicemail Boxes" tab once a new user is created. From there you have advanced options such as providing pins, greetings, and adding recipients.
To access Voicemail Boxes:
- Click on the “Voicemail Boxes” tab of SmartPBX, just left of the dashboard.
- Within the “Voicemail Boxes” dashboard, click on the “Add Voicemail Box” button.
- Fill out all the pertinent information in Basic Settings.
- Manage PIN, Auto-Login, Greetings, Instructions, Delete after Notification, Configurable via Menu via Advanced Settings and Add Recipients.
Feature Codes
Feature Codes allows you to map common system-wide features to use keys you're already familiar with. Feature codes include call parking, intercom, voicemail and more. These feature codes can be utilized by your device. For instructions to utilize feature codes, look at User Features Codes
Available Feature Codes
| Intercom | *0 |
| Park and Retrieve | *3 |
| Privacy | *67 |
| Enable Hot Desking | *11 |
| Enable Call-Forward | *72 |
| Check Voicemail | *97 |
| Toggle Call-Forward | *74 |
| Update Call-Forward | *56 |
| Disable Hot Desking | *12 |
| Retrieve | *5 |
| Vallet | *4 |
| Disable Call-Forward | *73 |
| Direct to Voicemail | ** |
Easy Call Logs
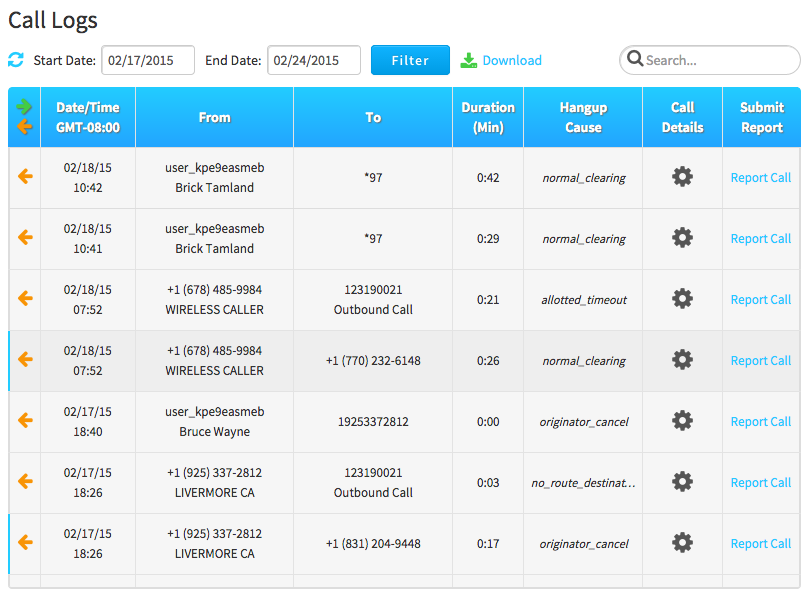
Diagnose call delivery problems with ease. Every call is tracked and every device that rings or that is attempted is shown. Call problems can also be reported with a single click.

