
 |
|
The following is a User Guide for comm.land 2.3 and its workspaces. Installation guide can be found here. |
The Dock, Workspaces, and Apps
With 2.3, you will have the power of Workspaces and Apps right at your fingertips.
What is a Workspace? Our Workspaces are a set of core features that always stay updated in the background, regardless of moving to other spaces within comm.land.
Current workspaces are as follows:
-
Phone
-
Contacts (Alpha)
-
Conferences (Beta)
-
Faxes
What is an App? This is everything else! The Apps that you know and love already can live right in comm.land.
Note: Currently only 3 Apps can be used in comm.land. More will be coming, along with the 2600Hz Marketplace
Current Apps Available are as follows:
-
Call Center (Basic and Pro - unified)
-
Conferences Admin (Beta)
-
Screenpops Admin (Alpha)
Accessing all your Apps and Workspaces - Simply hit the Dock Menu Button in the bottom left corner, and you will see 2 tabs – one for your Workspaces and another for your Apps.
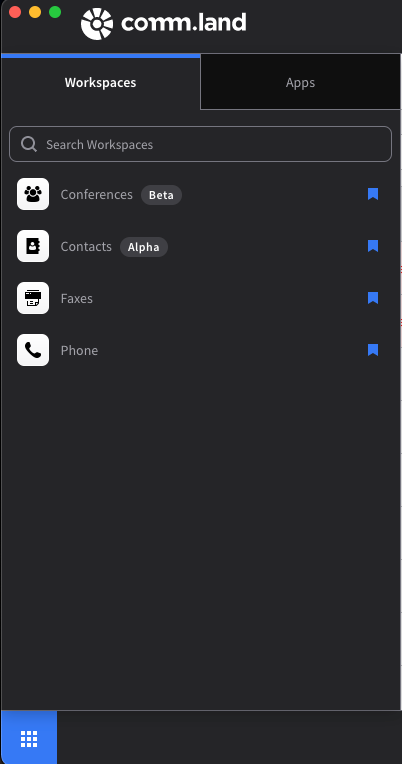

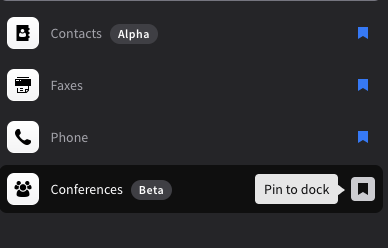
Customizing your dock - You can customize your dock by pinning different Apps and Workspaces. You can pin up to 4 Workspaces and 4 Apps to your dock. There is also space for a 5th Workspace and App, which will be the last used Workspace/App that is not pinned.
Phone Workspace (with Webphone)
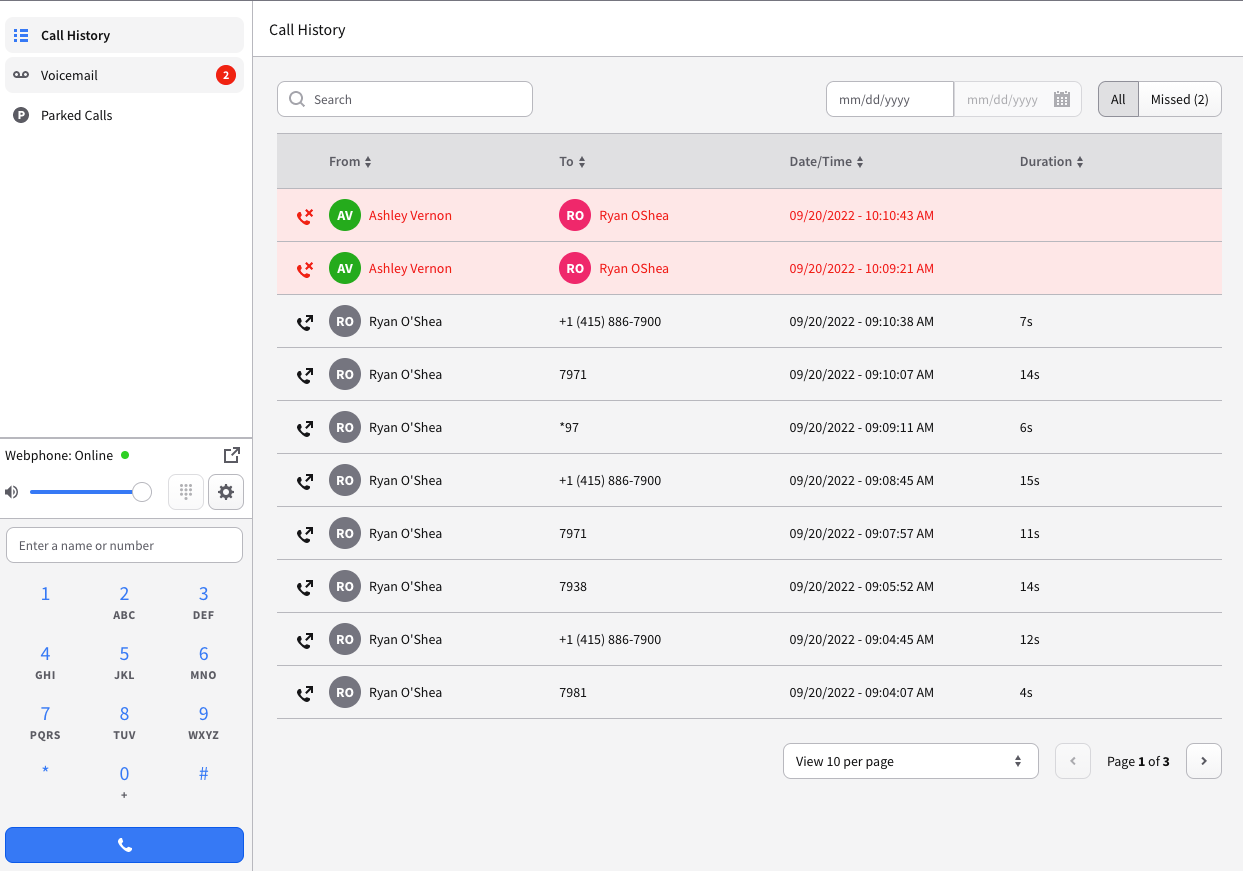
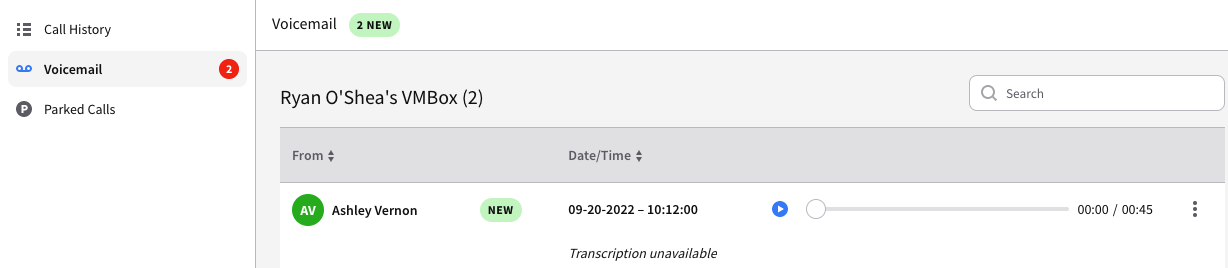
By default the Phone Workspace will open with the Call History tab selected, you can select to view Call History, Voicemail, or parked calls to the right of the webphone in your Phone Workspace.
If enabled, the webphone sits to the left of your chosen call data. Within the webphone, you can “pop-out” the phone to move around your screen or take out of your Phone Workspace.
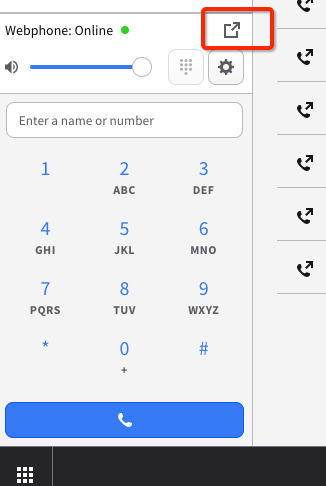

When you have your webphone as a new window, you will have the option to pin your phone back to the Workspace. This is helpful should you lose that new window. The webphone is always available in all App and Workspace pages via the “Phone” icon in the top right.

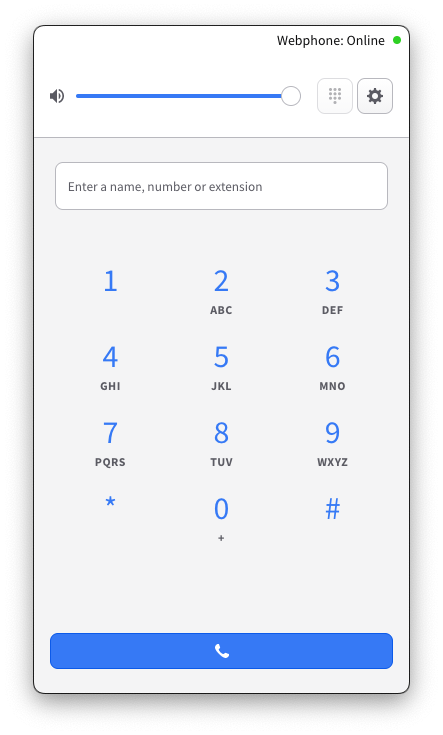
Using the Webphone
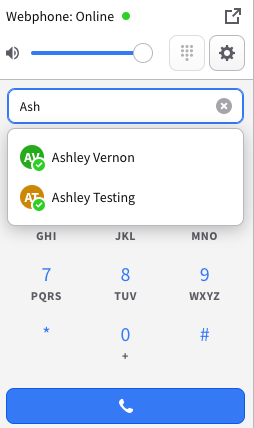
Simply enter a name (internal), number, or extension. If you enter at least 3 Characters, you will see a search for a user within your office! Simply click on the user, their information will auto-fill, then you can hit the dial pad to call.
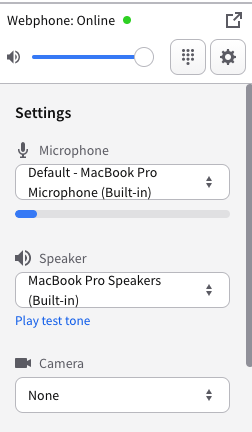
Selecting the gear icon, you will see your microphone, speaker and camera settings. You can leave it set as “Default” and it will auto-select your computer's default speaker and microphone. You can also select away from the default, which will stay present until device is disconnected.
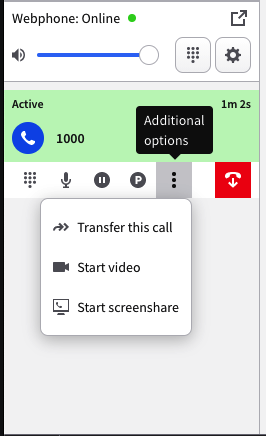
While in a call, you can open the dialpad, mute yourself, place the call on hold, park the call, transfer, start video or start a screenshare.
Settings Page
To access the Settings page, click on your username at the top right corner. Then select “Settings.”
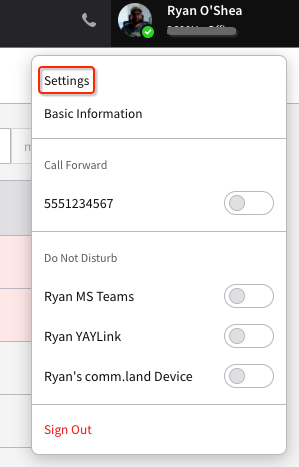
Note: Call Forward toggle will only become present after setting a forward for the first time from the Settings page.

Basic Information Page
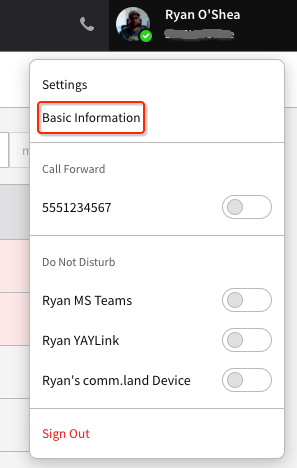
You access your Basic Information by clicking your name in the top right then selecting “Basic Information.”
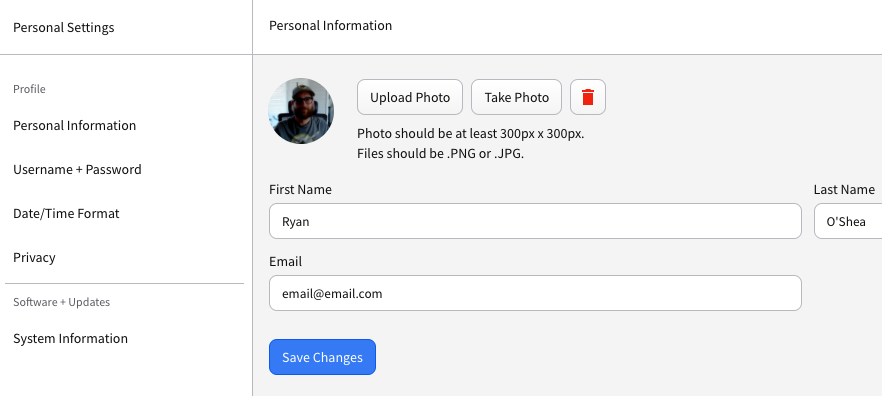
From the Basic Information area, you can set/update things such as your name, email, username and password. You can also set any date/time format preferences and caller ID privacy preference.
Contacts Workspace (Alpha)
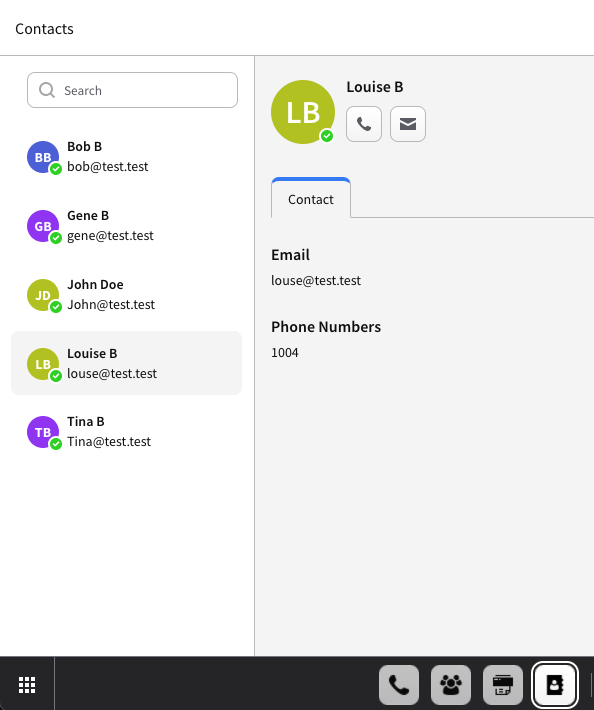
Easily look through your internal directory, call or email directly from the Contacts Workspace.
Conferences Workspace (Beta)
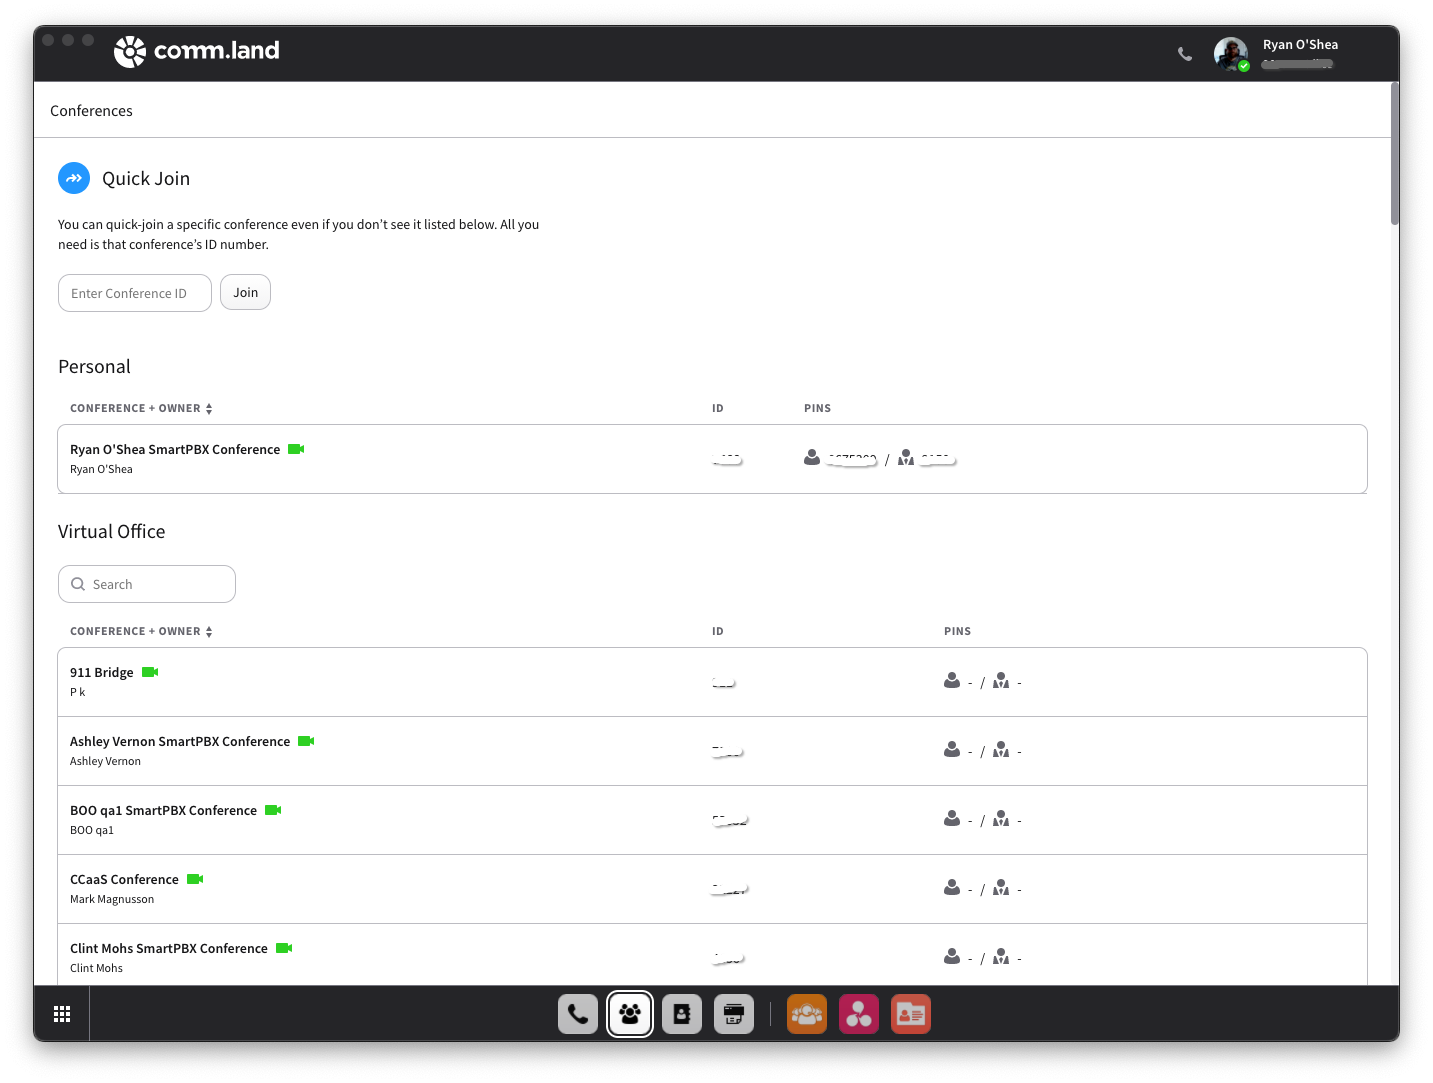
Upon entering the Conferences @orkspace, you will see an overview of all the conferences on your account. Your personal conference will be up top. To join a conference, simply hover over the conference row and select “Join.”

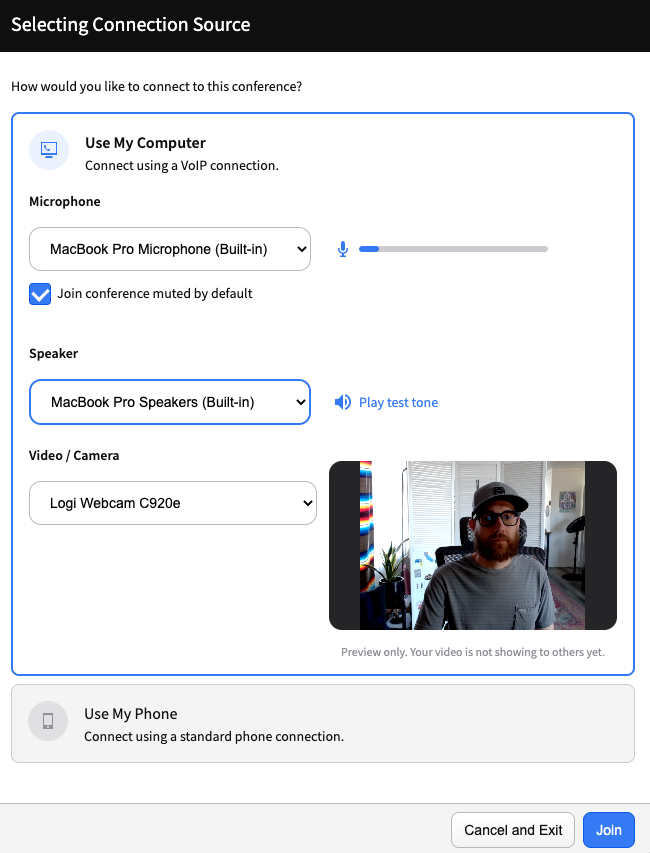
After selecting join, you will be presented with a set of options to join either by phone or computer.

Selecting Use My Computer will present you with options to select a microphone, speaker, and, if video is enabled on the conference, Video/Camera.
Selecting Use My Phone will provide you with the Call-in Numbers along with all the Conference ID and Participant PIN that will be needed to call-in.
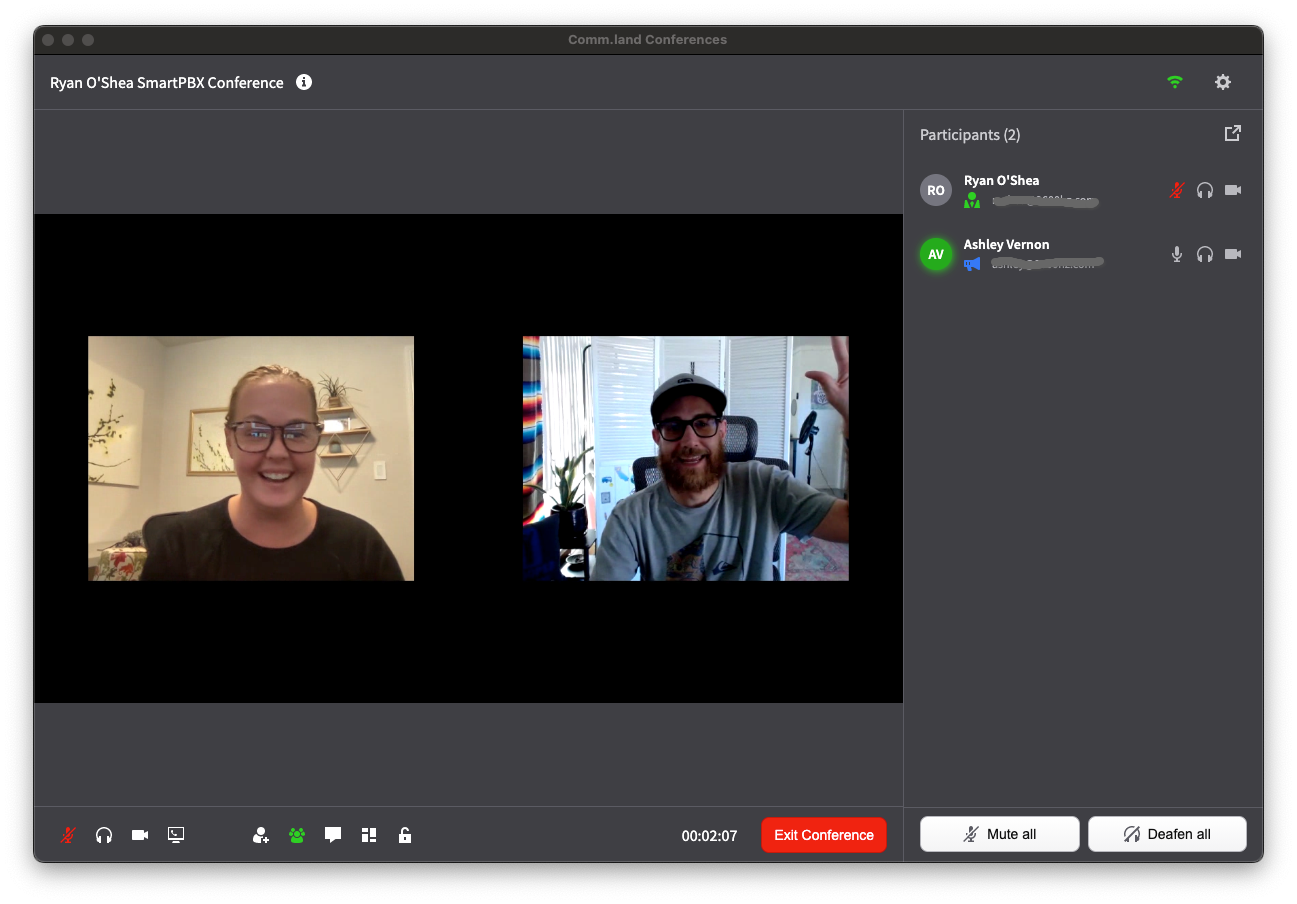
In video conferences you will have the following options.


For your personal conferences or conferences you are an admin of, you have extra options. You can force a layout on the screen, including locking it to 1 single user if needed for presenting. You also have the ability to lock or unlock the conference. Locked conferences will block all new users from joining, until an admin has unlocked the conference again. The ability to “Mute all” participants or “Deafen all” is also an extra feature available to conference admins.
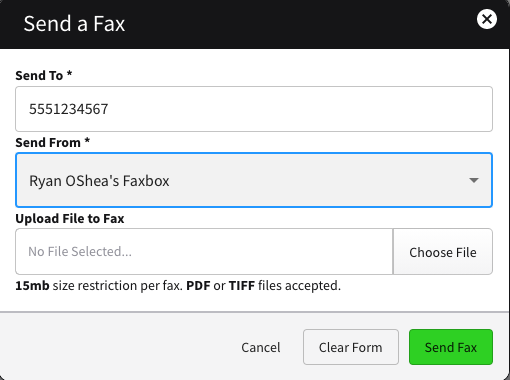
Faxes Workspace
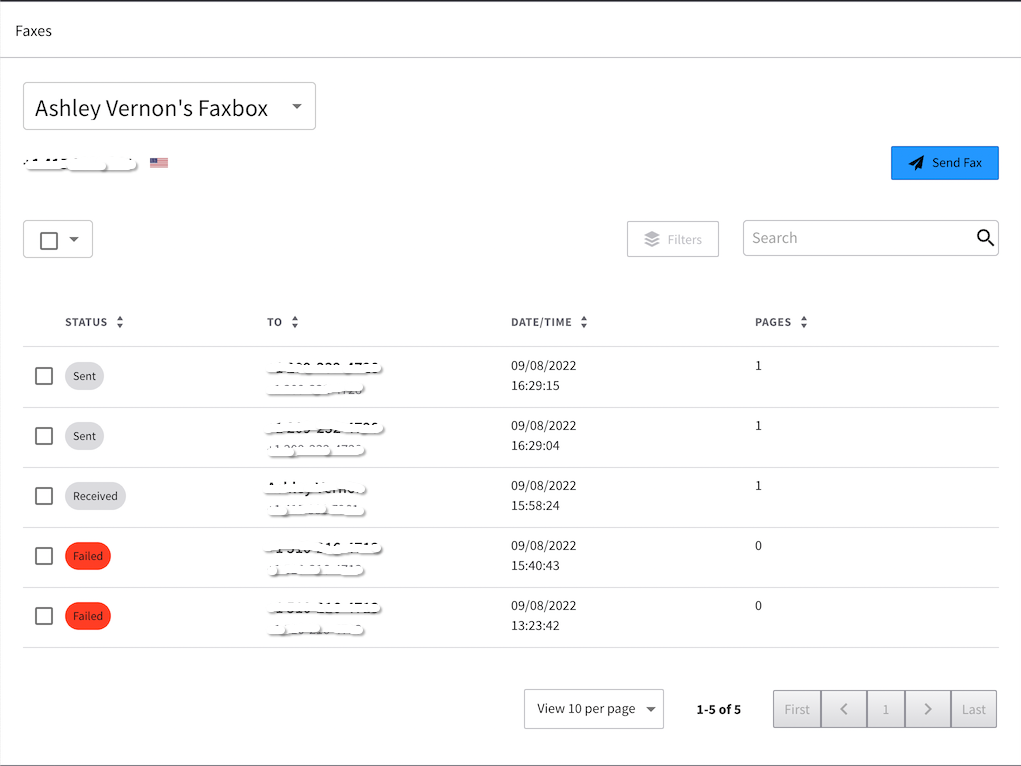
Sending a fax - You can send a fax easily by hitting the send fax button, it will then allow you to choose a phone number to send to and, if you have multiple faxboxes, it will allow you to pick which one to send from. Then simply upload a file you wish to fax. (15mb max)
comm.land Application Updates
Once you have downloaded comm.land to your desktop, you will receive automatic application updates. When this happens you will see a notification asking if you want to restart comm.land and launch the update immediately or later.
Recommended Comments
There are no comments to display.