Search the Community
Showing results for tags 'pbx connector'.
-
-
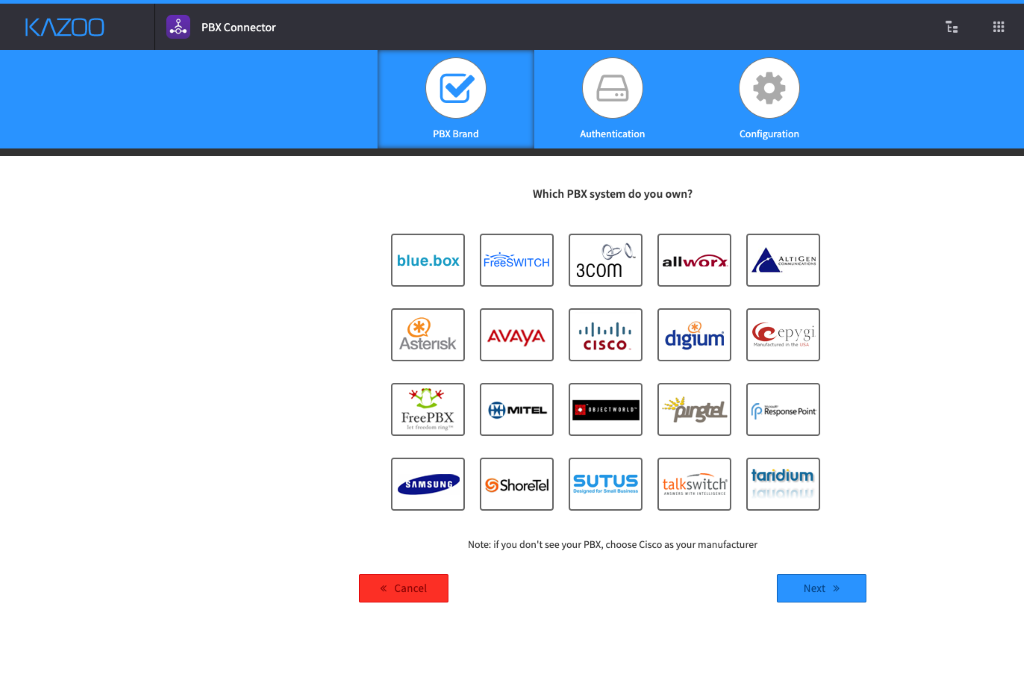
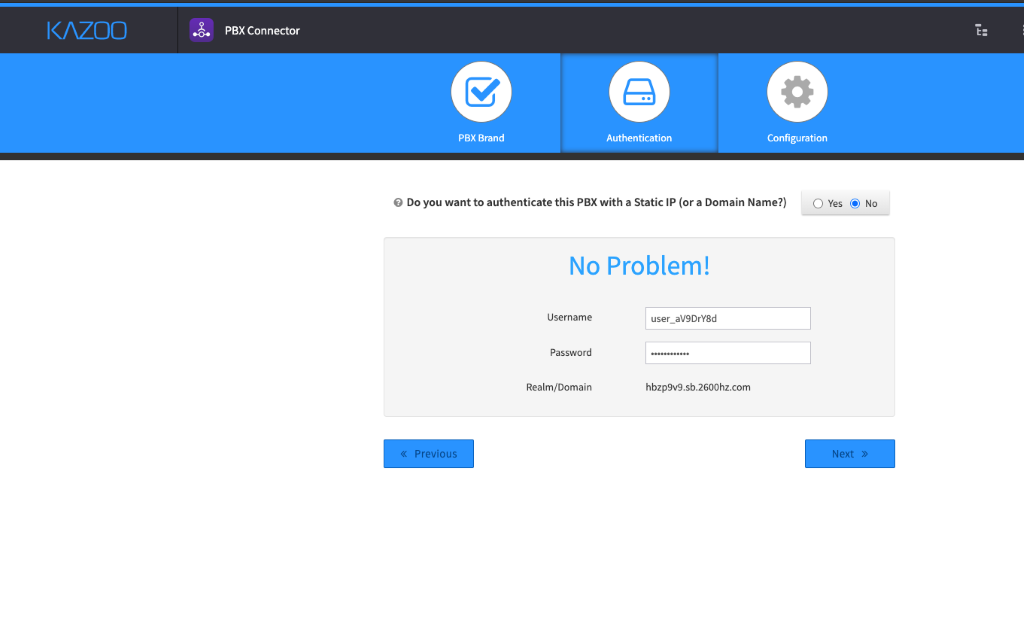
2600HZ STEP GUIDE – PBX CONNECTOR What is the PBX Connector? PBX Connector attaches any PBX system to our SIP Trunks so that you can get rid of old and expensive analog or PRI lines. The App is extremely user-friendly, allowing you to move numbers from one PBX to another in minutes. Using the PBX’s own dial-plan tools, pick which phone you want to ring, which menu you would like the call to go to, and how you would like the phone number to act. Assign, Add or Port Numbers Use spare numbers that you purchased in SmartPBX and assign it in the PBX Connector. You can assign and configure numbers before or after you configure your PBX system. These numbers will be mapped back to the PBX. In real time, it will purchase or port a number and map back to the PBX. Configure your PBX System Simply select which PBX system you are using from the dropdown, and create a name. 2600Hz has preloaded the most popular PBX manufacturers for your ease-of-use. If you do not see your PBX manufacturer, choose Cisco and notify 2600Hz support. Authentication Create a username, password, enter the realm/domain and determine if your PBX is on a static IP address.
-
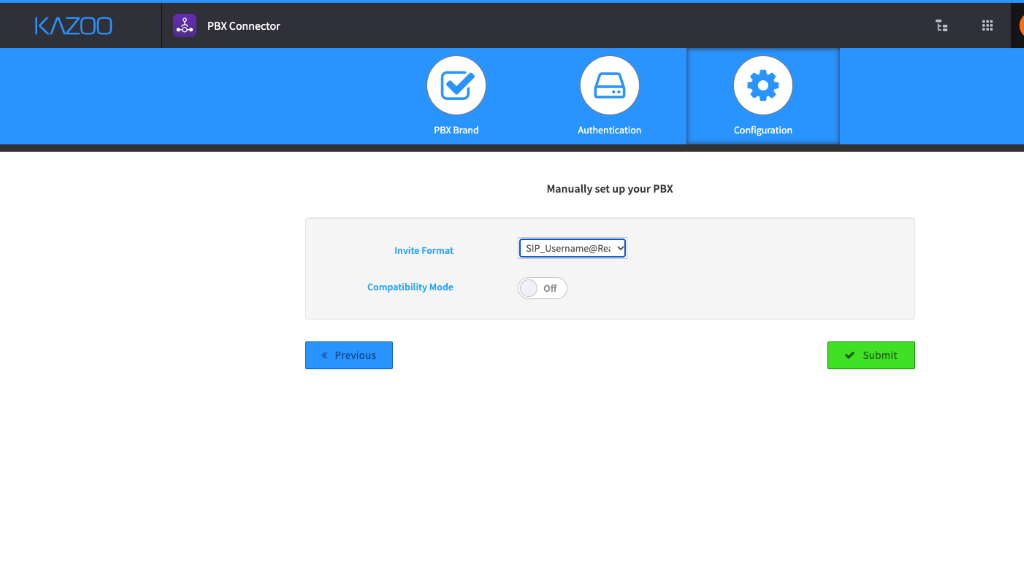
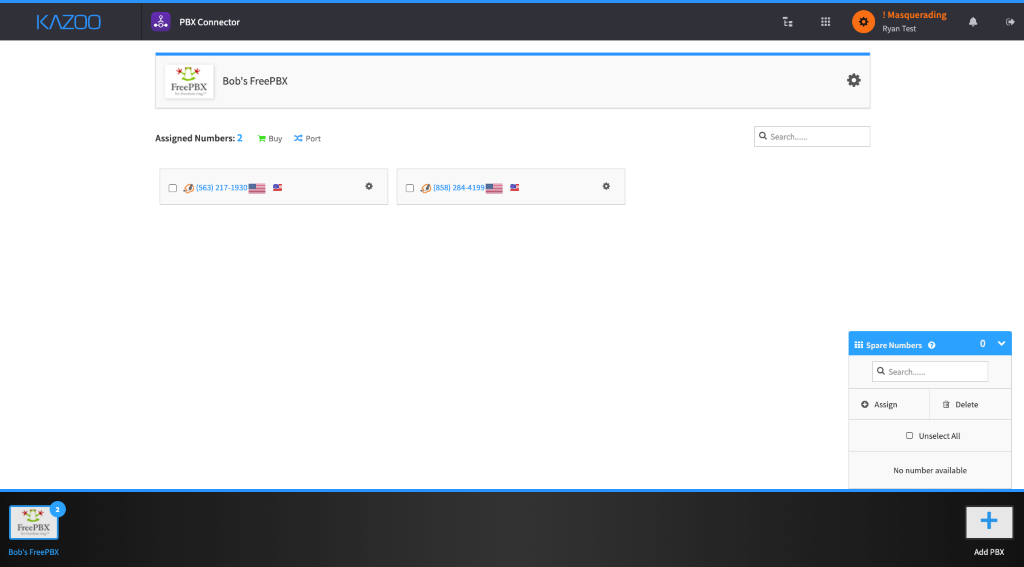
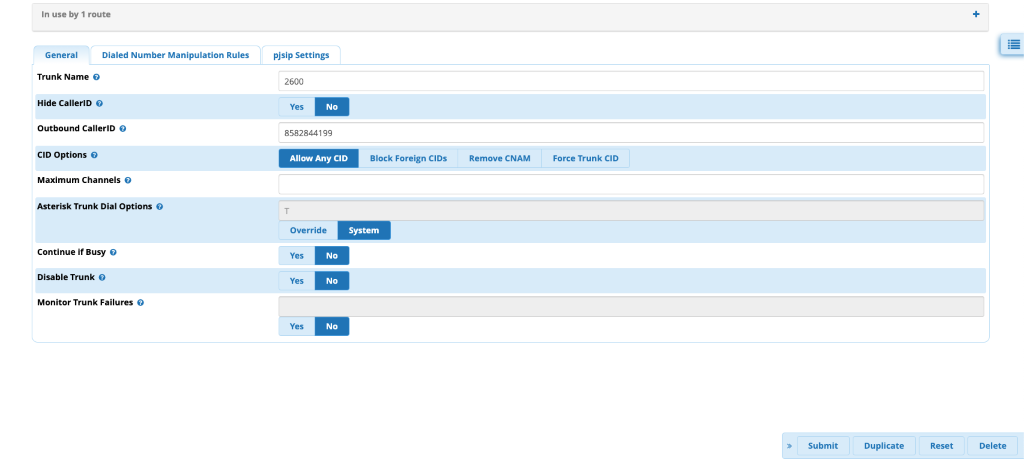
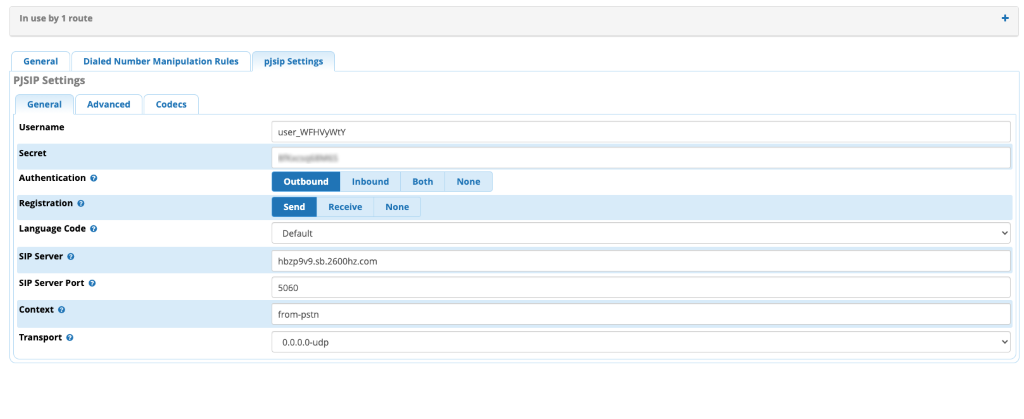
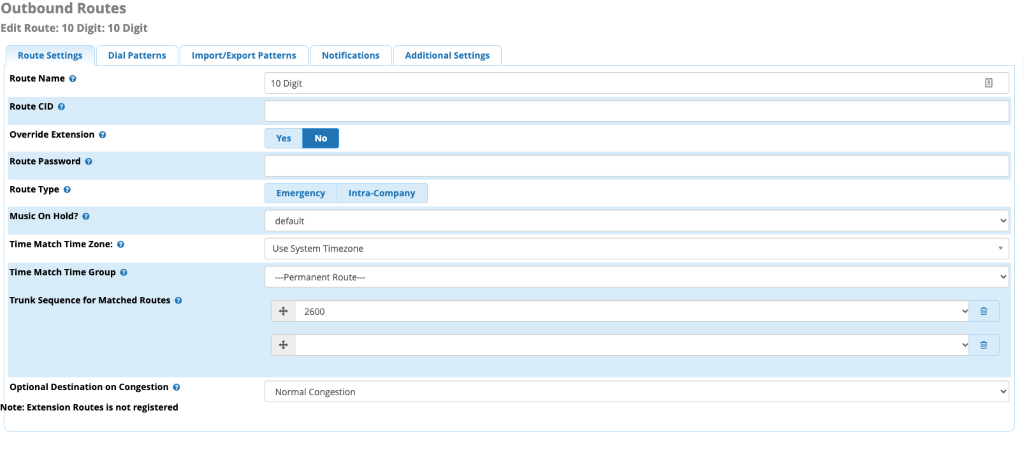
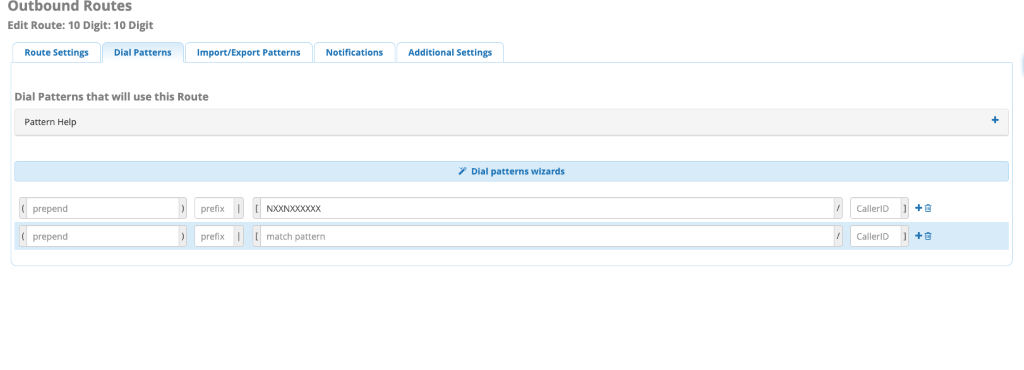
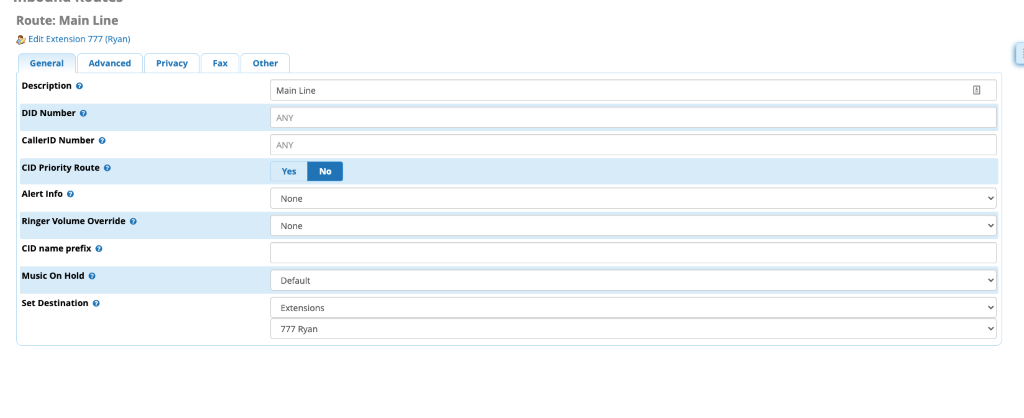
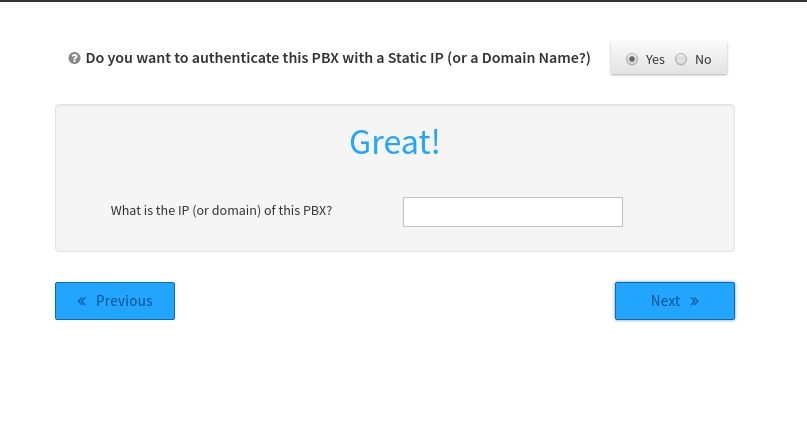
PBX Connector – Free PBX Hello! This is a little step by step guide for using the PBX Connector to connect to a legacy FreePBX Box. This is just a little for "fun" guide I cobbled together, thought I would share with the community. If you have an old FreePBX box with a bunch of FXS cards that you do not want to part with you can use this to create a SIP Trunk between your new KAZOO services and your legacy gear, making the move to newer cloud services easier. First open PBX Connector and Select FreePBX Do you want to authenticate this PBX with a Static IP or Domain, select NO –Copy the username, password and realm. That information will be needed for the FreePBX configuration. Change the invite format to SIP_Username@Realm - Then hit submit Simply add the numbers you wish to use on the other PBX and you are now done with this side of the configuration. Once logged into your legacy FreePBX system, go to Connectivity>Trunks Add new chan_pjsip trunk - Name it whatever you would like. Set the caller ID if you would like as well. Go to PJSIP Settings put in the username, secret (password) SIP server (realm) and SIP server port (5060) - Submit and apply settings, the trunk is now added but not functional until inbound and outbound routes are set. --------- Below are examples of routes you could do in FreePBX that you will need in order to make and receive calls via PBX Connector on FreePBX, these obviously will change based on your specific needs but the example should work in most use cases. Connectivity>Outbound Routes>Add new route Name the route (example 10 Digits) , select your new trunk to tie this outbound rule to your trunk. Add your dial pattern from the Dial Pattern tab – Submit and apply (repeat for various other outbound rules – examples, 911, Long Distance, Toll Free, International) Connectivity>Inbound Routes>New Route You can simply set this to ANY and ANY to route any number you assign to the system to a specific spot, or you can set each DID one at a time to go to specific spots. Submit and Apply Now, you should be able to make and receive calls to your legacy FreePBX box.
-
I have configured PBX connector via username and password authentication method. How i can connect remote PBX using IP authentication? Note that I did search google and kazoo documentation with no accurate information about.
- 2 replies
-
- pbx
- pbx connector
-
(and 2 more)
Tagged with:
-
2600HZ STEP GUIDE – PBX CONNECTOR What is the PBX Connector? PBX Connector attaches any PBX system to our SIP Trunks so that you can get rid of old and expensive analog or PRI lines. The App is extremely user-friendly, allowing you to move numbers from one PBX to another in minutes. Using the PBX’s own dial-plan tools, pick which phone you want to ring, which menu you would like the call to go to, and how you would like the phone number to act. Assign, Add or Port Numbers Use spare numbers that you purchased in SmartPBX and assign it in the PBX Connector. You can assign and configure numbers before or after you configure your PBX system. These numbers will be mapped back to the PBX. In real time, it will purchase or port a number and map back to the PBX. Configure your PBX System Simply select which PBX system you are using from the dropdown, and create a name. 2600Hz has preloaded the most popular PBX manufacturers for your ease-of-use. If you do not see your PBX manufacturer, choose Cisco and notify 2600Hz support. Authentication Create a username, password, enter the realm/domain and determine if your PBX is on a static IP address. View full File
-
Download a .pdf file using the link below PBX Connector Product Overview 2019-09-26.pdf View full File


