2600HZ STEP GUIDE – BRANDING
Adding a logo and white-labeling your portal is done via the BRANDING application.
*Branding is done at the reseller level of your account.
General tab

Configuration
-
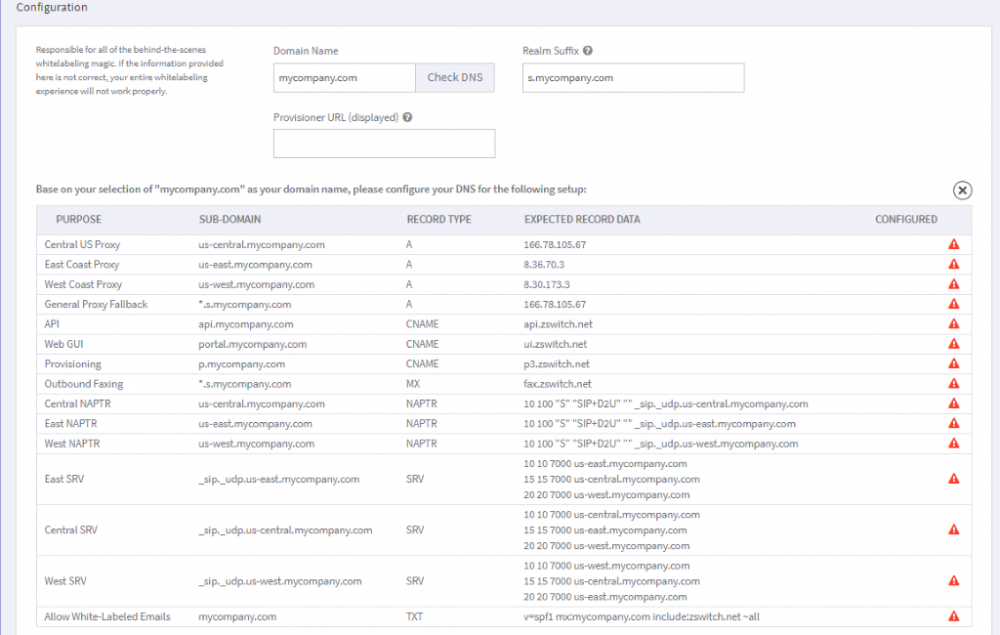
From the General tab, in the Configuration section, enter a Domain name. This should be the string you would like your customers to use to get into their account. For Example: portal.mycompany.com
-
Once you have entered the Domain Name, click Check DNS. A list of suggested sub-domains will be provided along with their purpose, record type and record data that can be used to set up your DNS records.

-
Optionally, you can enter a Provisioner URL. This is what will be displayed at the top of the Provisioner app and can be helpful in a more user-friendly name.
NOTES:-
We we recommend completing this DNS Mapping setup prior to setting up any new accounts. This will ensure all accounts will use the white label path structures.
-
For a detailed user guide showing and explaining this process please review the "Branding: Set up your White Label DNS" document, found under the Branding / User Resources category here.
-
We we recommend completing this DNS Mapping setup prior to setting up any new accounts. This will ensure all accounts will use the white label path structures.
- The Realm Suffix is used to generate the account realms for your accounts using your white-labeled interface. This should be a prefix on your domain name, so in the example above, your realm suffix might be, s.voice.mydomain.com. This would also be your “wild card” in your DNS records.

- The Provisioner URL can be set as well to replace the API URL displayed on the Provisioner App. This can be populated with the suggested sub-domain for Provisioning as shown in the suggested DNS records

- Once this information has been entered, click Save Changes. Once saved, the Company Info and Brand Customization sections will appear on the General tab, and you will now see the Advanced tab as well.
Company Info
-
The Company Info section is where you will enter information and links for your company.
Brand Customization
The Brand Customization section is where you will enter your logo and other visual representation of your company
- Company Logo – *must be no larger than 192 px (w) x 62 px (h)
-
Click Select a file, and choose your logo file to upload

- Favicon + Page Title – this is what your customers will see on their browser tab
- Click Select a file and choose the file for the Favicon to be used.
- Provide a page title. This title will be used in the Page Tab on your browser and can be accessed by Google Analytics.
- Login Page – this is the page your customers will be brought to upon entering the URL
- A custom welcome can be typed that will present under your logo.
- Choose your brand color – this color will occupy the right side of the page, complemented by black on the left
- Turn on the social media links you’d like to advertise, and post your link in the field
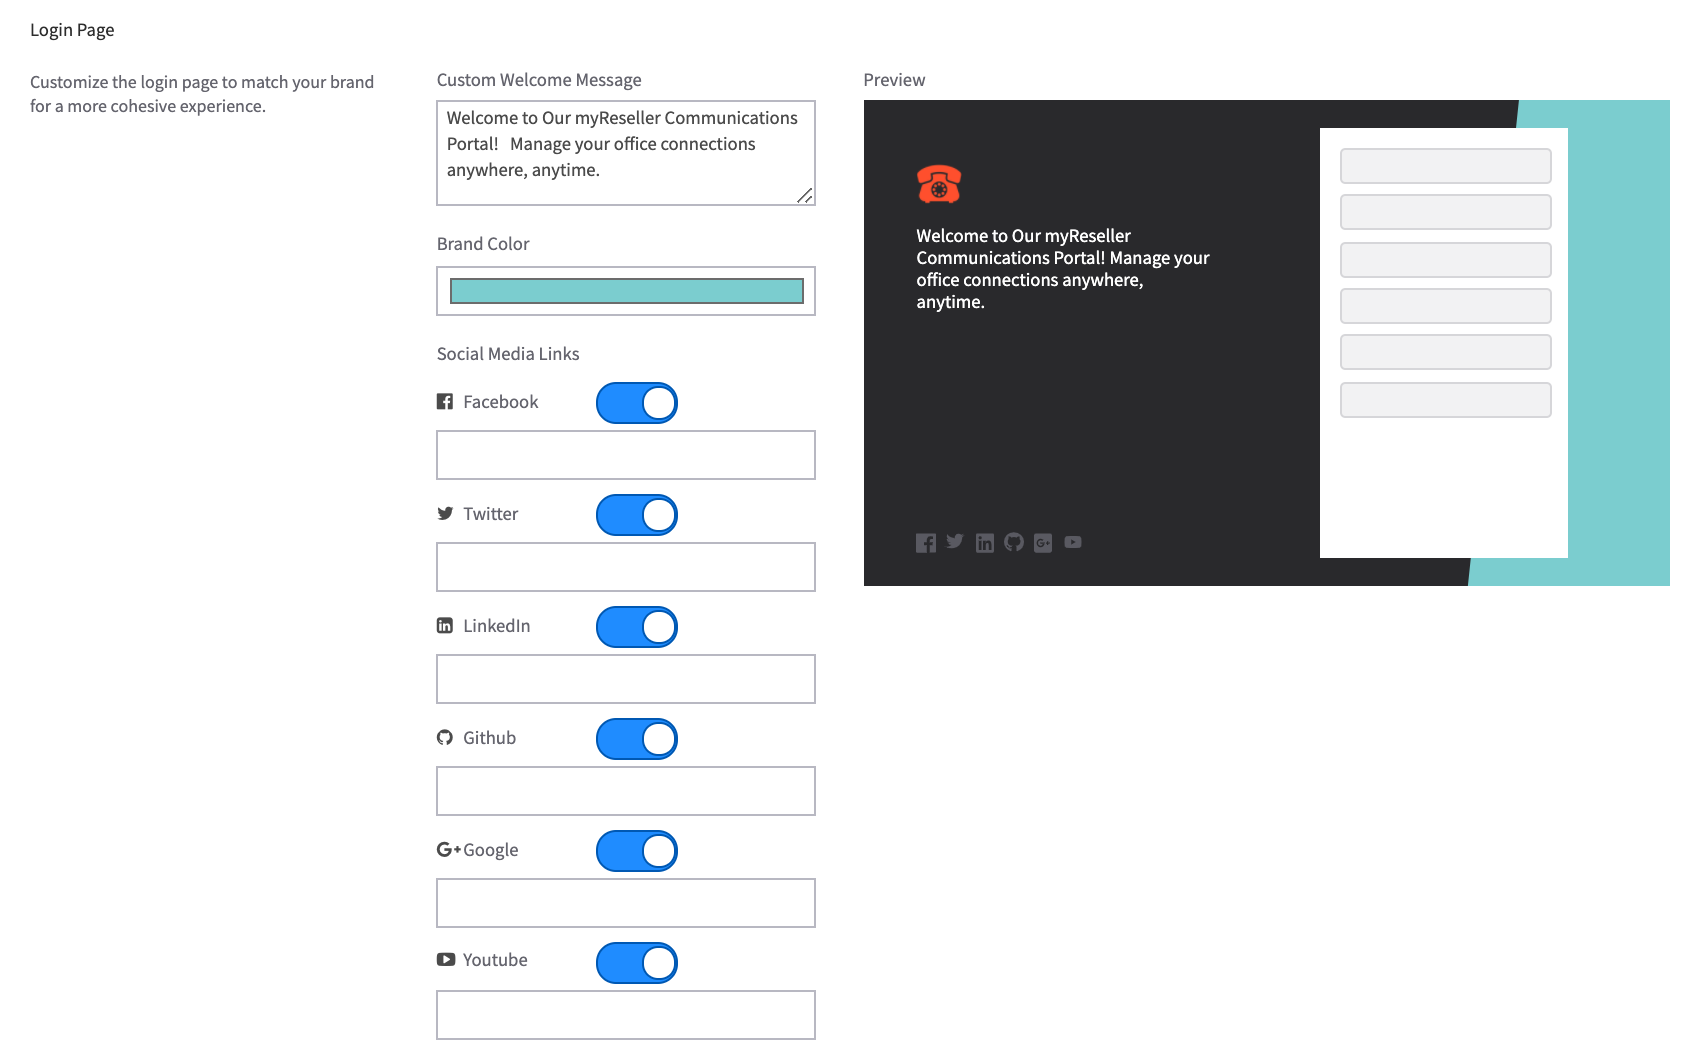
Using the settings shown above, your login screen would look something like below: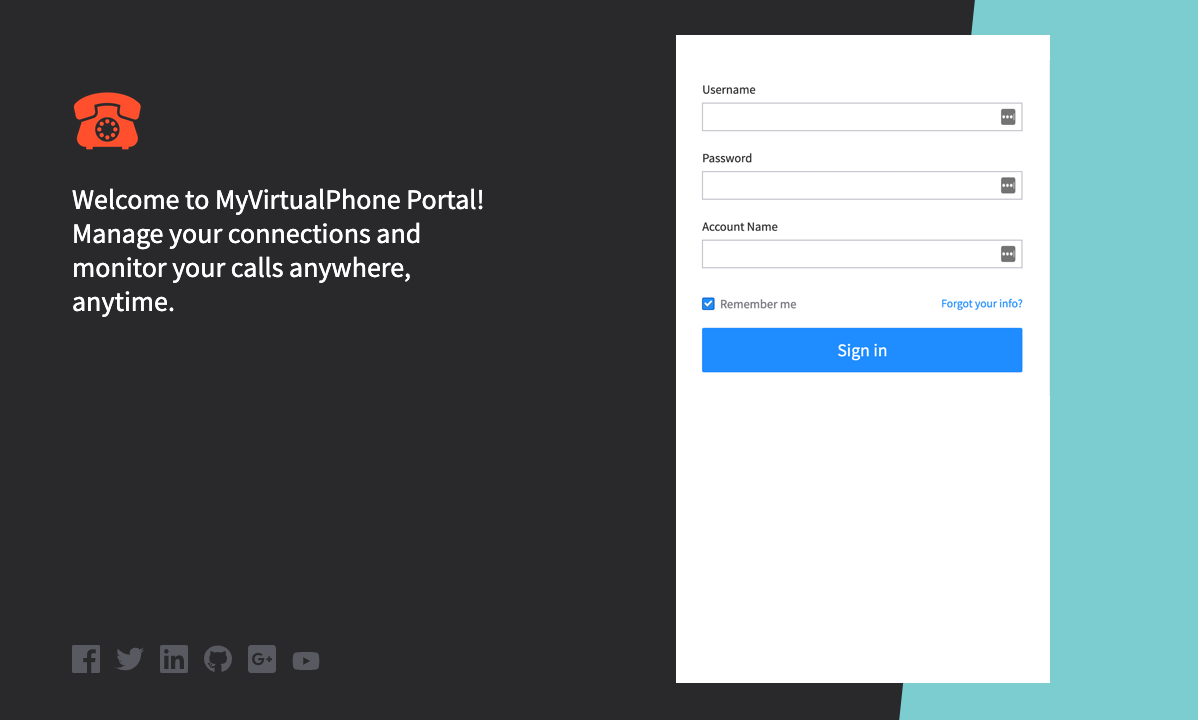
Advanced tab
On the Advanced tab, you will dictate the default for porting permissions, as well as the default for your Carrier Options.
NOTE: This tab will not display until you've entered a domain name and saved.
Number Porting
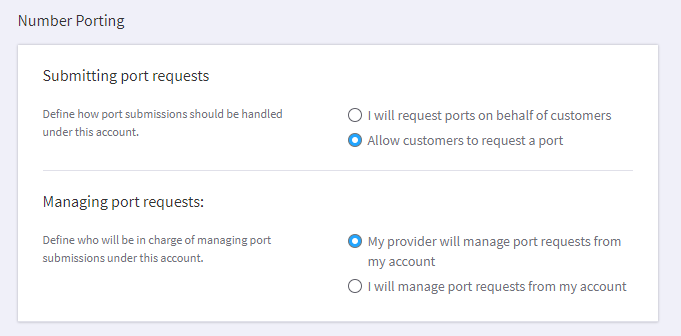
Non-BYOC Resellers (Using 2600Hz Carriers)
- Your selection under Submitting Port Requests will depend upon whether or not you would like your customers to be able to submit their own port requests. If you do not wish to allow your customers to submit ports, select “I will request ports on behalf of customers”.
- In the Managing Port Requests section, select “My provider will manage port requests from my account”
BYOC Resellers (Bring Your Own Carriers) – you will work directly with your own Carriers.
- Select “I will request ports on behalf of customers” in the Submitting Port Requests section
- Select “I will manage port requests from my account”
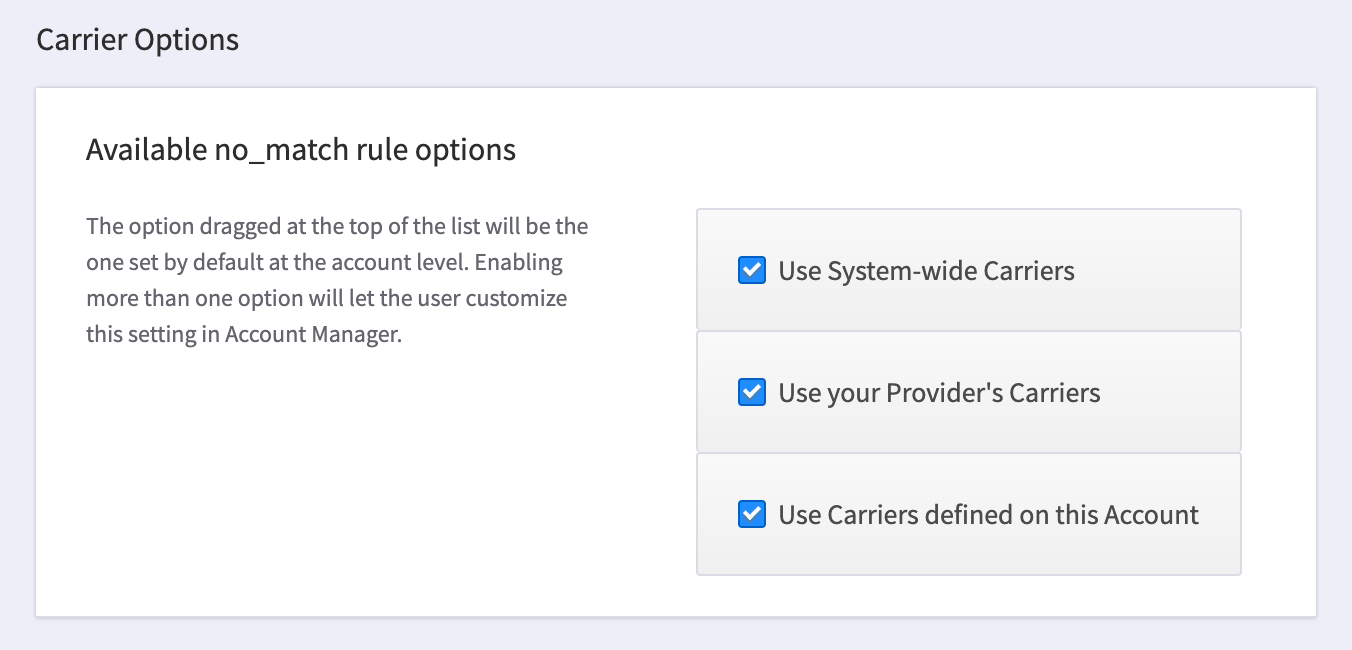
Carrier Options
Here you can enable/disable options for carrier use, and set priority for each option.
Templates tab
On the Templates tab, you will find the email templates that can be sent out automatically on your behalf to your customers or to 2600Hz. Please be sure to review all templates to be sure the correct audience is being targeted.
- The template must be enabled in order to be used
- The recipient must be selected – original user, account admins or a specific email address can be selected/noted
Emails can be edited and then previewed. Be sure to click Save Changes when finished with the edits. This should be done for each email you wish to use, others should be disabled
Frequently Asked Questions
I do not see the Advanced Tab on my branding home screen
This tab does not display until you've entered your domain name and save. If it still doesn't display, exit the application and relaunch it.
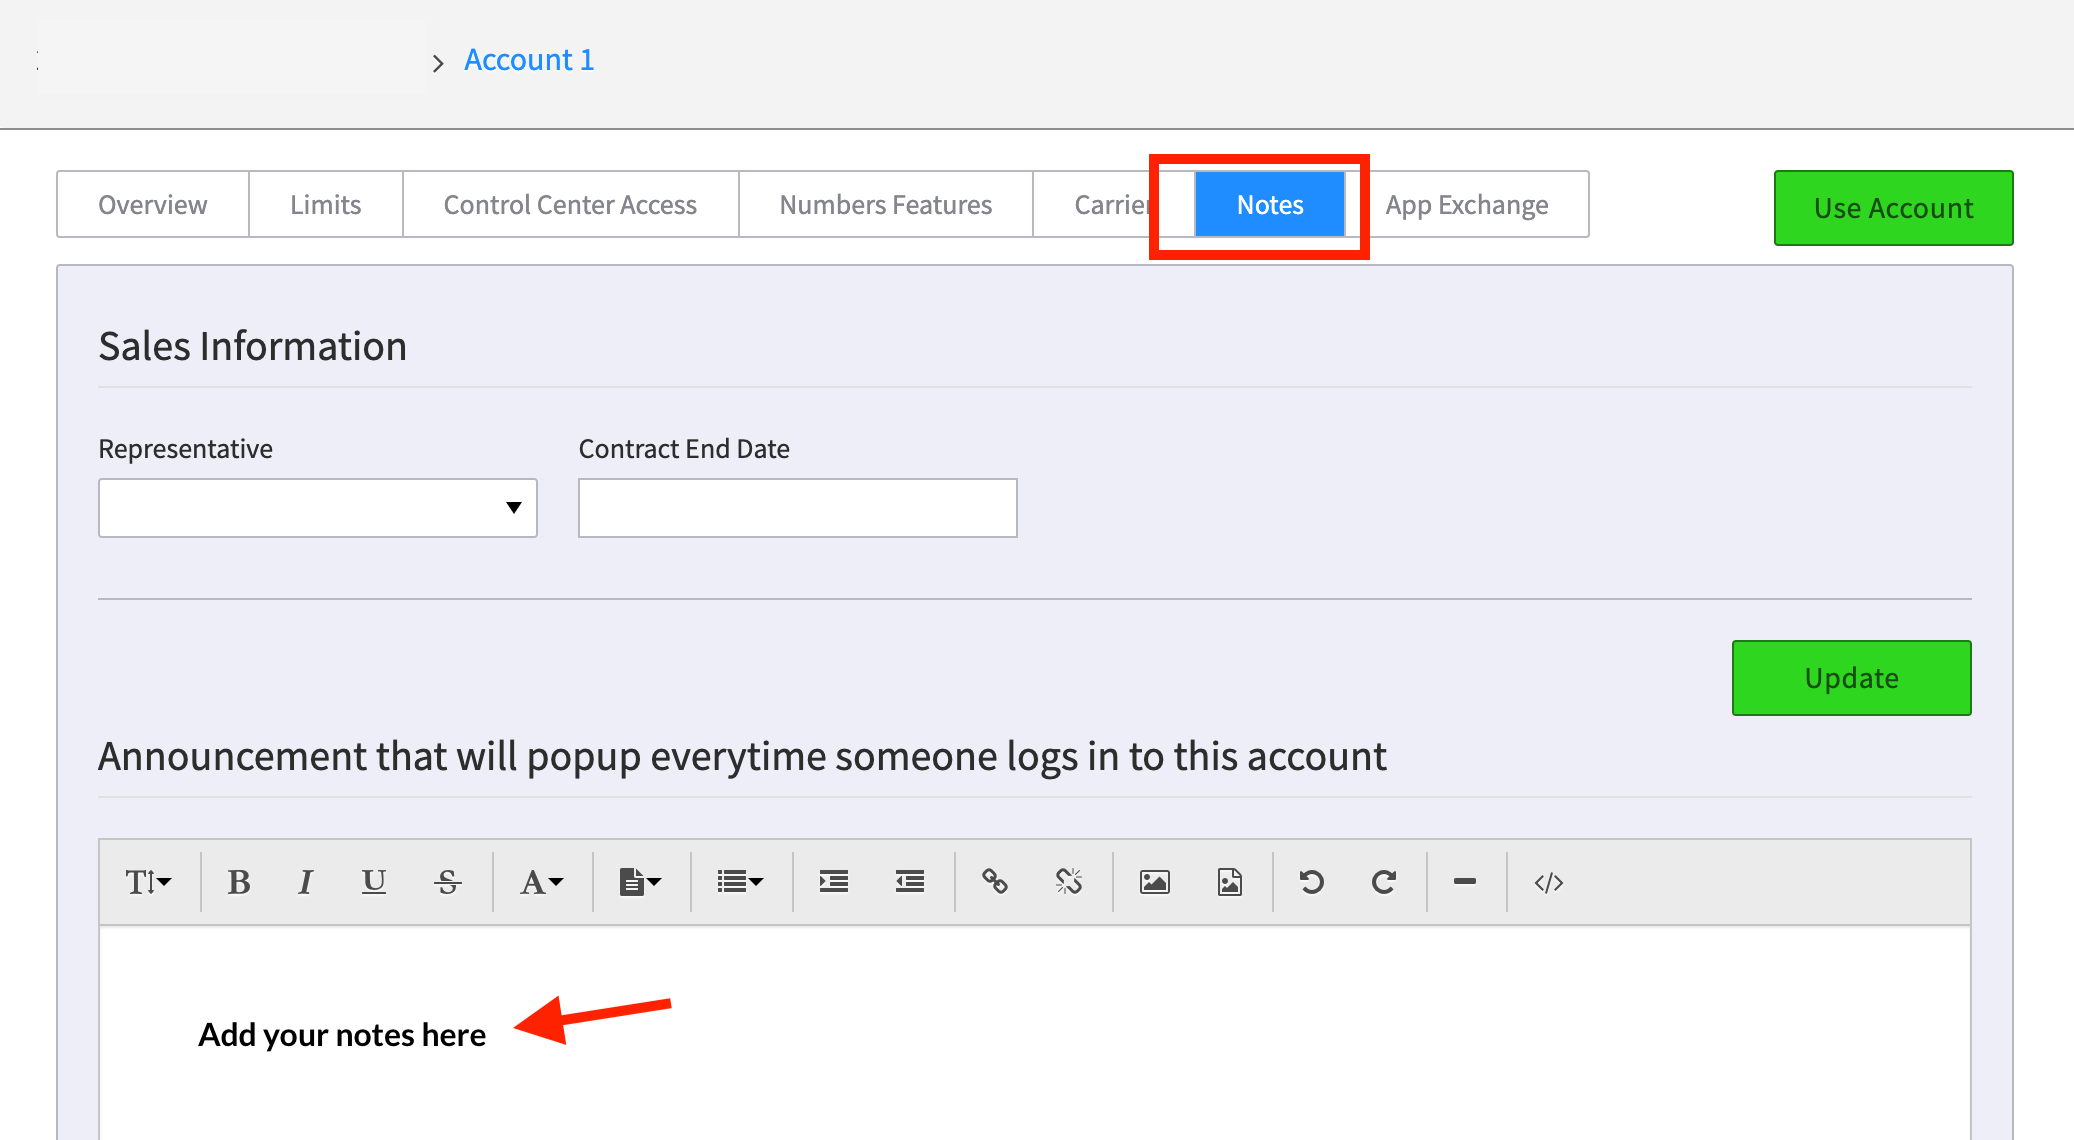
How do I create / edit a custom announcement that comes up when I log into an account?
This custom dialog box, or account welcome message is managed in the Accounts Manager app. Log into your main account and select the sub account to manage. At the top you will see a "Notes" tab, select that and enter your text in the WYSIWYG field.
Related Articles
|
|
| SmartPBX User Guide | |
| Accounts Manager Wizard User Guide | |
|
|
API Reference Docs







Recommended Comments
There are no comments to display.