


USER GUIDE – BUILD A VIRTUAL RECEPTIONIST IN SMART PBX (also called an IVR)
User Story
An office wants to set up a system on their PBX where the caller selects different extensions/options for:
- Receptionist
- Directory / List of Extensions
- Sales group
- Voicemails for Users and Groups
- Answering Service or 3rd party number
- Spanish language menu
This is often called a “Virtual Receptionist” or an “IVR” (for "Interactive Voice Response") setting. You will be able to guide your callers to different extensions depending on their purpose.
Overview
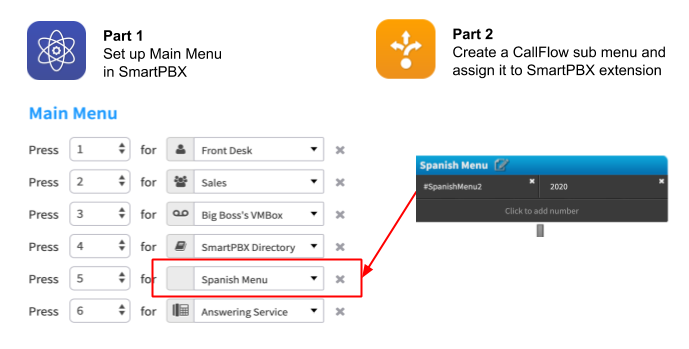
This guide is set up in two parts.
- Part 1 steps through an initial setup for a main menu using SmartPBX.
- Part 2 steps through how to add sub-menus and additional features to the standard virtual receptionist process.
This addresses our initial user story item for adding a Spanish language menu.
To achieve this we will leverage our powerful Callflows application and create a “submenu” there, and then reference it in SmartPBX.
The process looks something like this:
Before you start
Part 1 will take you through setting up a basic Virtual Receptionist, or call directing menu. This guide assumes you have gone through basic SmartPBX setup steps (add link for setup reference) and have:
- Configured a Company main number and emergency / 911 address
- Added users to a directory and assigned their extensions
- Added/enabled devices and phone numbers to the device tab.
- NOTE: If you use an external answering service, you will want to add their phone # and landline as a device.
- Added/enabled a group of users (such as sales, billing, appointments, etc) if that will be an option for your Virtual Receptionist
- List of your office hours and holidays
Part 1: Create an initial Virtual Receptionist Menu in SmartPBX
 Open SmartPBX
Quick steps include as follows:
- Go to the Main Number / Incoming Call Handling menu
- Enter office hours, and vacation and holiday times that may affect your Virtual Receptionist response
-
For each “setting” -- Open Hours, Lunch Hours, After Hours, and Holidays, choose an initial Callflow and click on its Virtual Receptionist link.
- Add menu number item and attach its destination
- Add Greetings for each extension if desired
- Save
- Save as part of the Company Directory for future access
Detailed Steps
STEP GUIDE – BUILD A VIRTUAL RECEPTIONIST IN SMART PBX (also called an IVR)
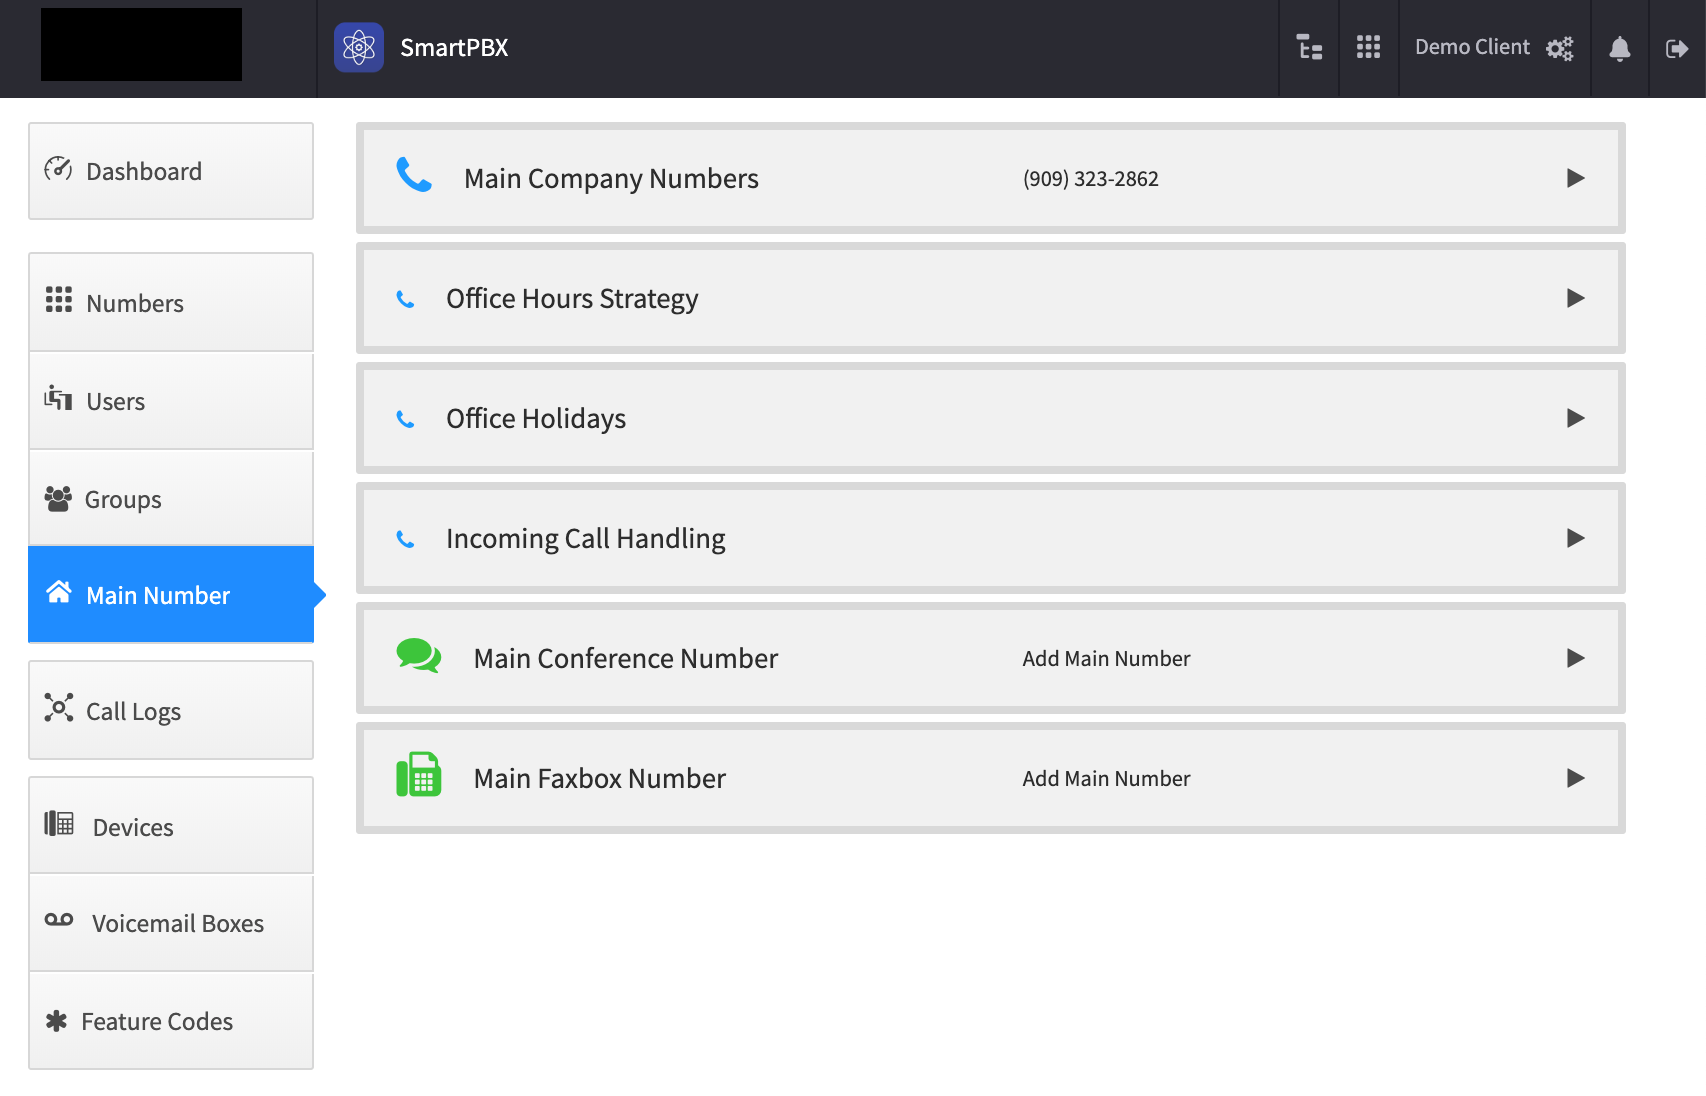
1. Select Main Number tab from the left menu. You will see this screen:
2. Enter Office Hours Strategy
This is important as you will likely have different call routing options when your office is closed, either for lunch, after hours or a holiday.
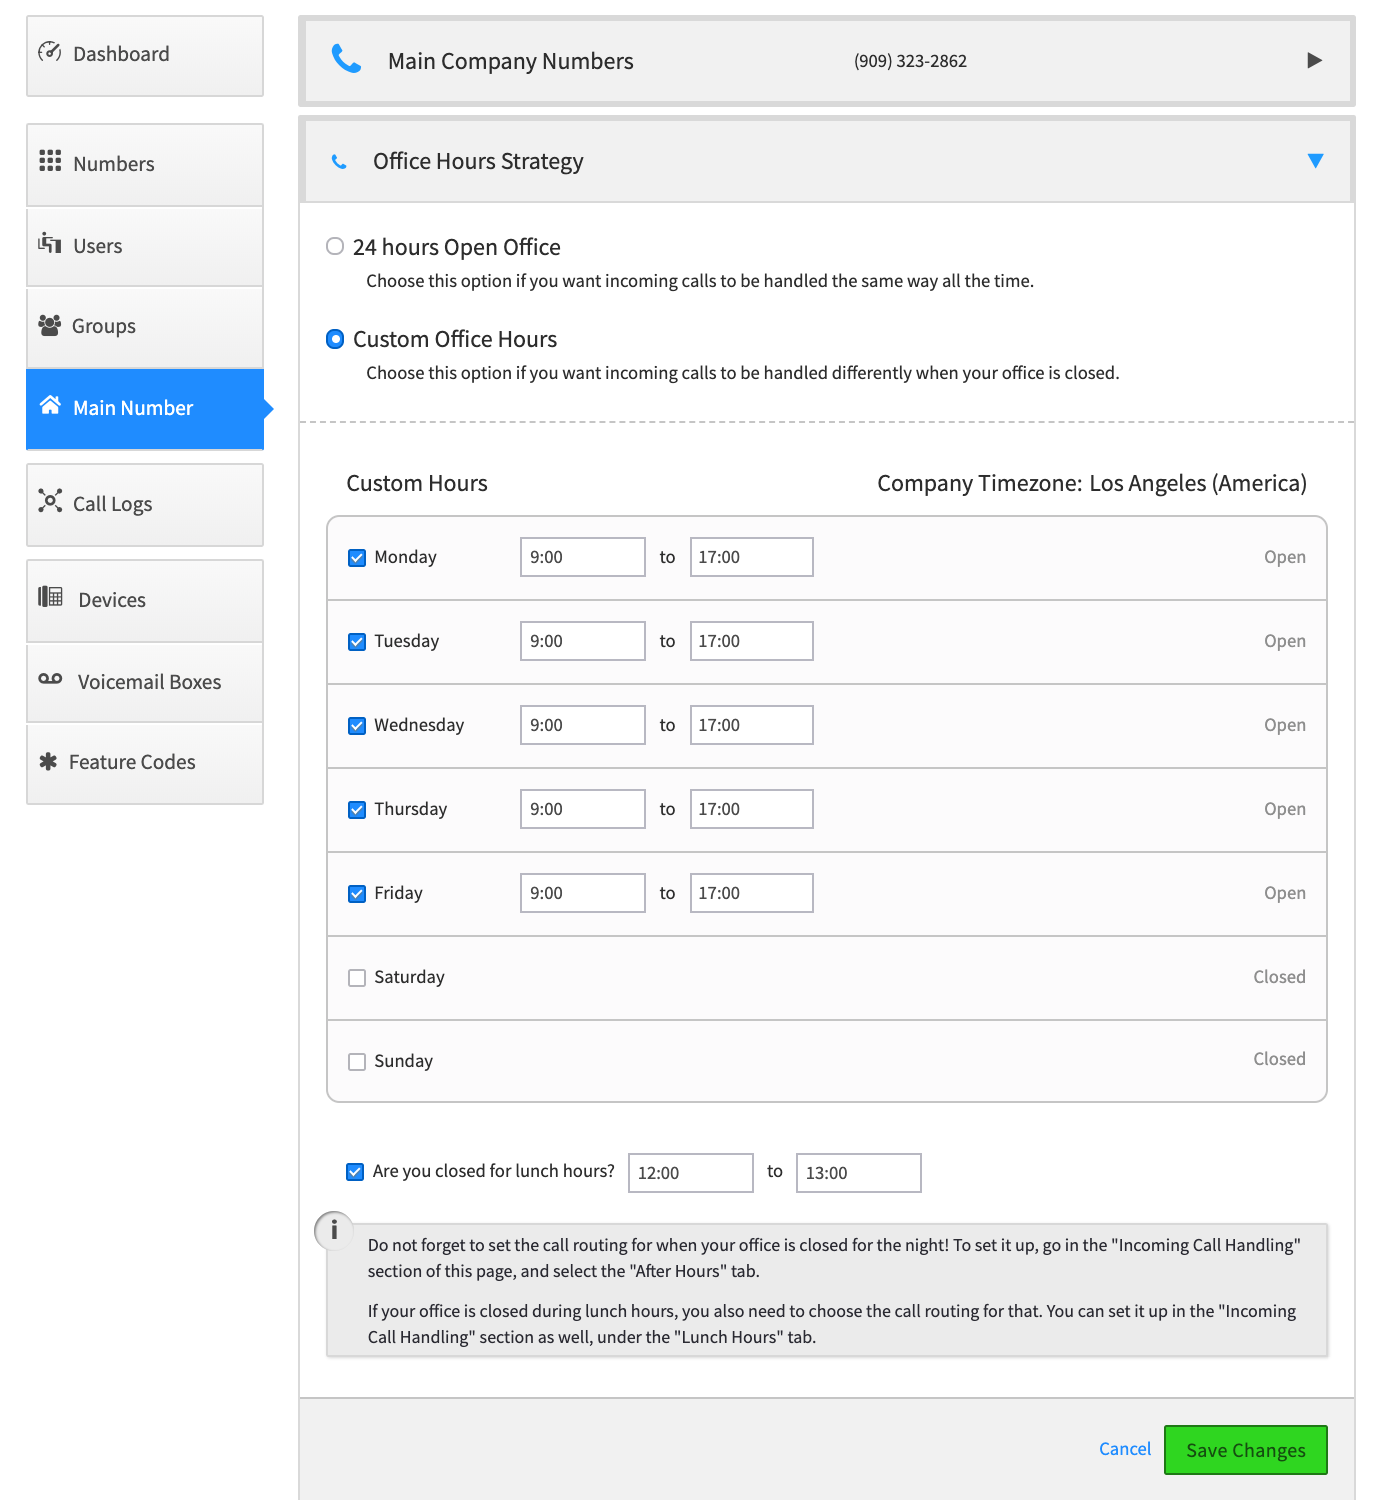
NOTES:
- Verify your time zone
- Enter your “lunch hour” if you send calls to a different number during that time
- SAVE your edits!
3. Enter Office Holidays
Again, these notes will trigger different call routing procedures.
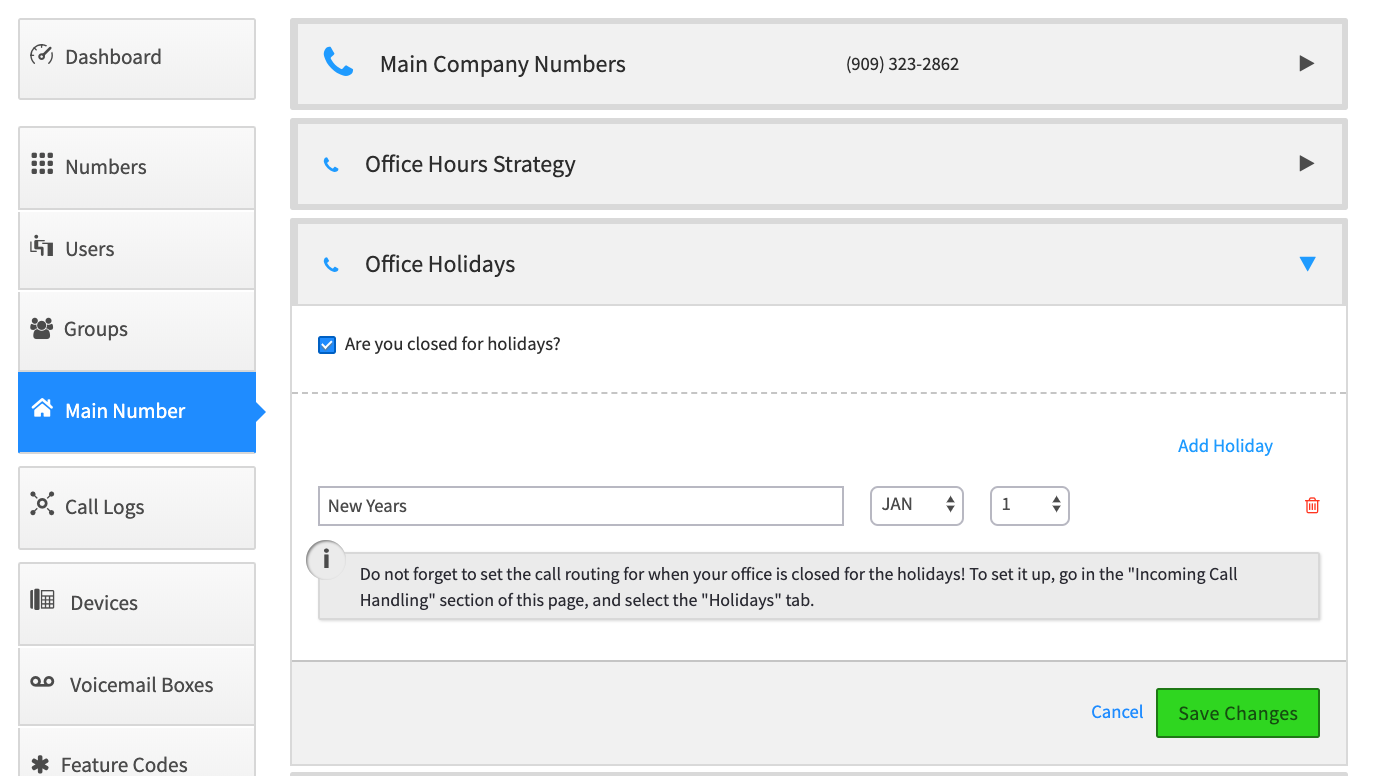
NOTES:
- Once you add holidays, you will need to make sure you create an Incoming Call Handling scenario for holiday routing.
- SAVE your changes!
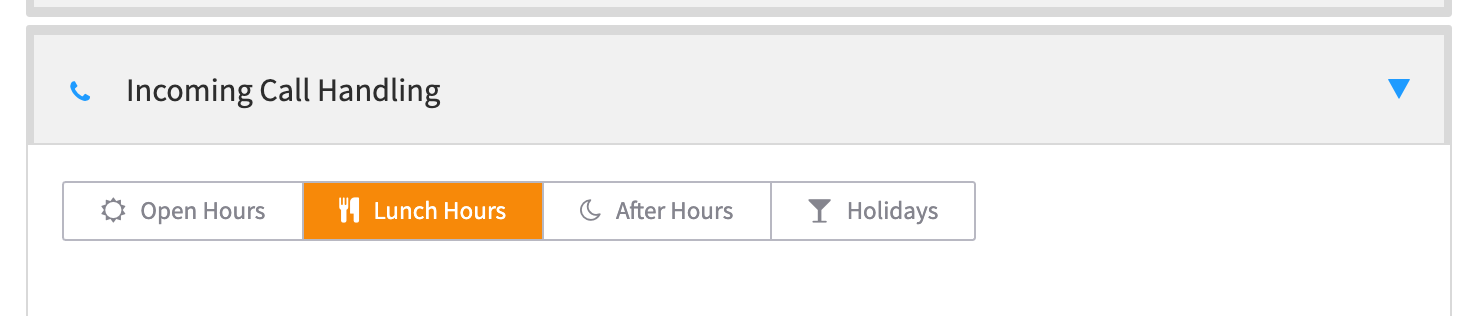
4. Configure your Virtual Receptionist routing for each time setting
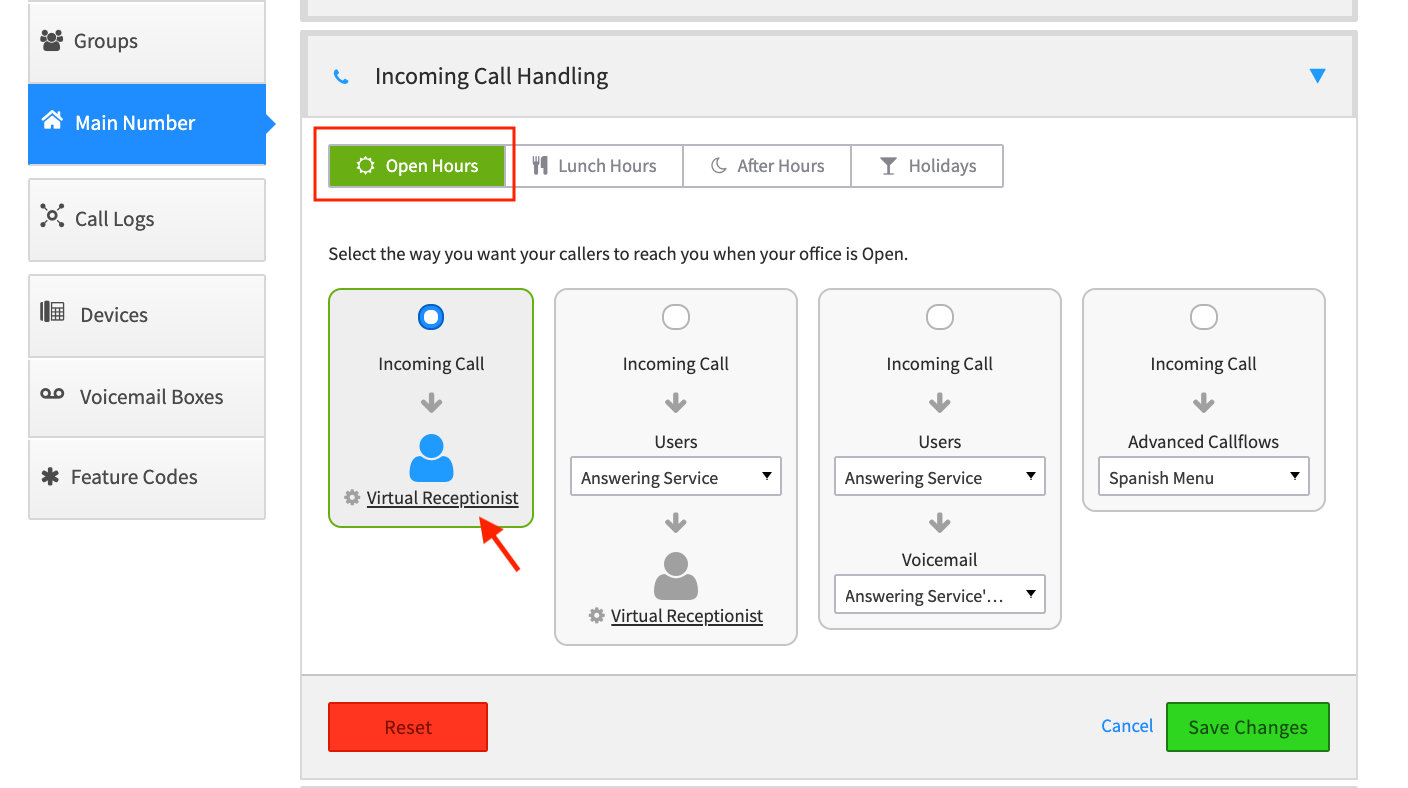
There are four different settings to configure for incoming calls: Open Hours, Lunch Hours (if you define this separately), After Hours, and Holidays. With each tab, you will see the menu choices shown below. The first box will send calls directly to the Virtual receptionist. The second box will provide a single option, and then forward to the Virtual Receptionist. For this session we'll work with option 1.
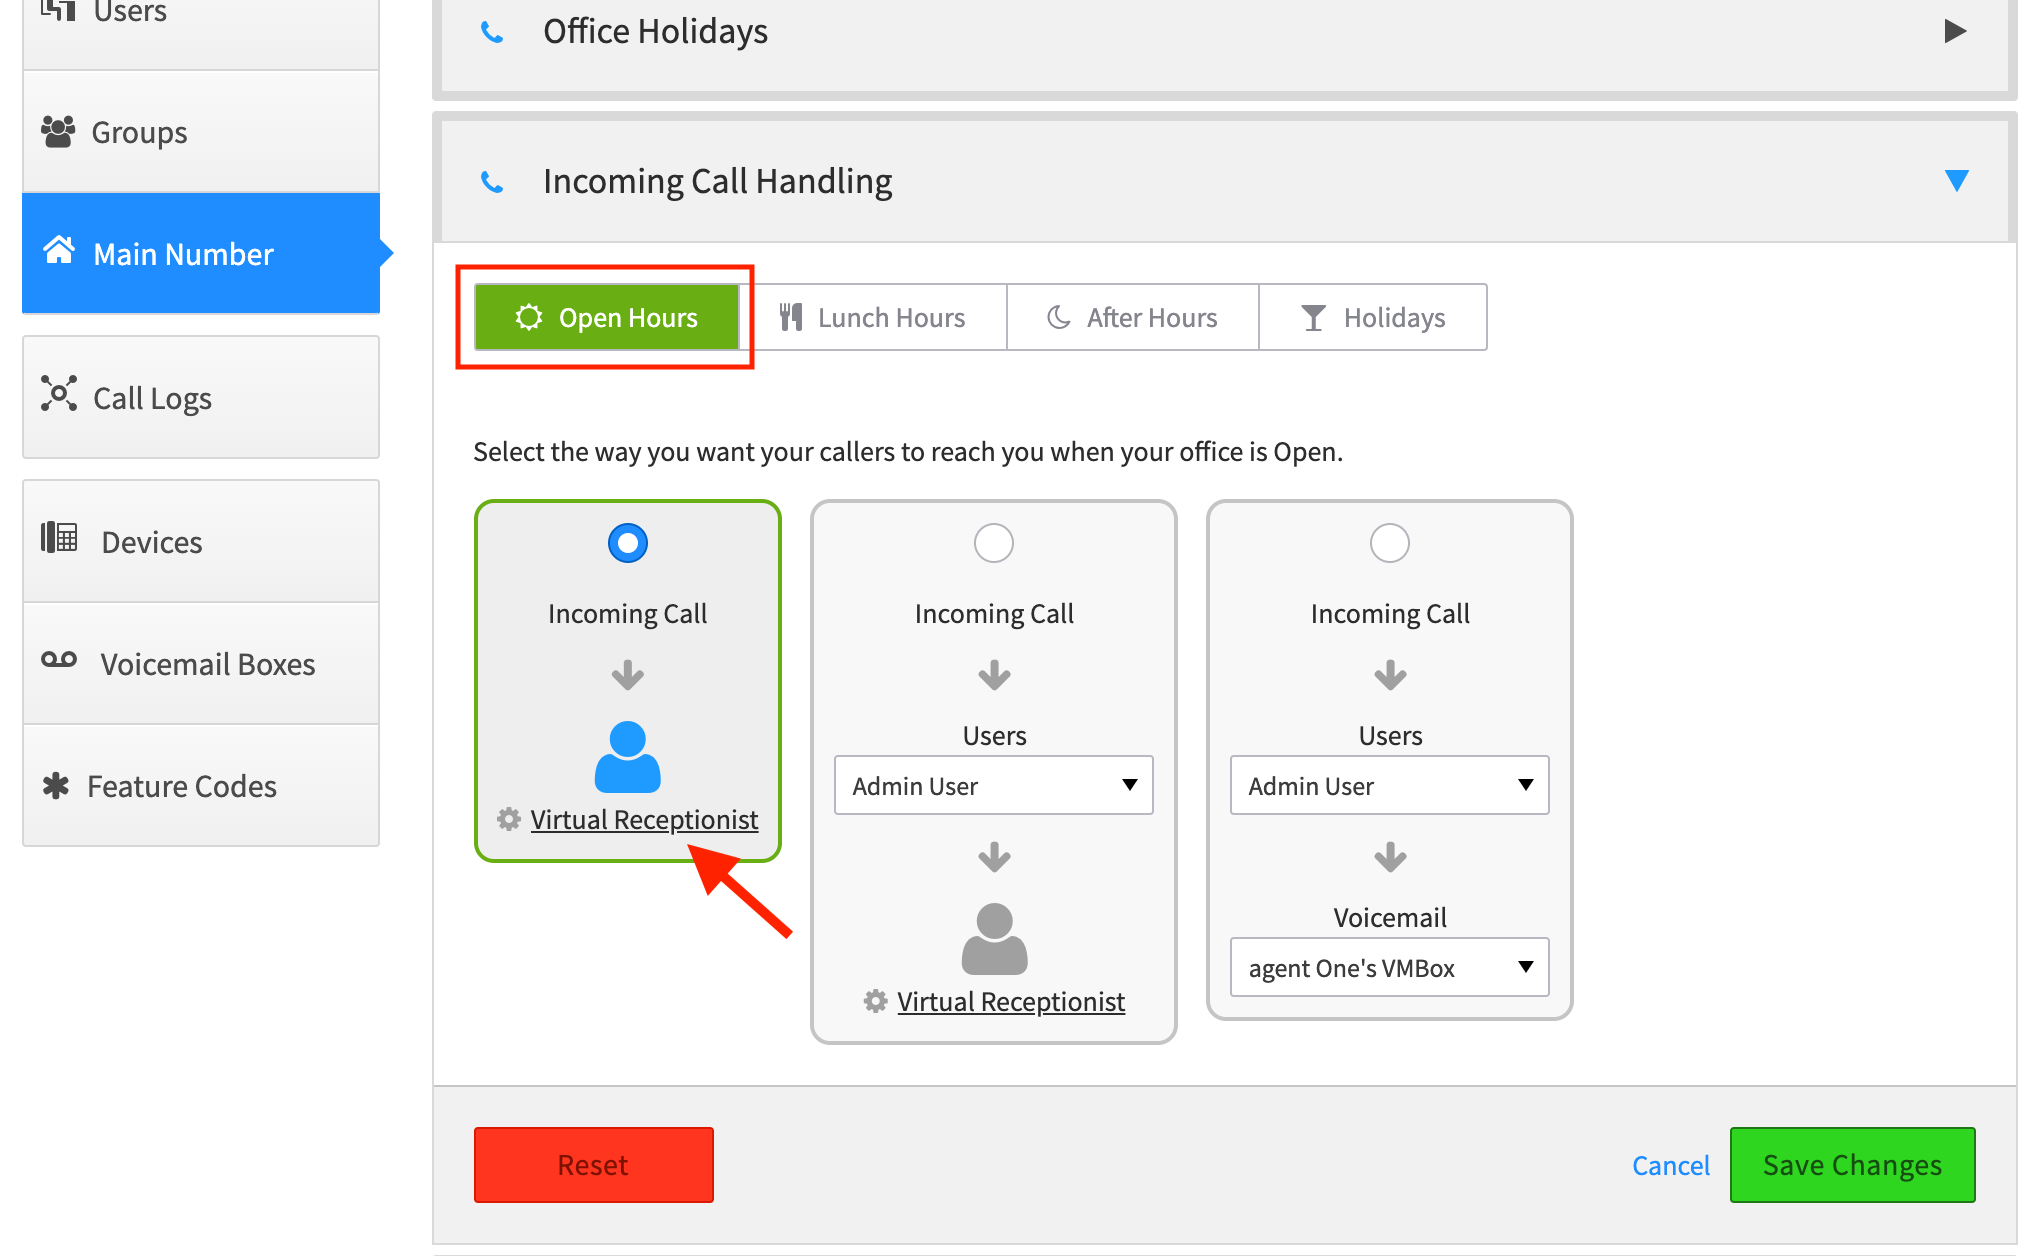
-
Check to see that Open Hours is selected in green.
Note: if you don't see the "Lunch Hours" or other options to the right, it is because you have not defined these in the dialog boxes above - they are optional. - Select the first box, and click on the Virtual Receptionist link.
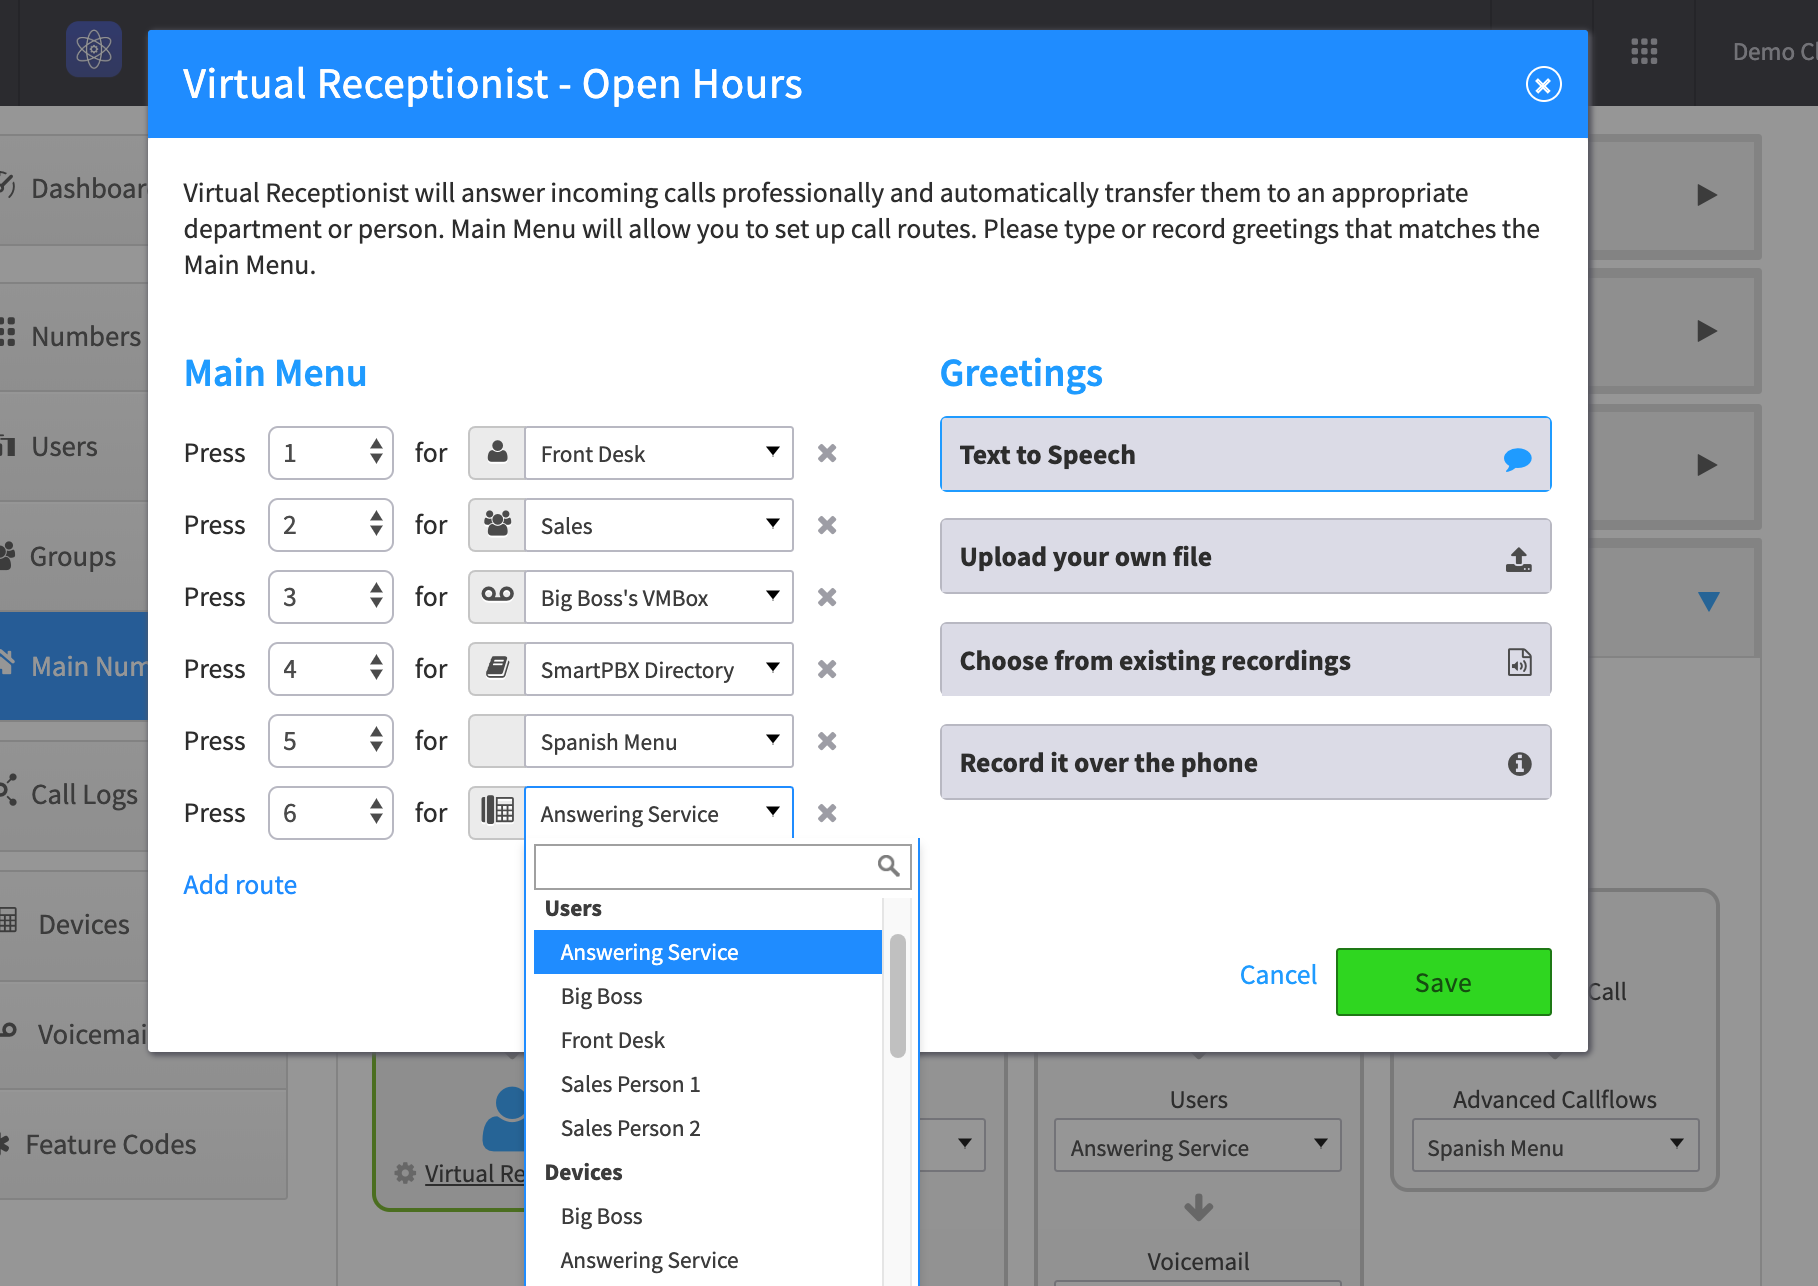
You will see a dialog box like below:
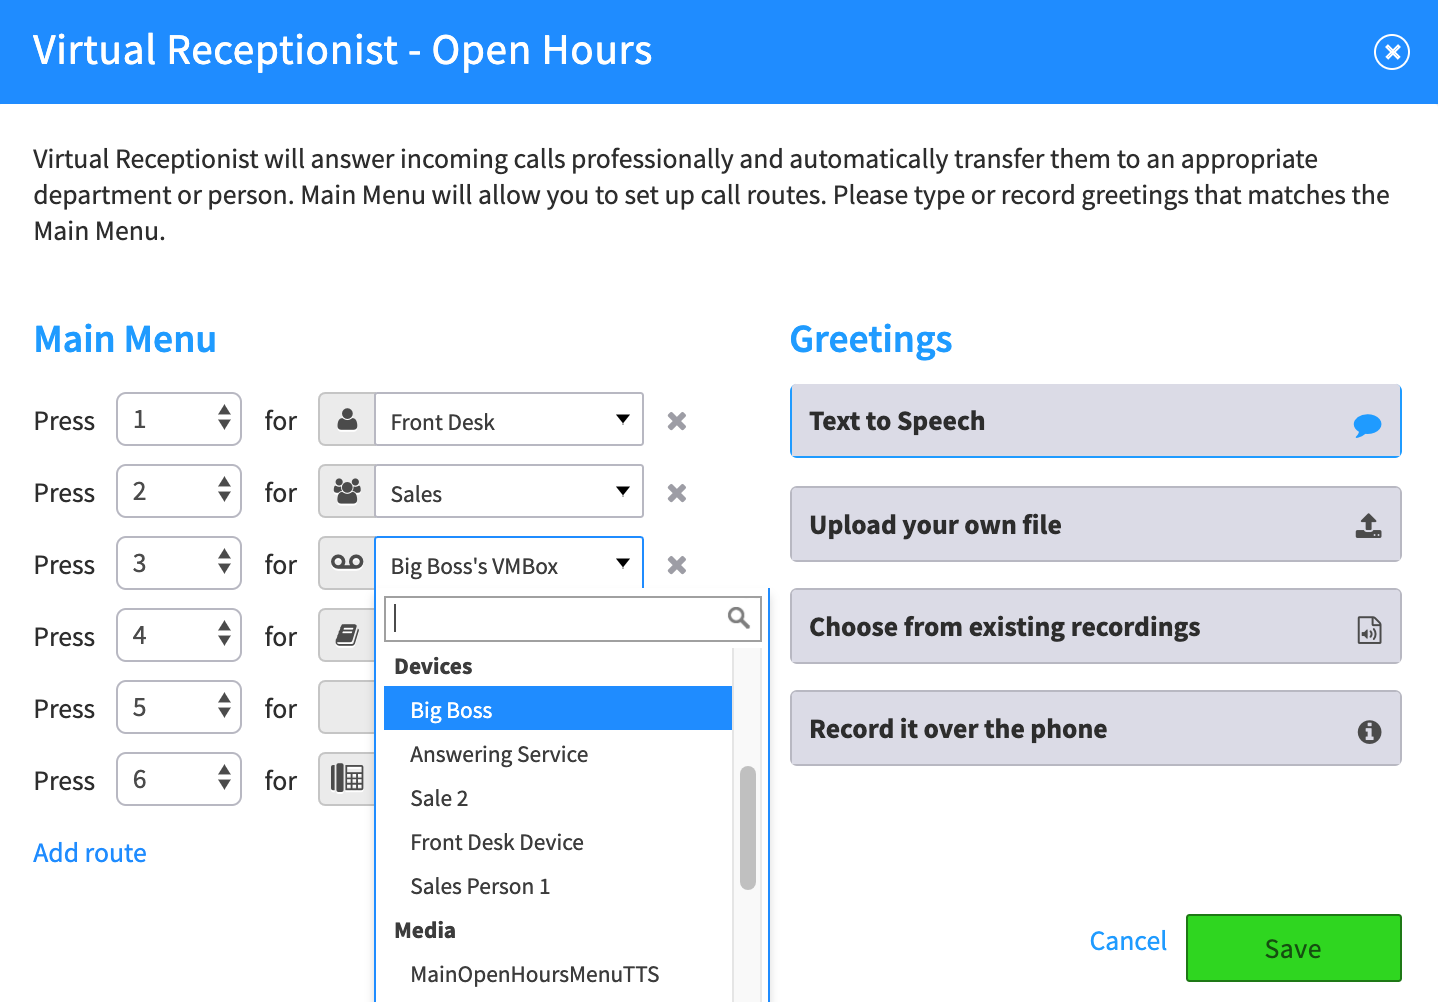
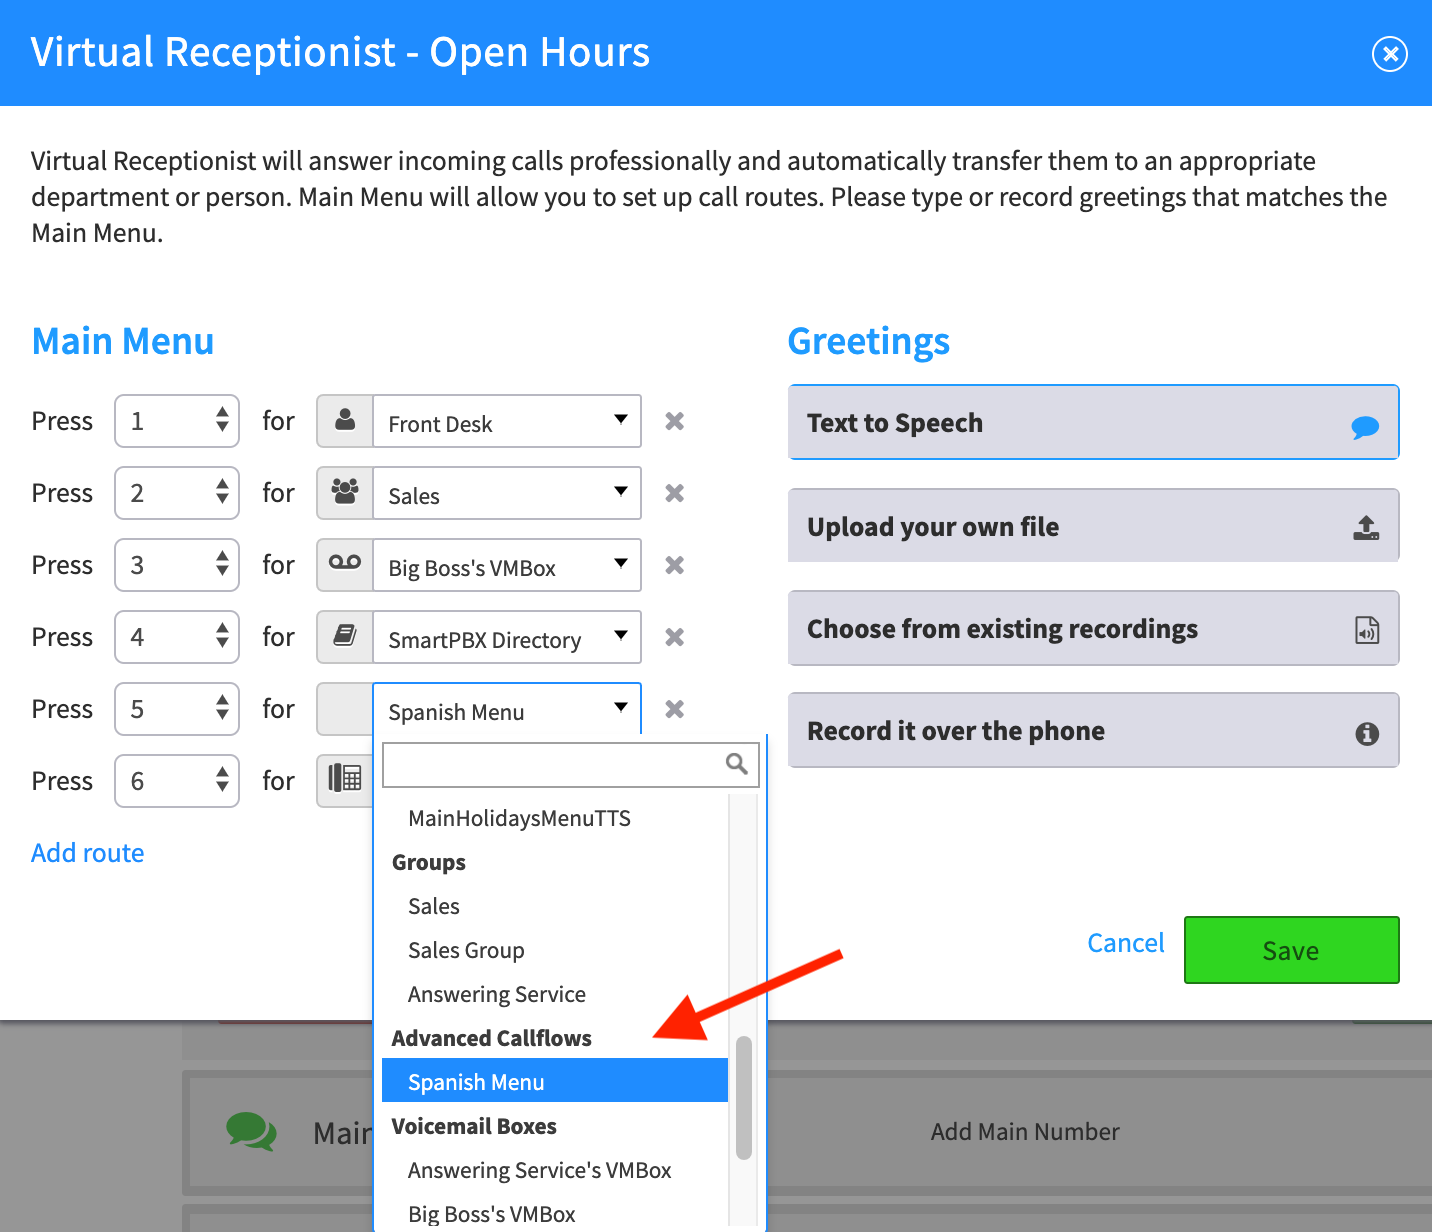
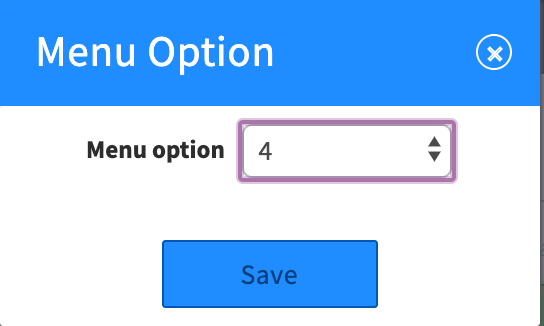
5. For each menu item number, assign an extension or a device.
NOTES:
- You should see all the users, devices and messages assigned to this account in your drop down. If you do not, return to the main SmartPBX menu and add the connections you need.
-
If you do not see your “Account Directory” as a top level choice in the drop down, you will need to go back to your Users tab, select each user and check the box “Include User in the Company Directory".
(See dialog box below)
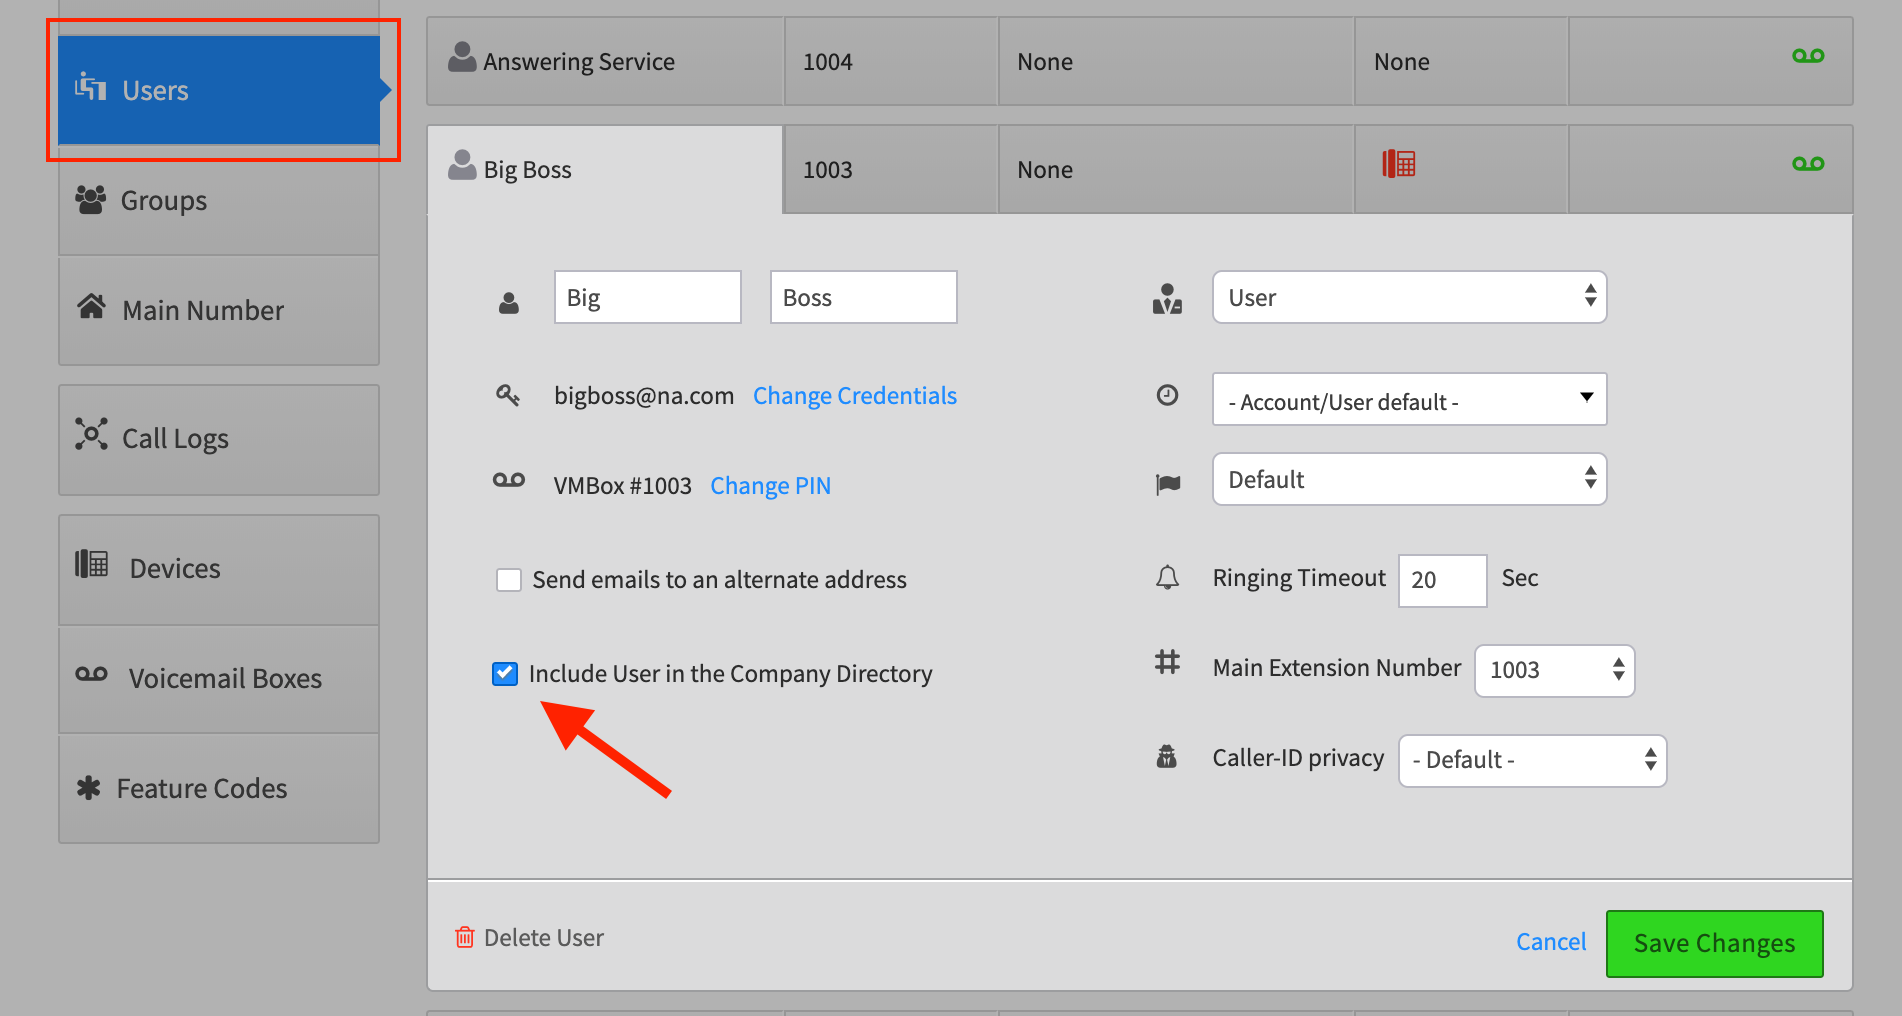
SAVE! your settings so far.
Return to your Main Menu / Incoming Call Handling / Virtual Receptionist - Open Hours menu and
6. Add a Greeting
If you want to add a greeting before you offer menu choices, choose from one of the options for creating that greeting shown on the right.
You can:
- Type a text that converts to speech
- Upload a pre-recorded .mp3 file
- Choose from existing recordings
7. Step through the same process for Lunch Hours, After Hours, and Holidays.
This is important! If you do not add your preferences for the different hours and holidays, your callers will only hear your first setup option.
8. AND SAVE!

 Part 2: Advanced Virtual Receptionist Setup using Callflows
This section is optional. It demonstrates how to use Callflows to add more complex steps to the Virtual Receptionist process. This includes:
- Adding sub-menus for different languages
- Adding call routing options to groups
Add a Spanish Speaking menu option
If you want to add a second menu option, for example in a different language, you will need to set up a Callflow that directs the caller to a separate menu.
Quick Steps
- Open Callflows
- Create and build a new Callflow
- SAVE your Callflow
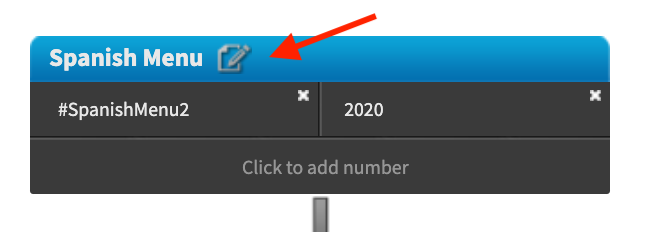
- EDIT your Callfllow and make sure to select “List Callflow in Main Number” option so it is displayed in SmartPBX.
- Open SmartPBX and assign your new Callflow to an extension in the Incoming Call menu.
Detailed Steps
Open the Callflow Application
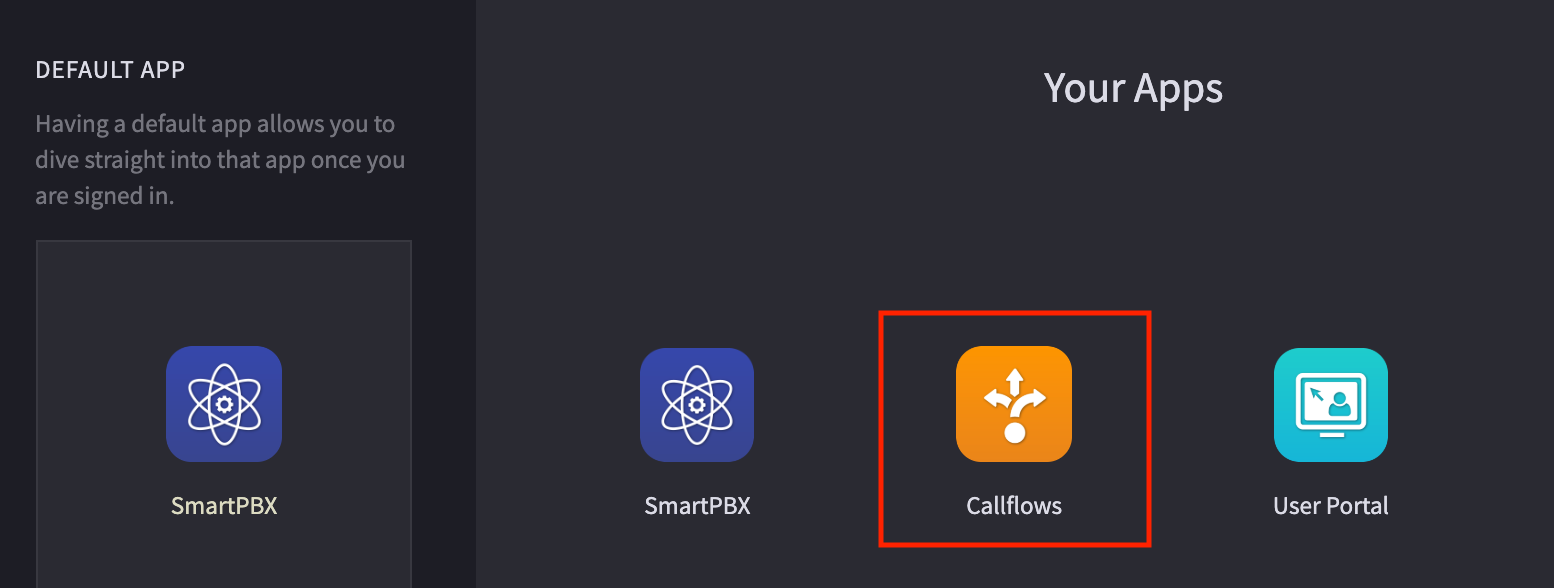
1. To access this application, select the Apps icon at the top right of your screen.
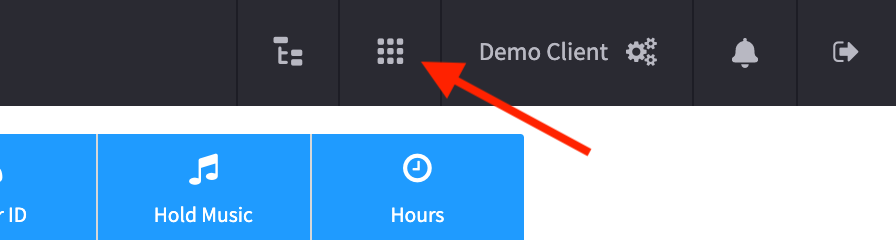
2. Click on Callflows
If you do not see it, enter it under “search apps”. If it is still not visible, ask your administrator to enable it for you.
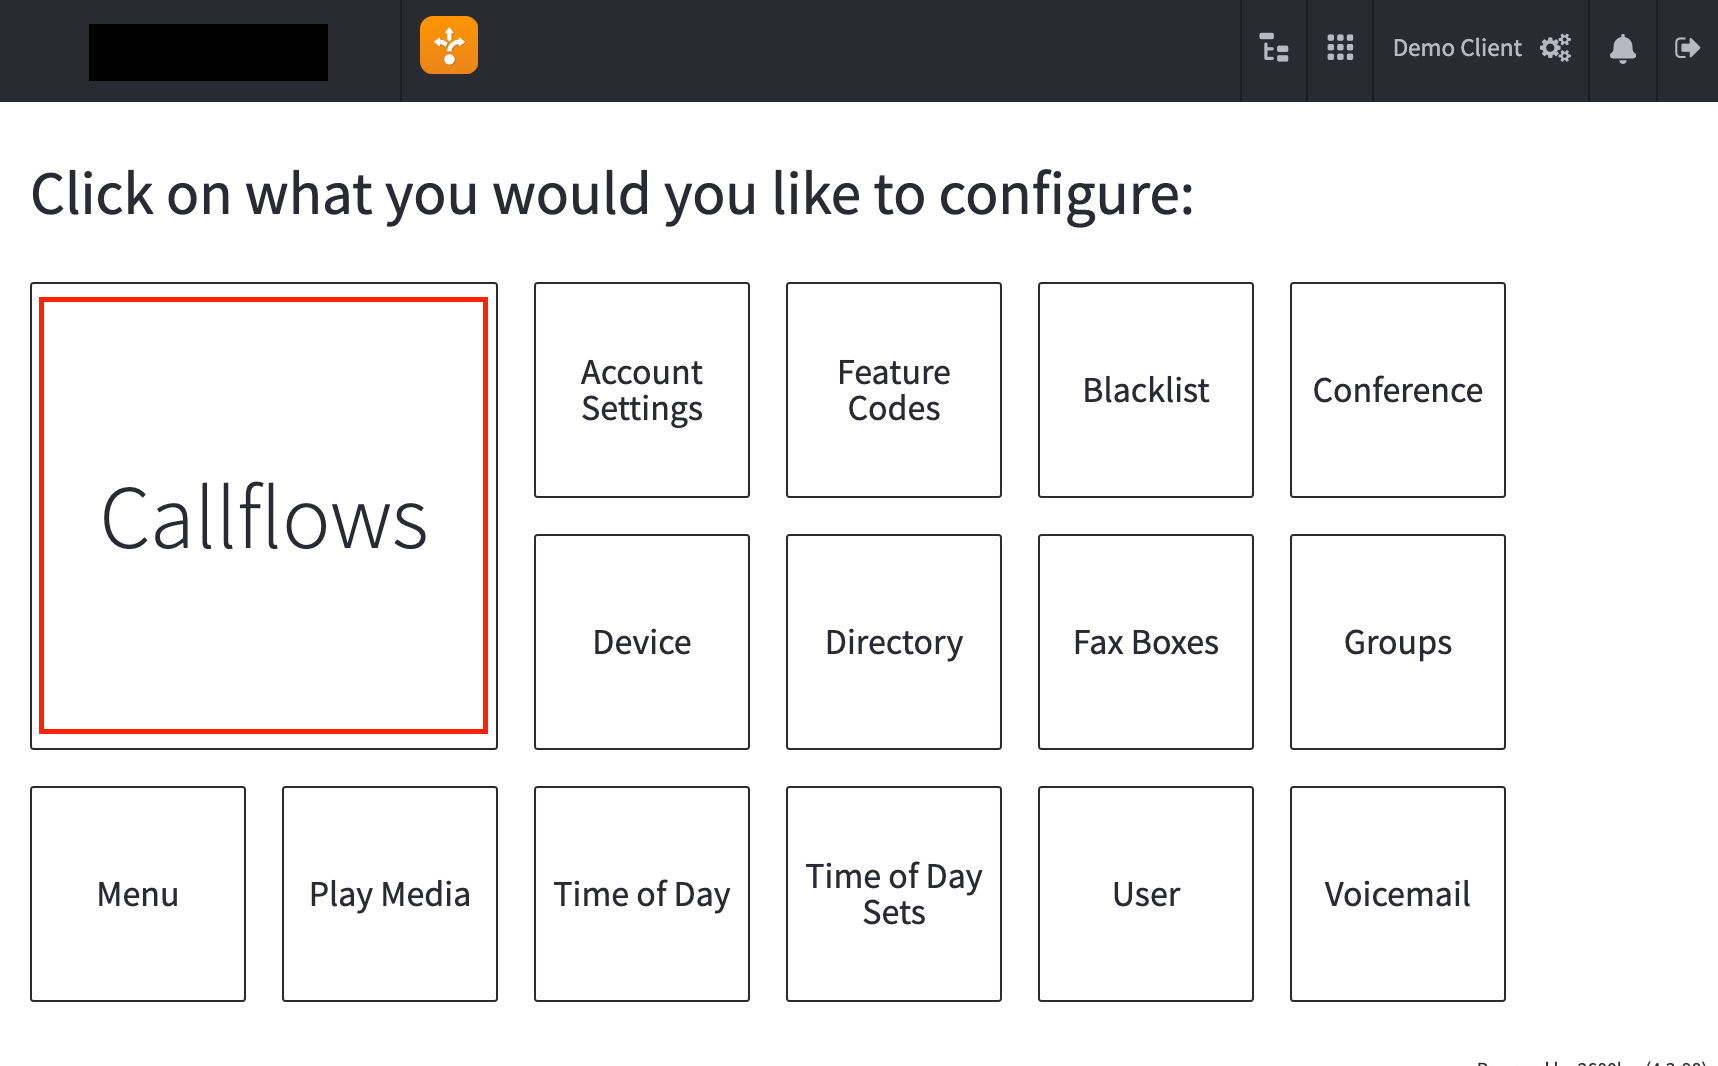
3. Select Callflows from the Main menu
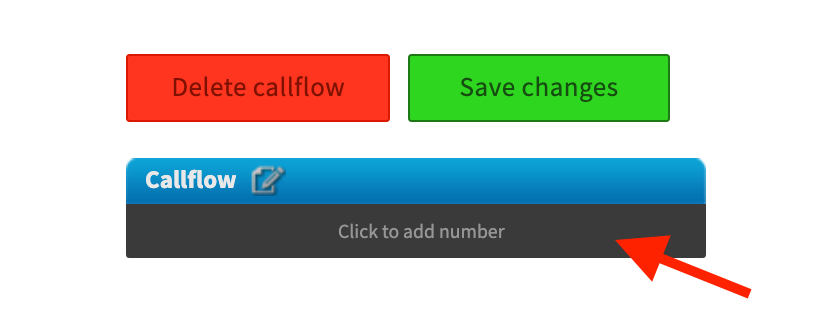
4. Then select Add Callflow
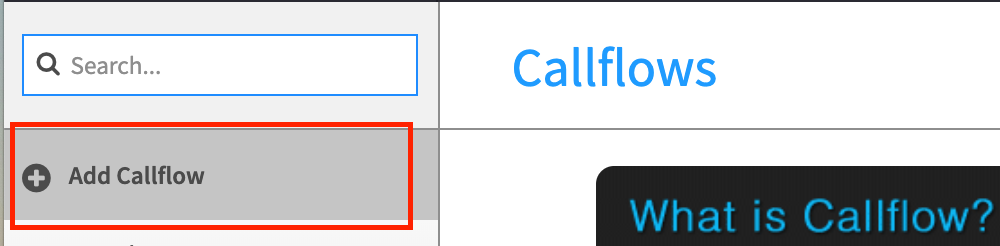
And add the phone number or extension associated with this flow, or routine. You can choose a spare number in your inventory or define an extension to be used.


NOTE
This extension is what you will use as the beginning of your Spanish Speaking Callflow.
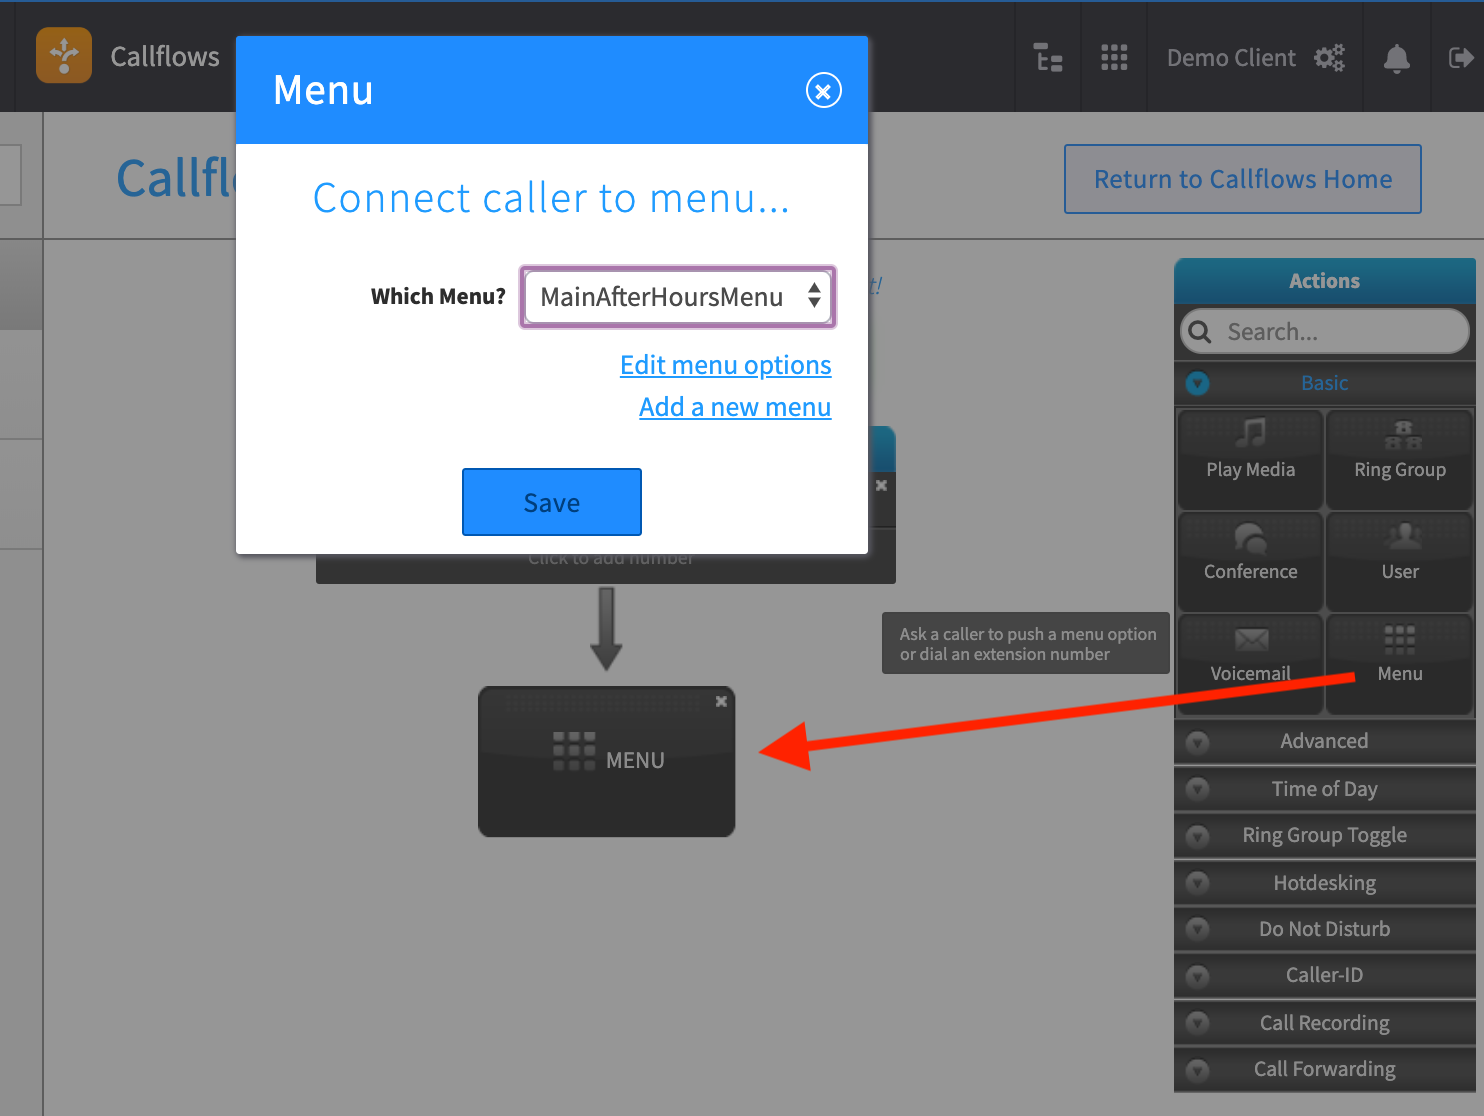
5. Add a new menu to your Callflow
Find the Menu button in the Actions bar to the right, and drag it dynamically to below the Callflow block. The menu dialog box will pop up.
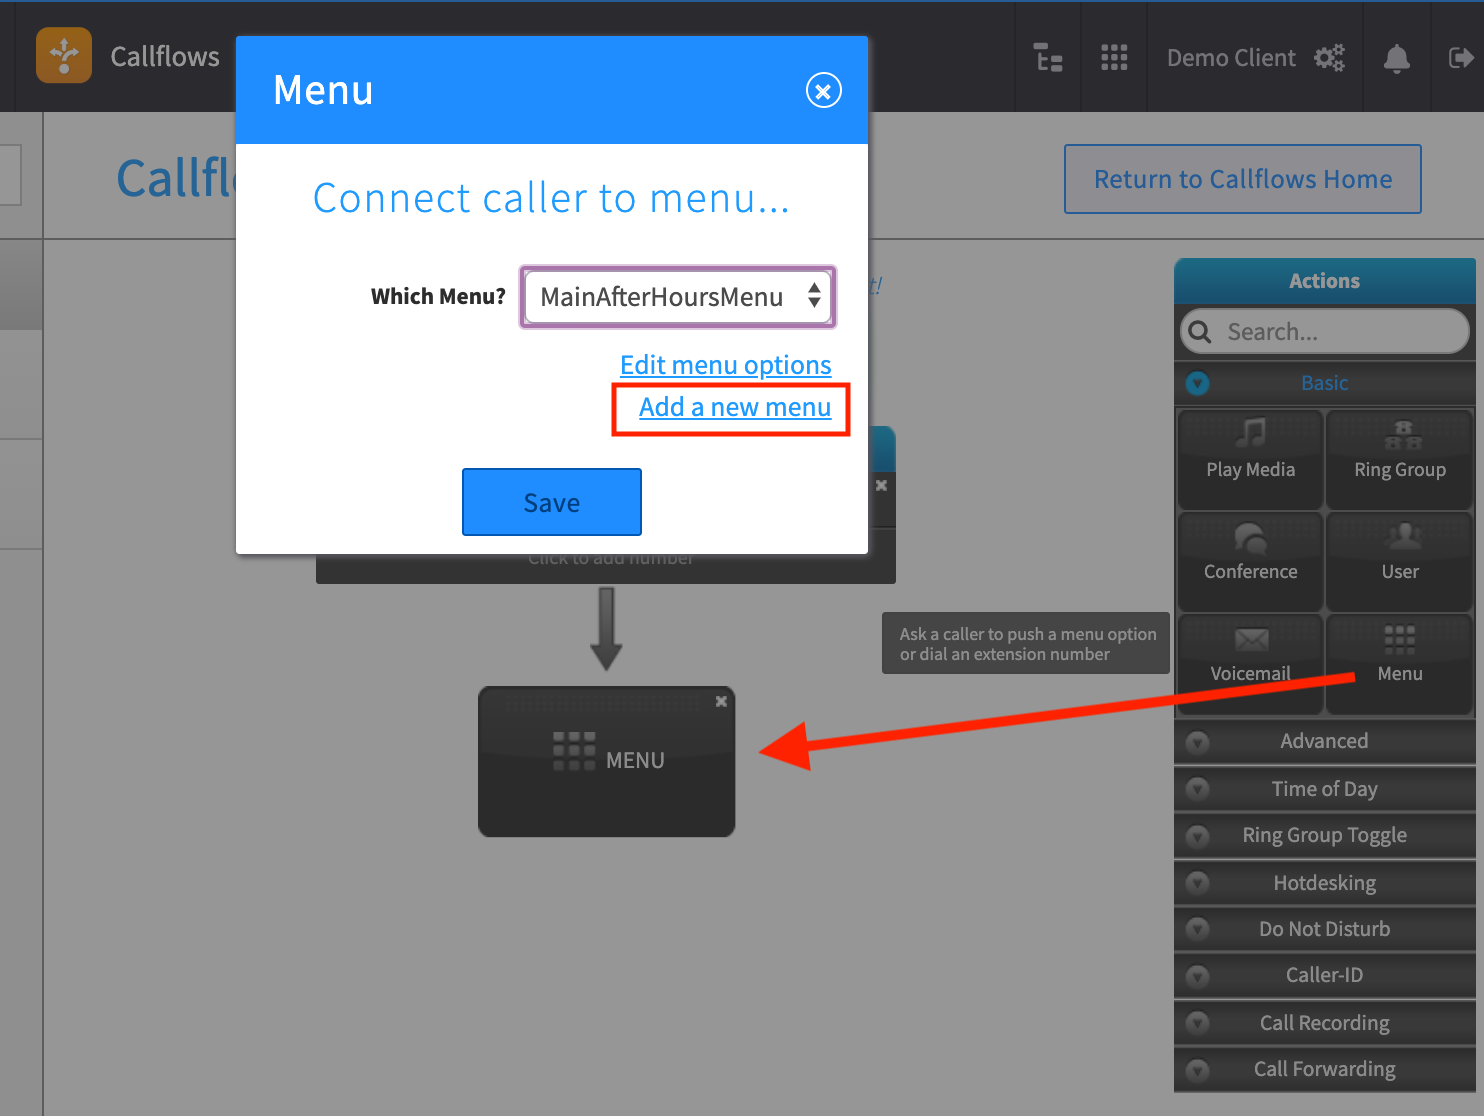
6. Add a greeting message using the bottom selection options. You can
- Type in a message that will be converted to speech (TTS) and define the “profile” of the speaker (e.g. female/male, etc.)
-
Upload a pre-recorded .mp3 file
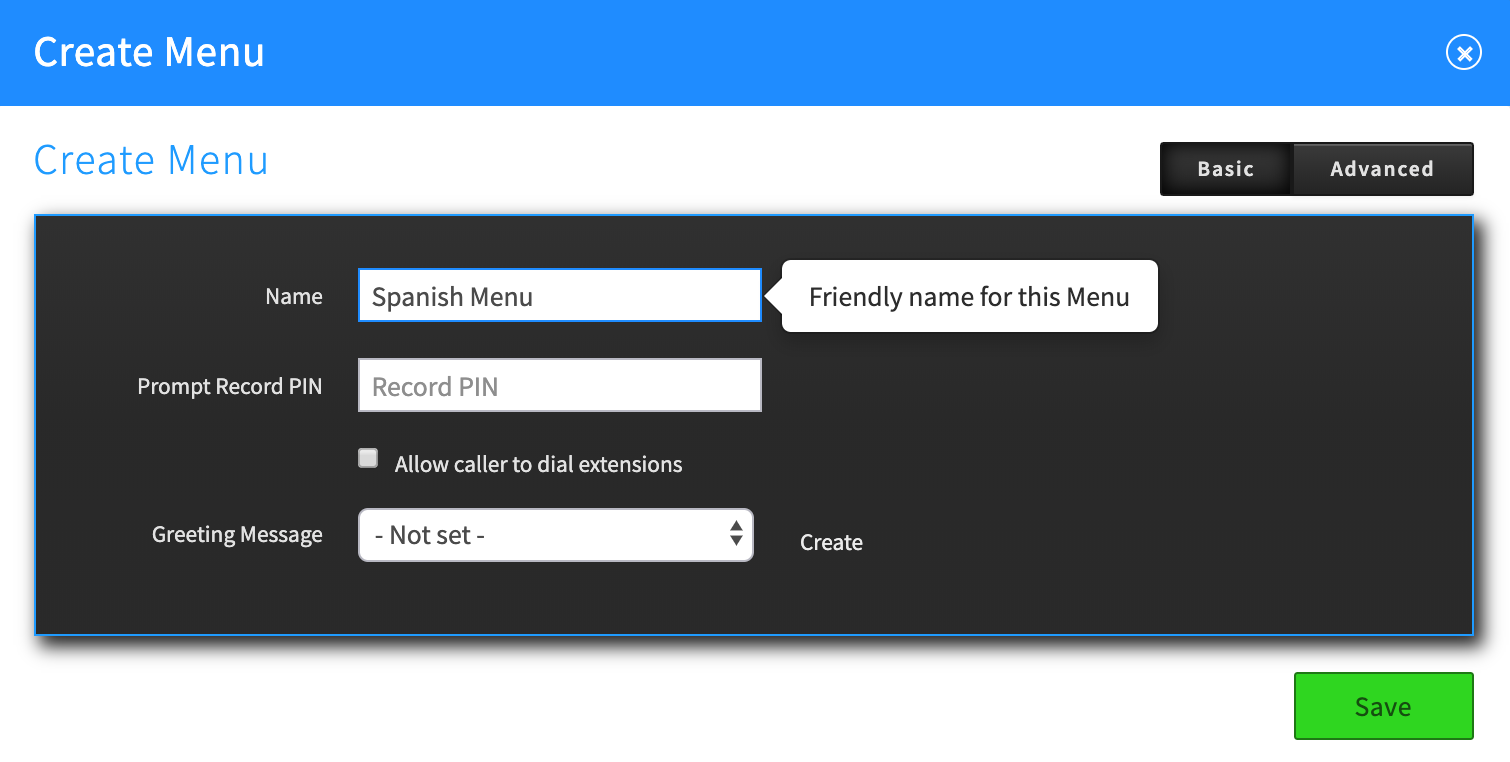
NOTES:
- A “Not set” option will mean no greeting is played and the menu options begin.
- “TTS” is short for Text to Speech. Enter text and it will be spoken for you.
- You can edit your media file using the edit option; this includes defining the “speaker” profile.
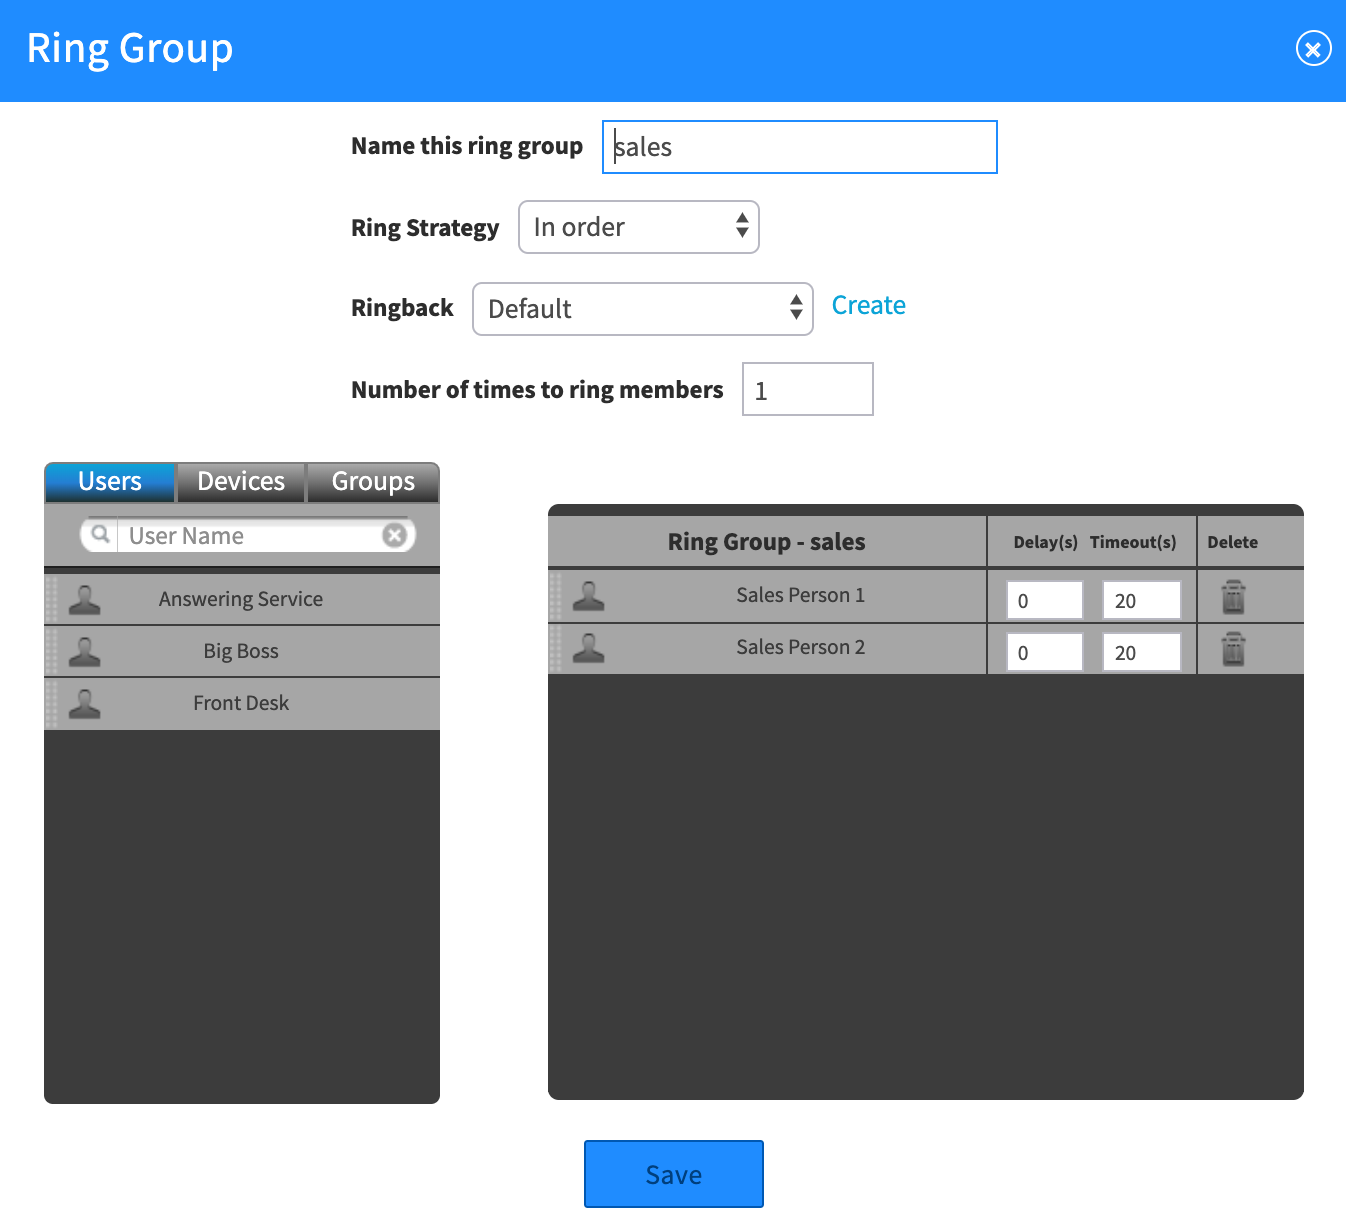
7. Add extensions to the Spanish Menu Callflow
Once you have the Spanish menu set up, you will want to attach the extensions that you had defined in SmartPBX, basically copying the same navigation from the main menu to the Spanish menu.
To do this, drag the user, ring group, directory, and device buttons from the Actions menu to the Callflow diagram.
TIP: A quick way to find the device button: enter the word device in the search box at the top.
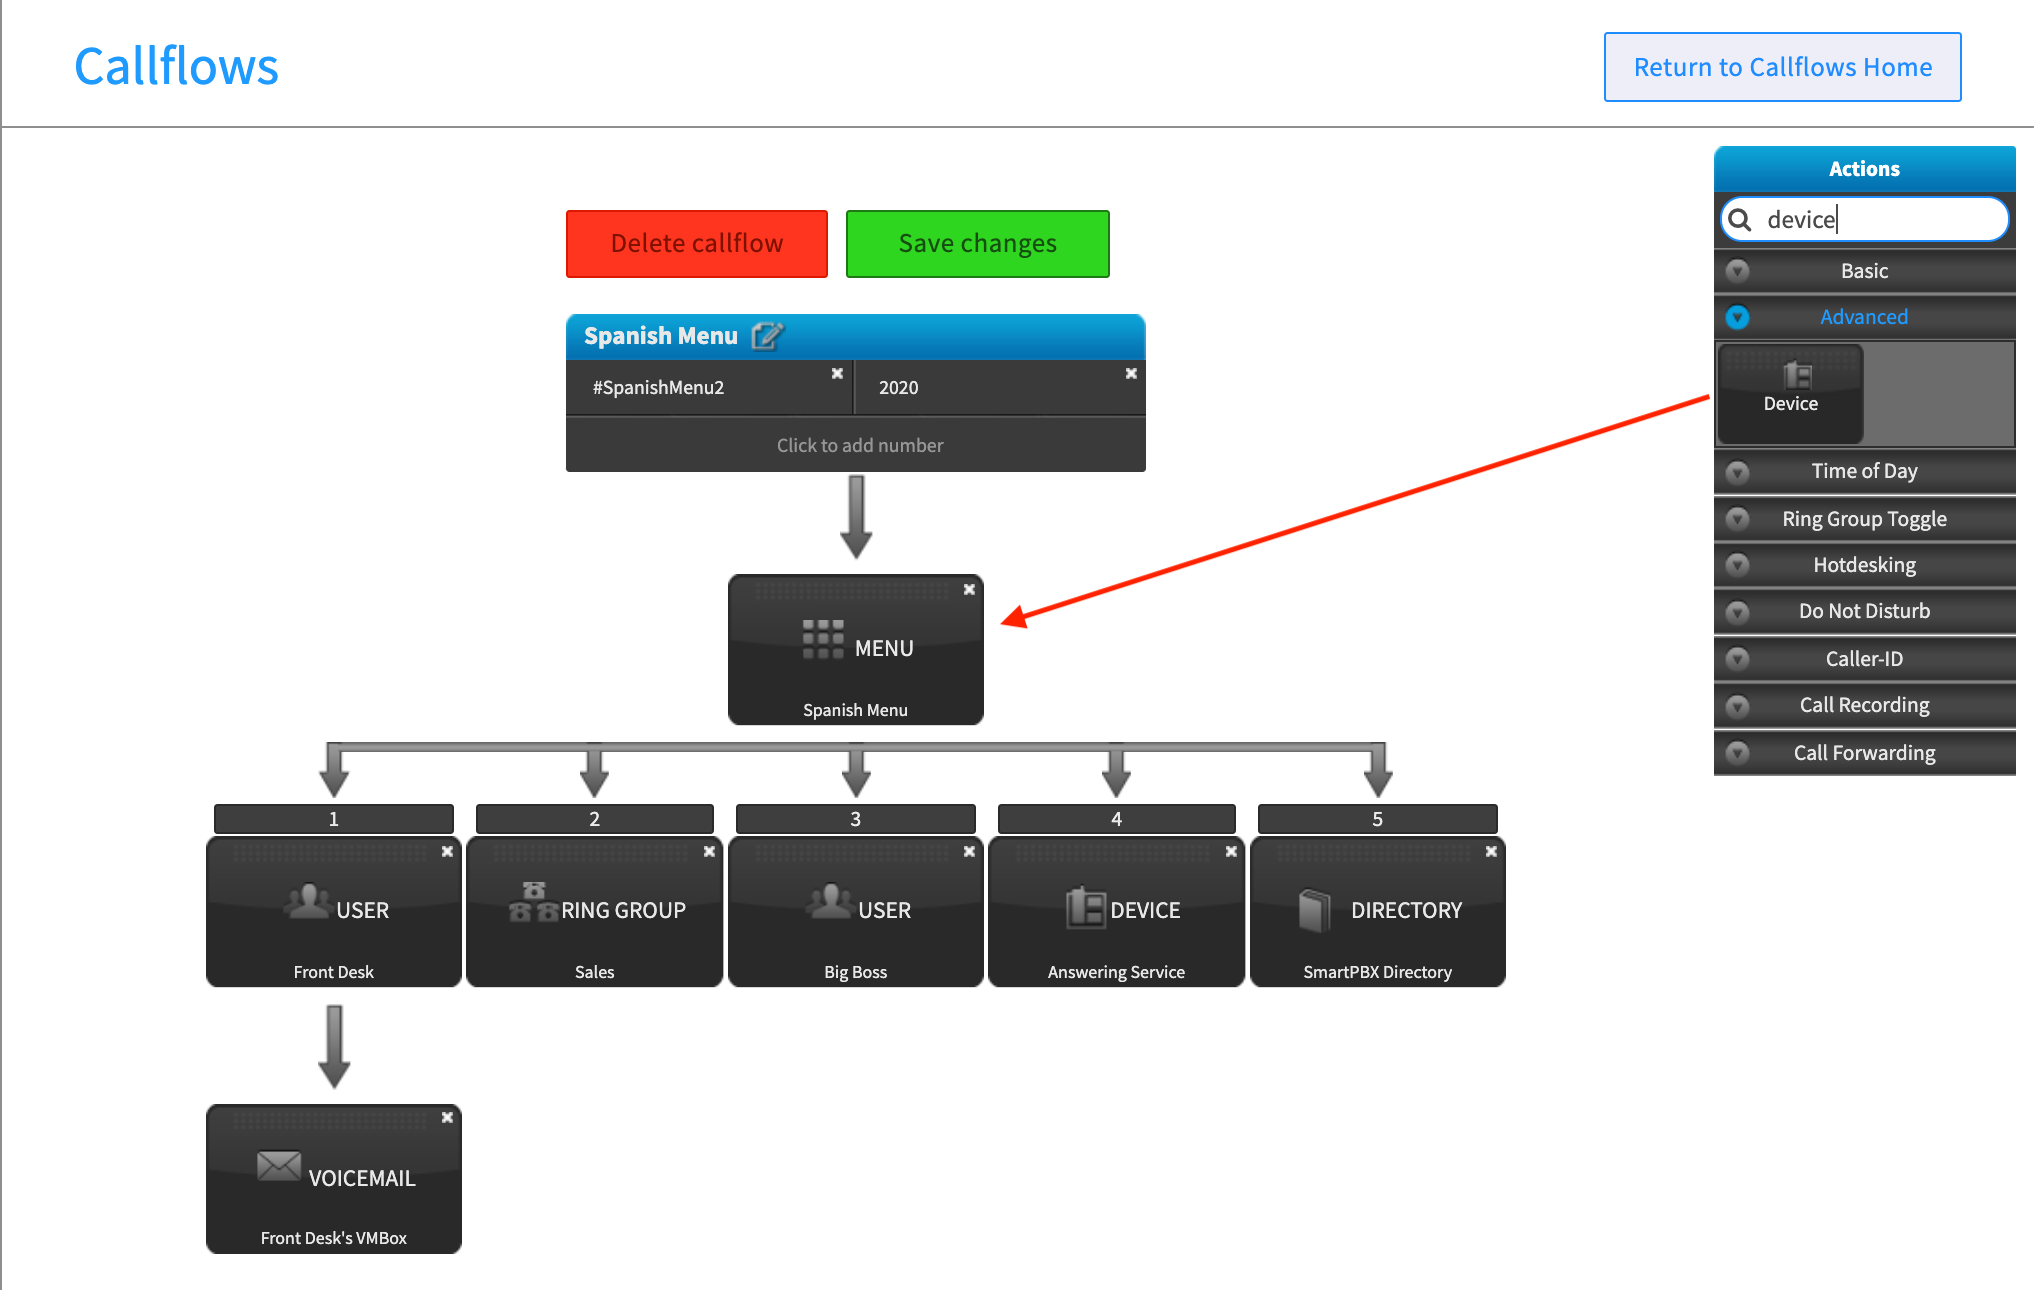
NOTES
- When you save this callflow, it will re-arrange the blocks in the correct extension order, 1,2,3,4, etc.
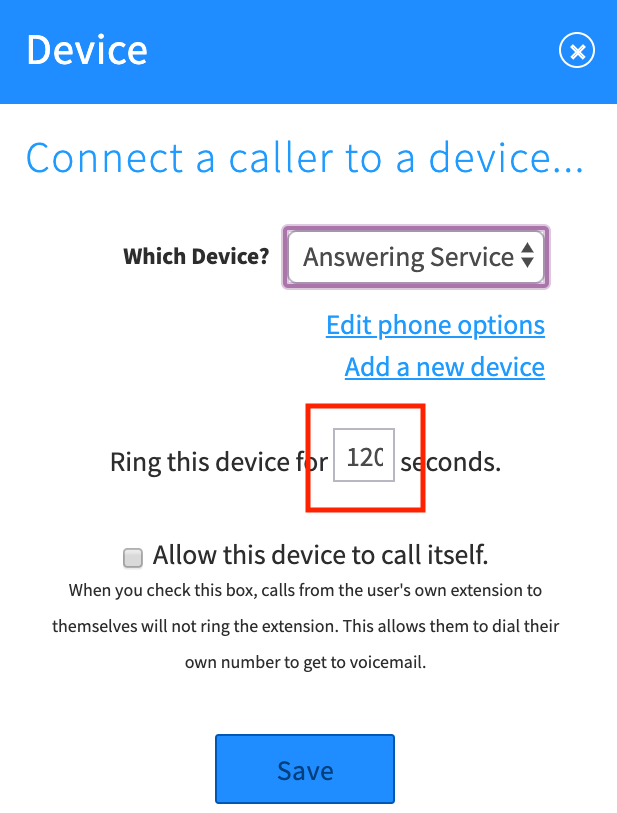
- When assigning a remote call forwarding device, it's recommended you increase the time setting for "Ring this device for ... " It defaults at 20 seconds, you may want to increase to as much as 120 seconds to allow enough time to reach the forwarding/destination phone number. See image below.
Once you drag an action to its place, it will prompt you to assign a user, a phone extension or voicemail box, depending on the action you’ve selected.
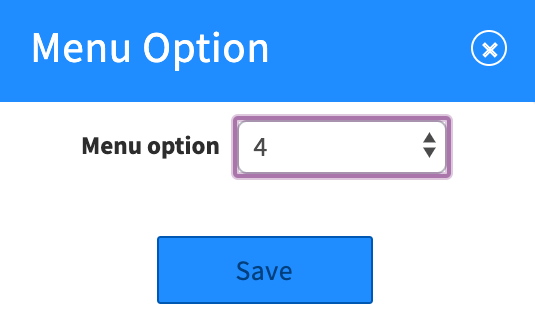 .
. 
8. SAVE your Callflow
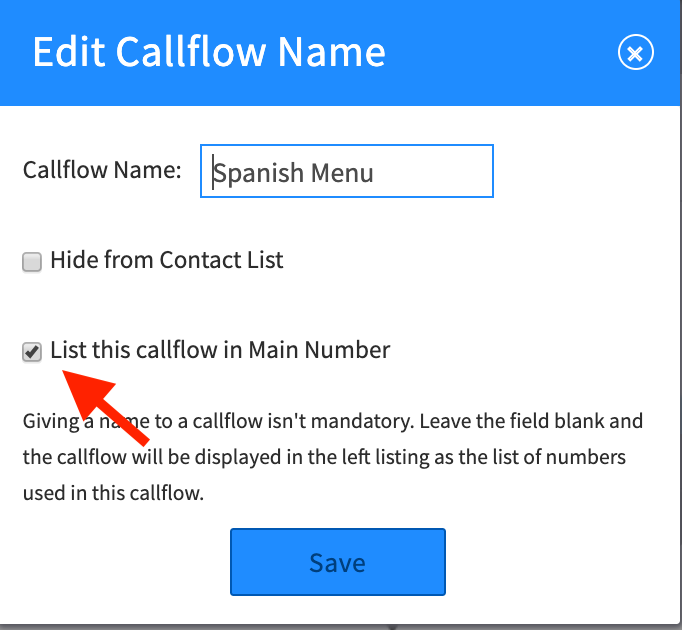
9. List your Callflow in Main Number
Confirm it is set to “List this Callflow in Main Number.” This will flag the Callflow and enable it to display as an option in SmartPBX.
To verify this is checked, select Edit at the Callflow name level, and check the “List …” box
10. Return to SmartPBX to assign your new Callflow!
Go back to your SmartPBX Main Number menu / Incoming Call Handling, and re-select Virtual Receptionist.
- Note you will now see a 4th option in your configuration screen that is pulled in from the Advanced Callflows application. Unless you want to only use a callflow you have set up that includes multiple menus, etc., you can ignore this. We will add the menu we created in our original Virtual Receptionist navigation.
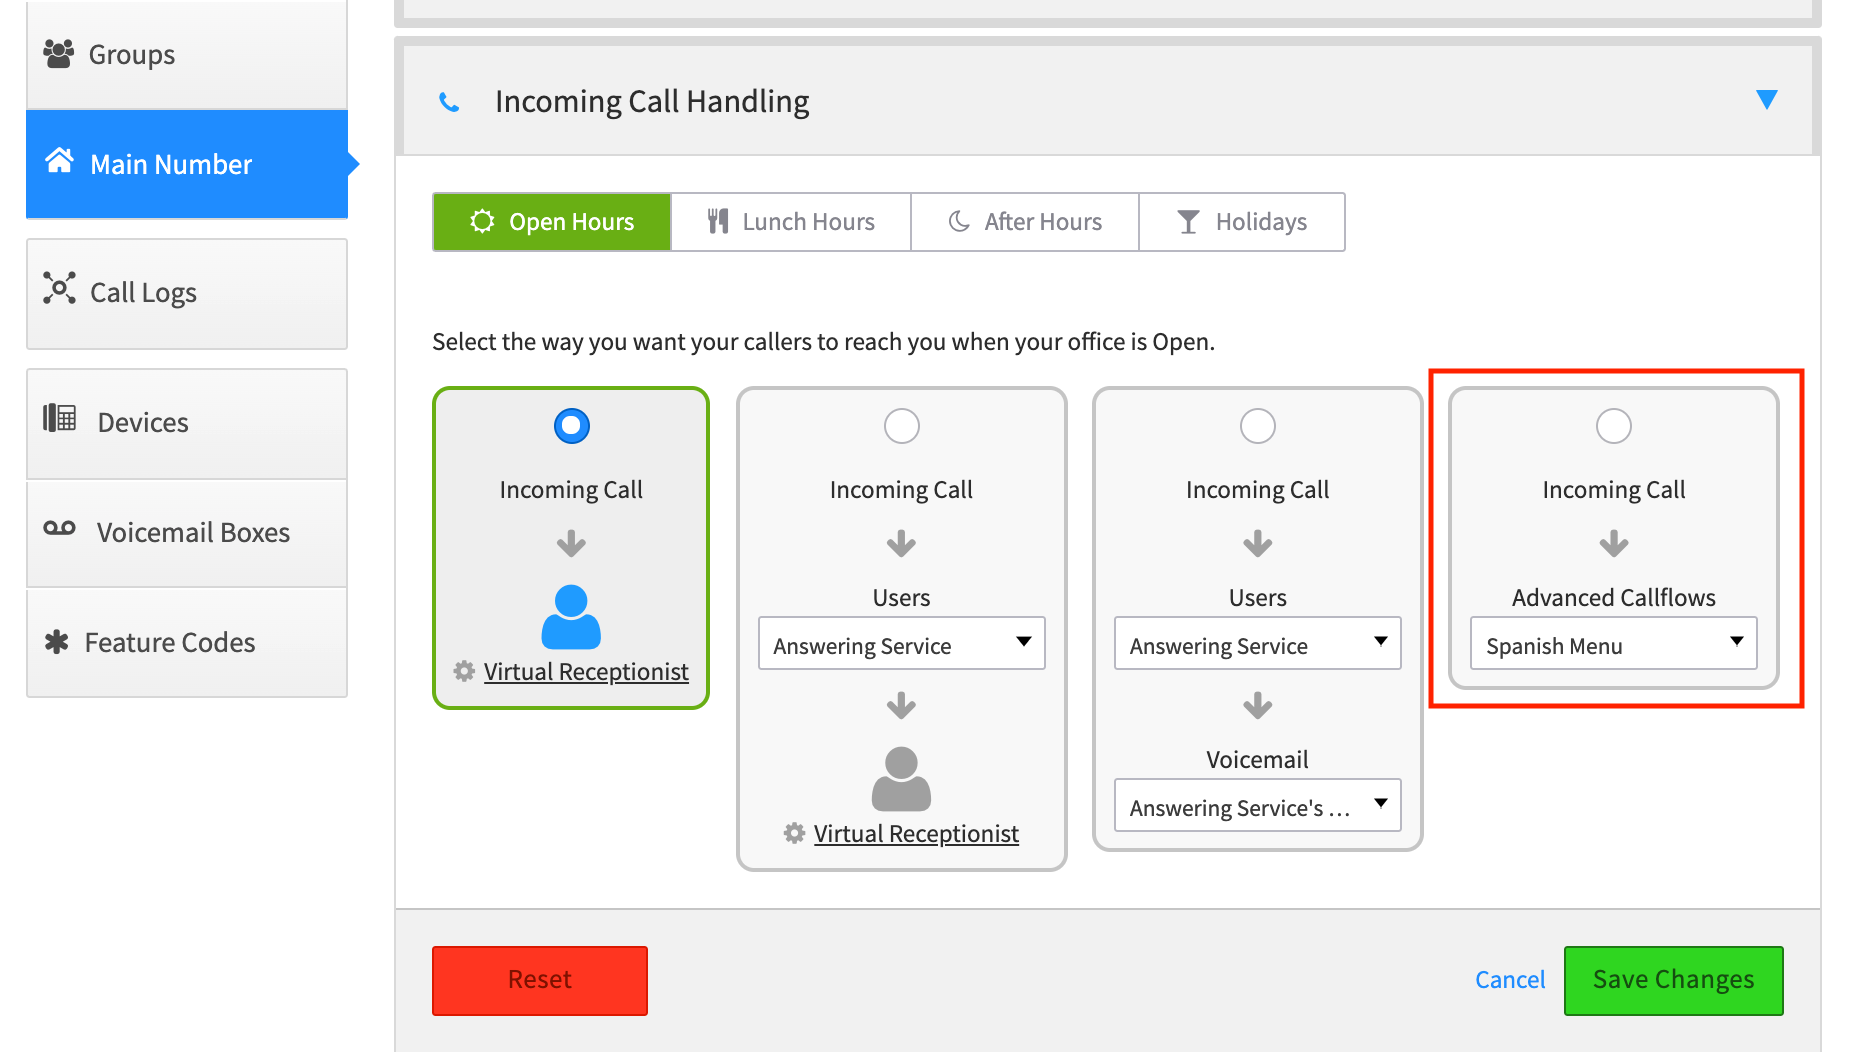
Here, you are now able to select your newly created Spanish Menu options under the Advanced Callflows category.
11. Step through the same process for Lunch Hours, After Hours, and Holidays.
This is important! If you do not add your preferences for the different hours and holidays, your callers will only hear your first setup option.
NOTE: If you do not see these options, it means you have not defined settings for these options. Use the Main Menu drop-down options and fill out the details.
12. Test your Magic!
#####


Edited by Emily R (show revisions)
Recommended Comments
There are no comments to display.