


User Story
An account wants to create an extension that when activated it forwards calls to multiple people in the account, such as a sales or support department.
What is a ring Group?
A ring group is an extension in your account that is mapped to multiple people. These are often used to ring a specific department in an office, for example a support team or sales team. Within each ring group, you can define a succession of rings, where one extension is tried first, then the call is moved elsewhere, to another extension or to voicemail.
 Setting up a Ring Group in SmartPBX
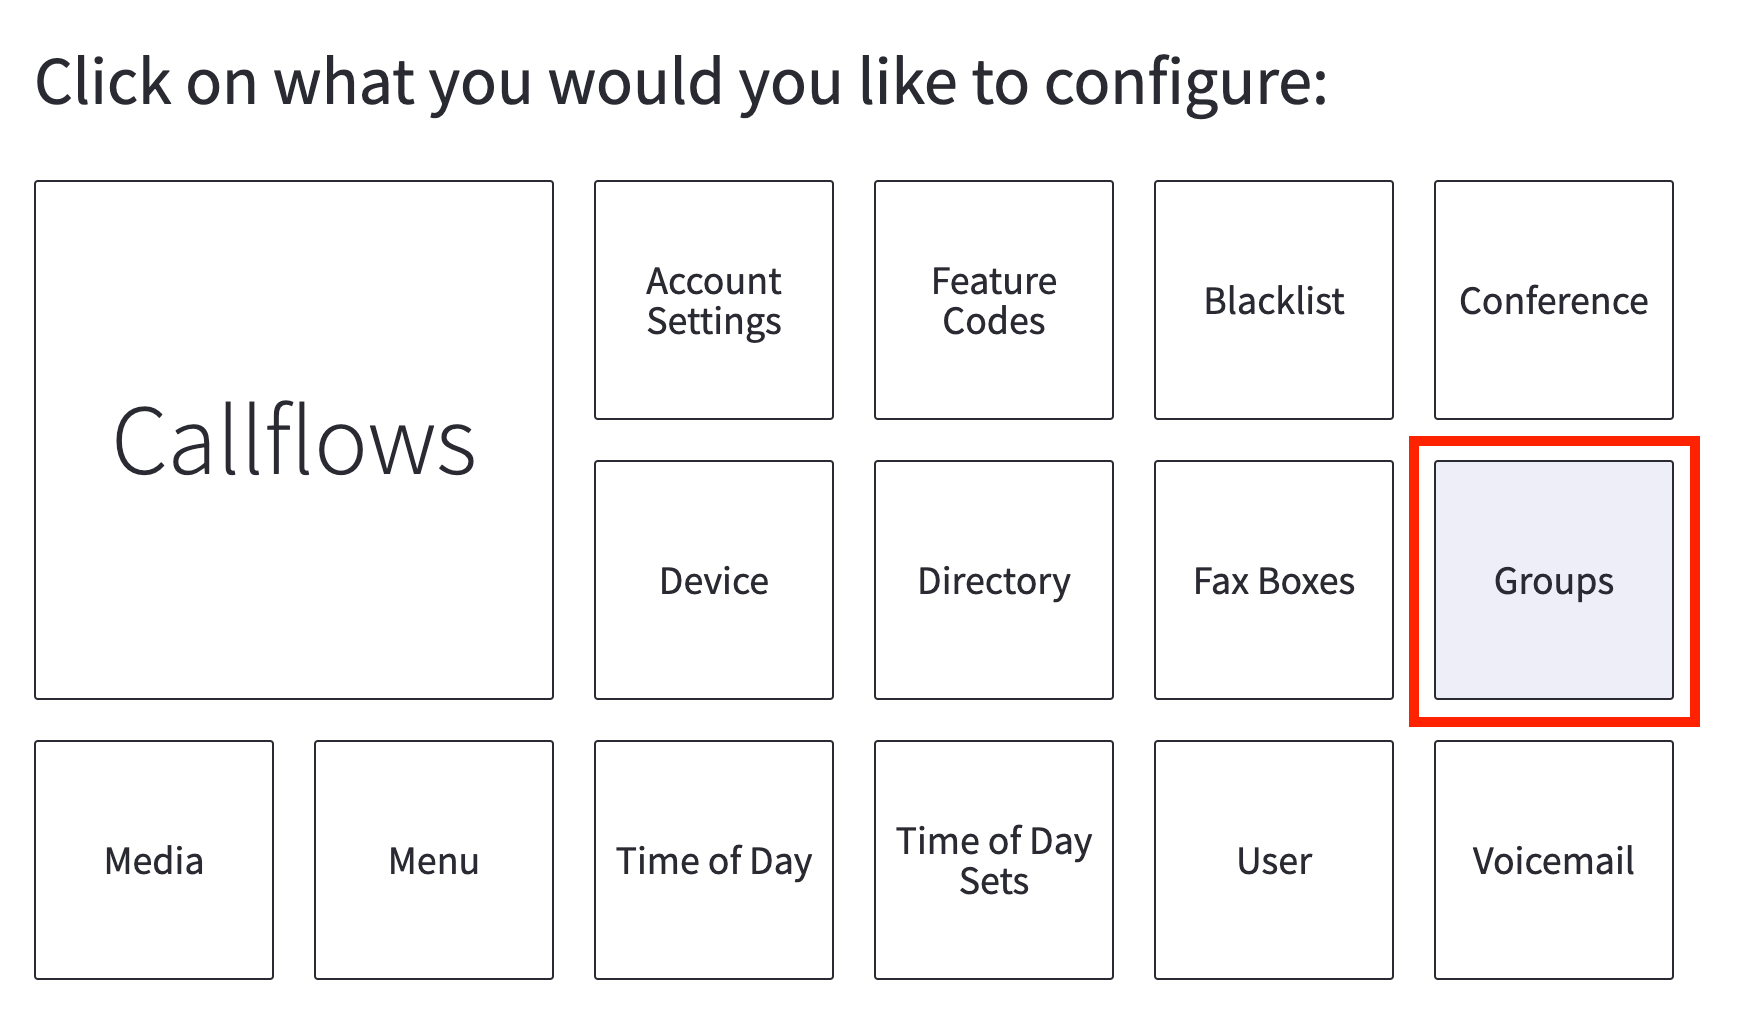
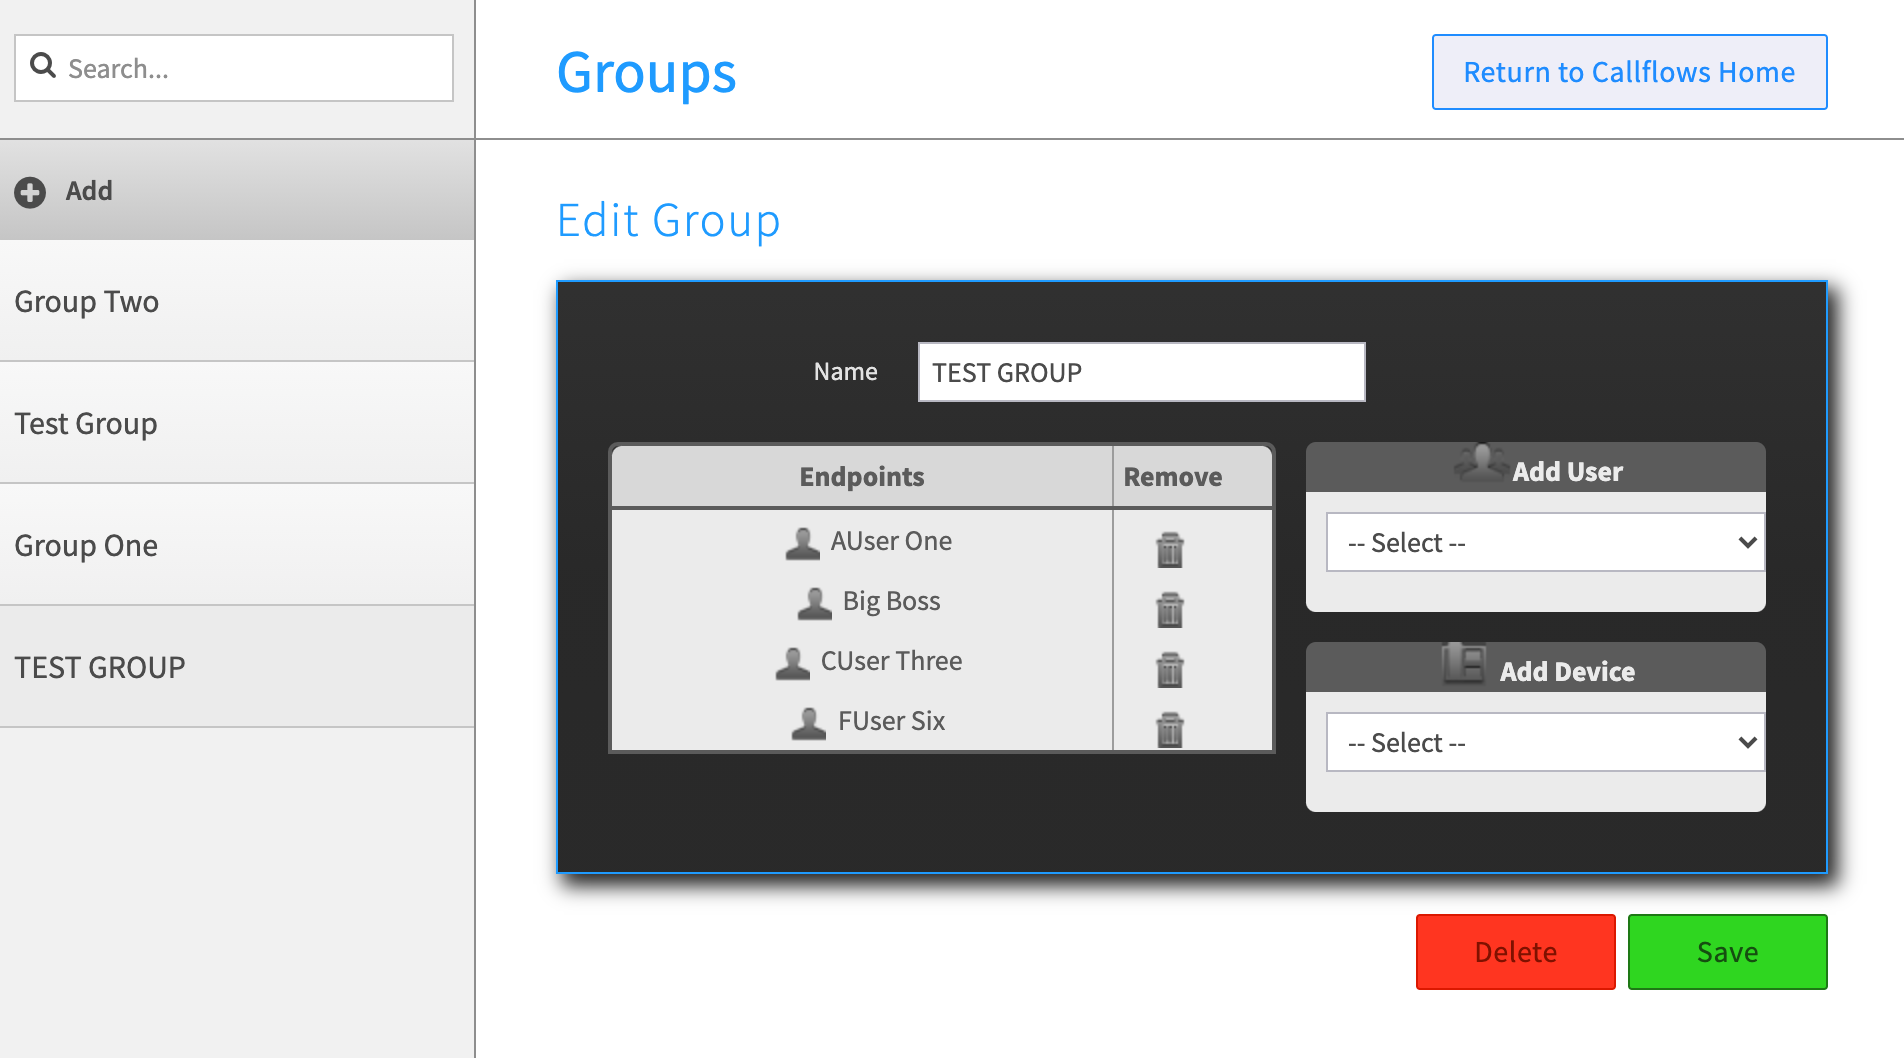
From your SmartPBX dashboard, Select Groups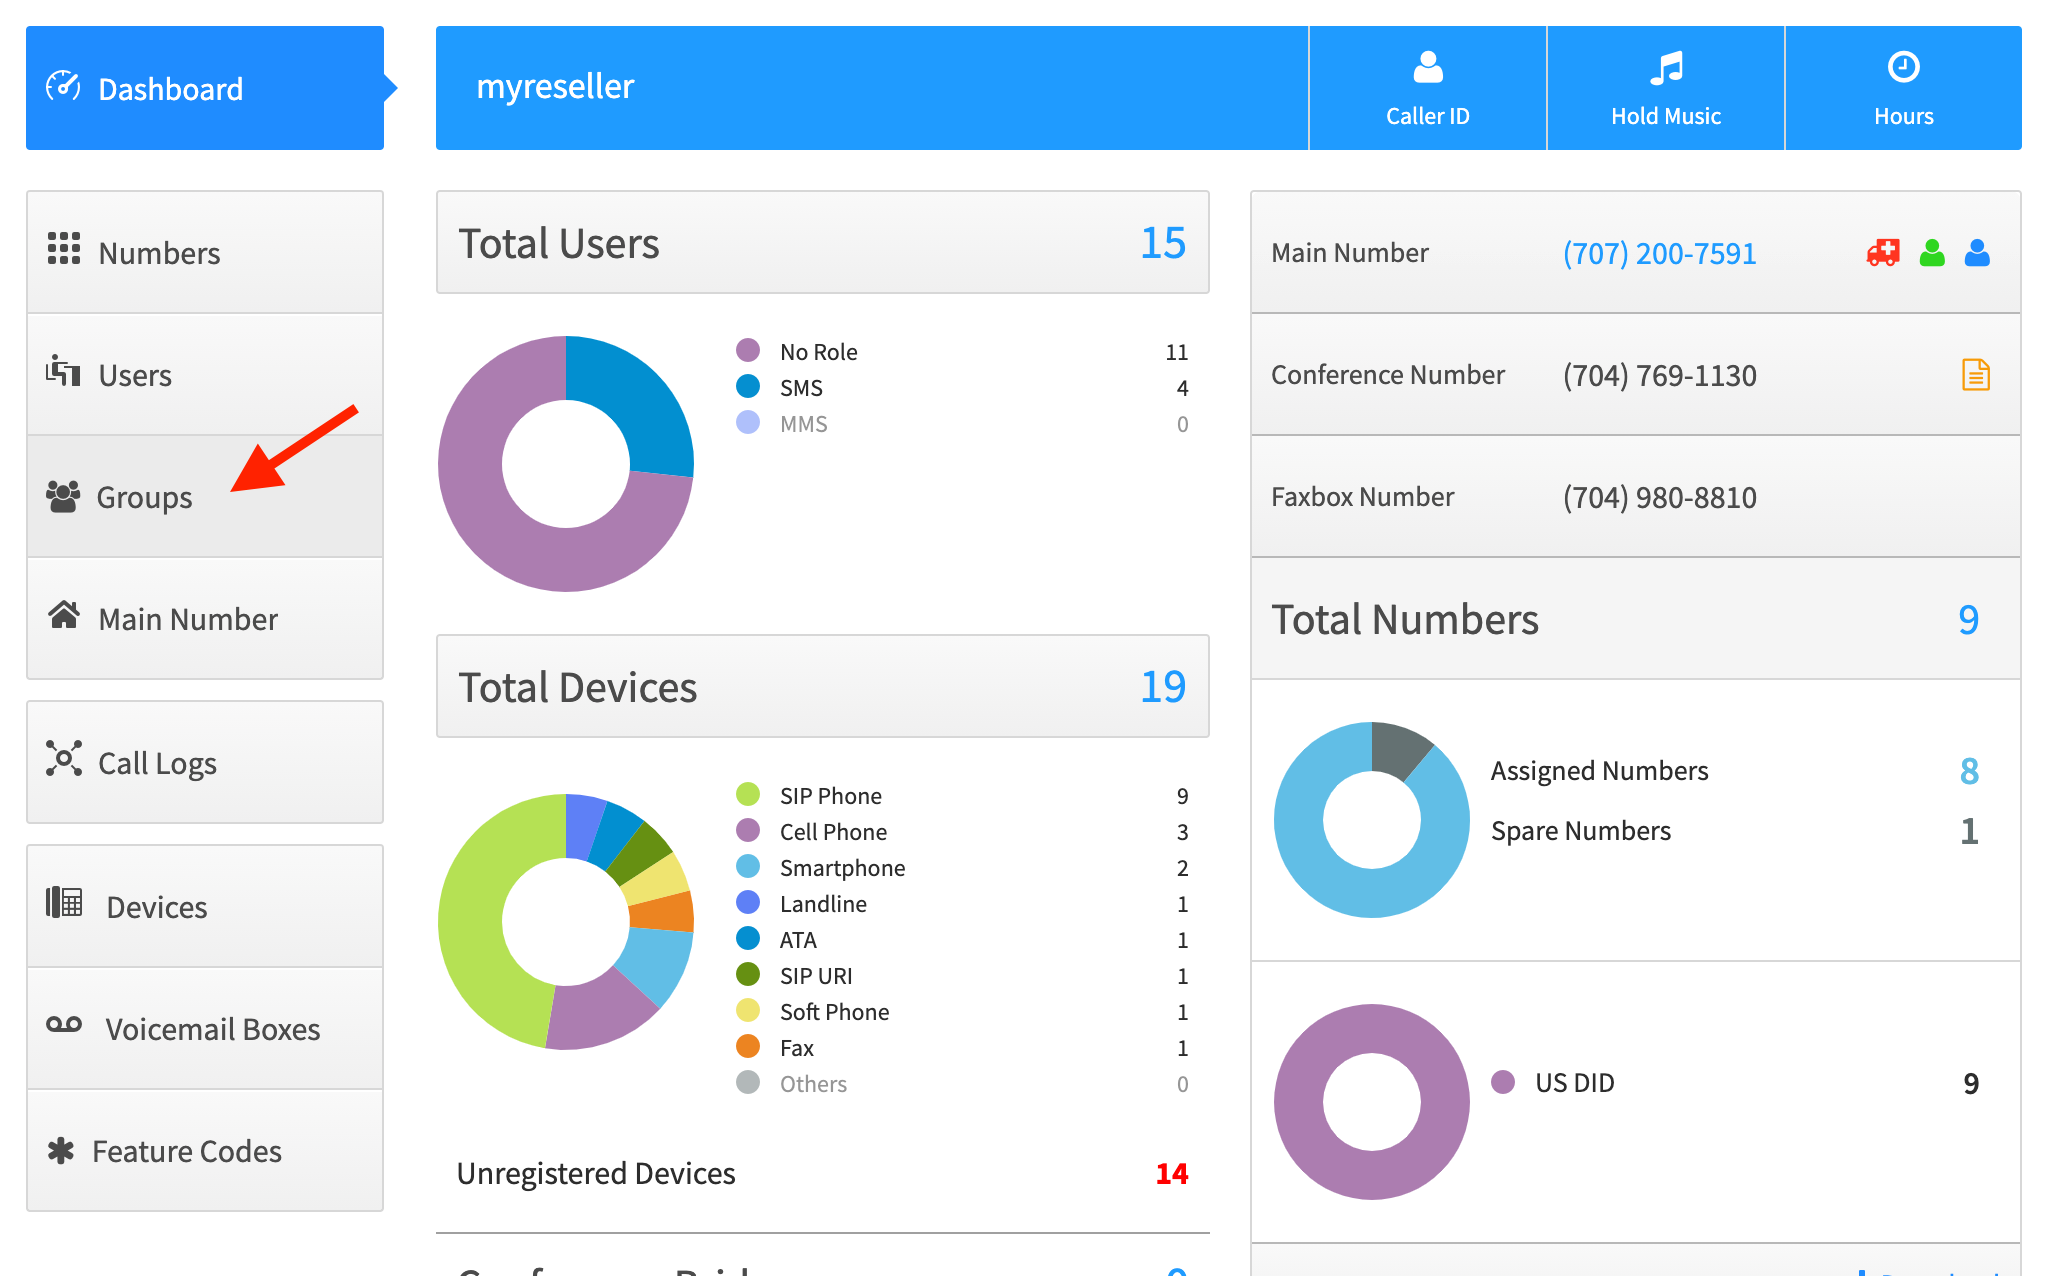
Select Add Group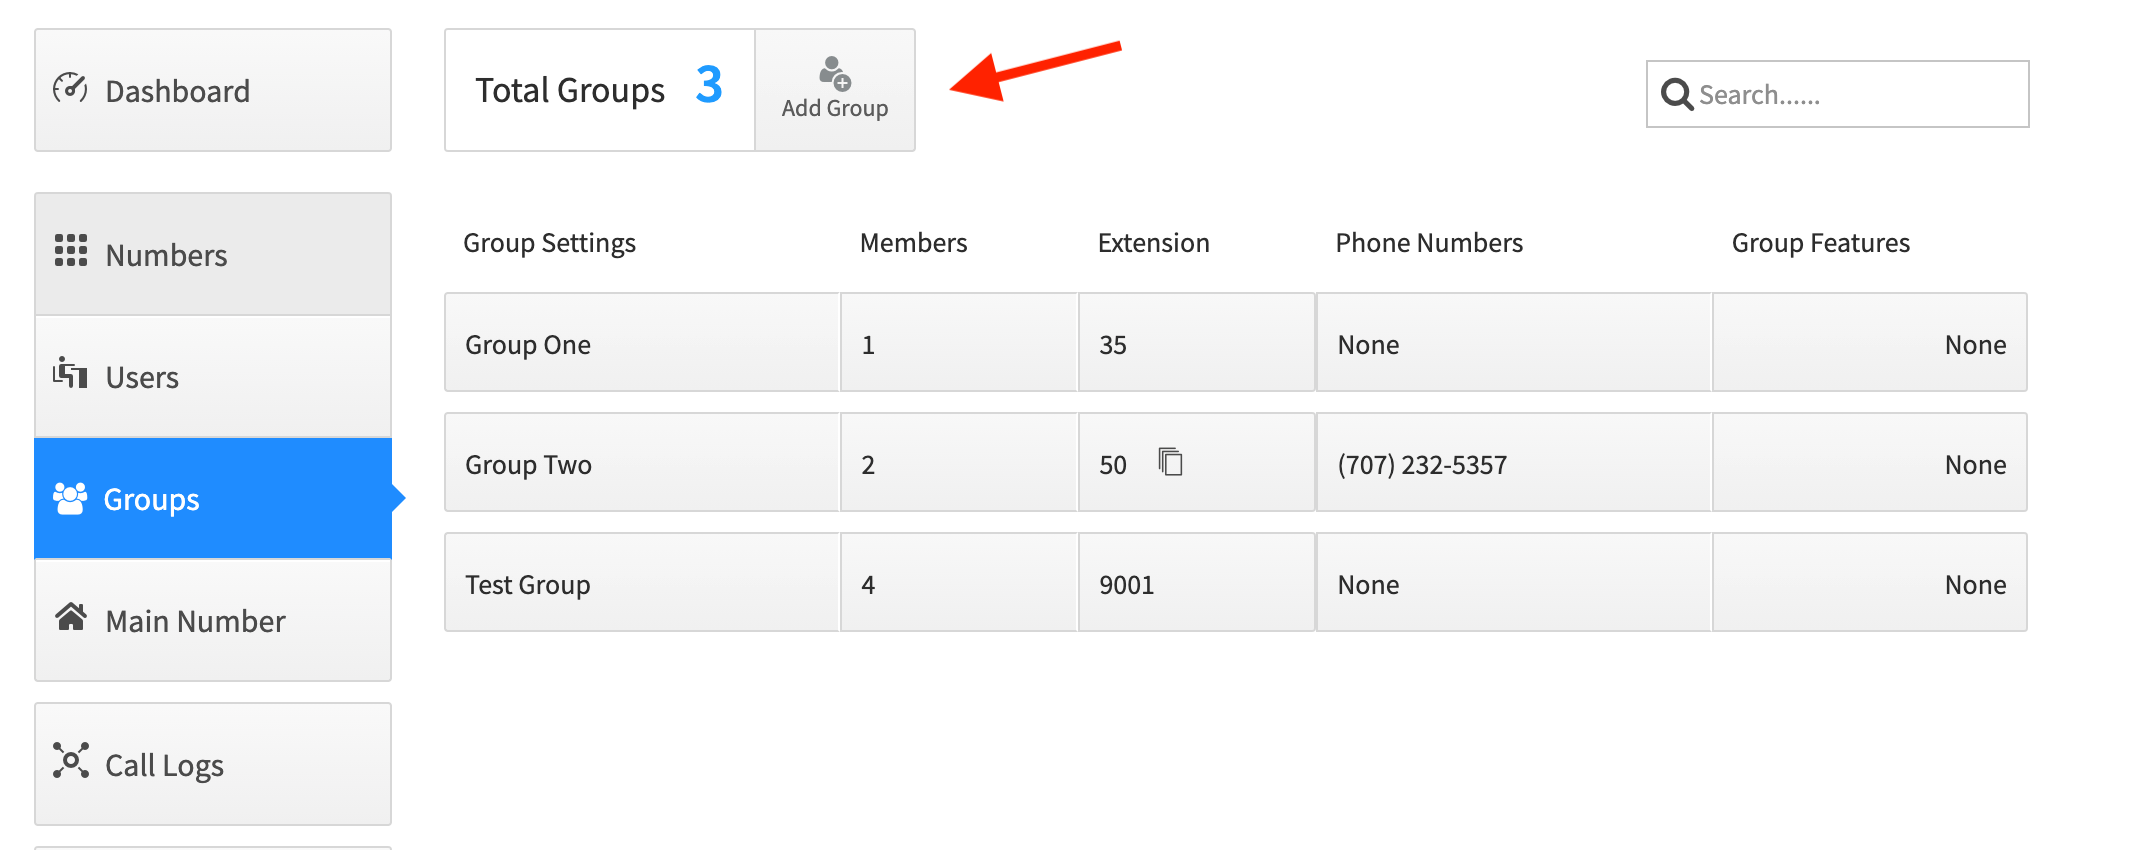
Give your Group a name
Choose a name that helps remind you what the ring group is for.
Enter an extension
If you don’t know available extensions, click on “Find One”. It will list extensions already added to your account. Choose one that is not already assigned.
Drag User names from "Available Users" column to the "Selected Users" column
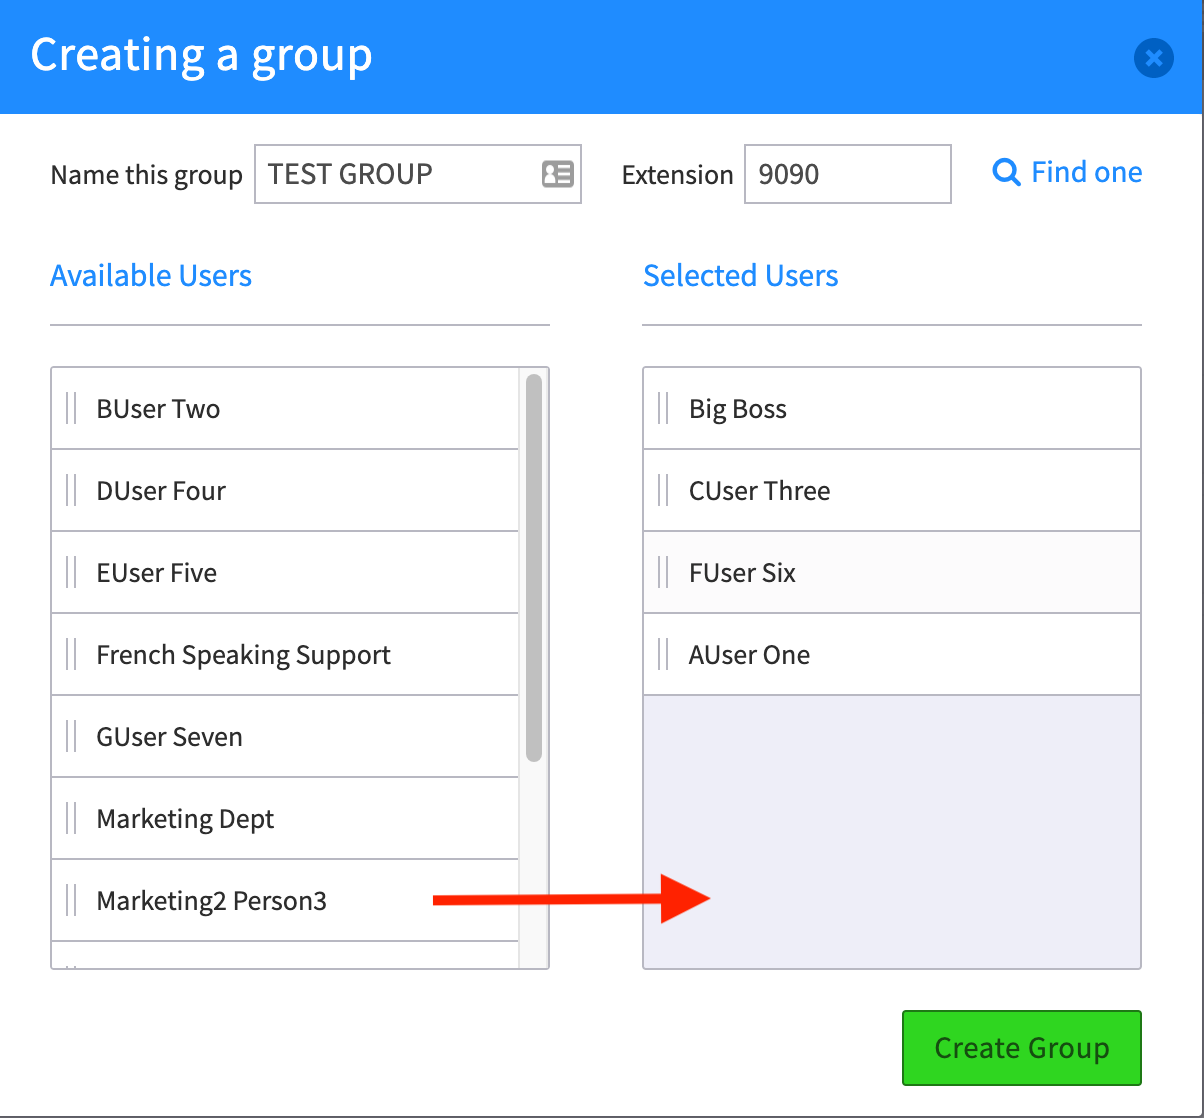
Select Create Group
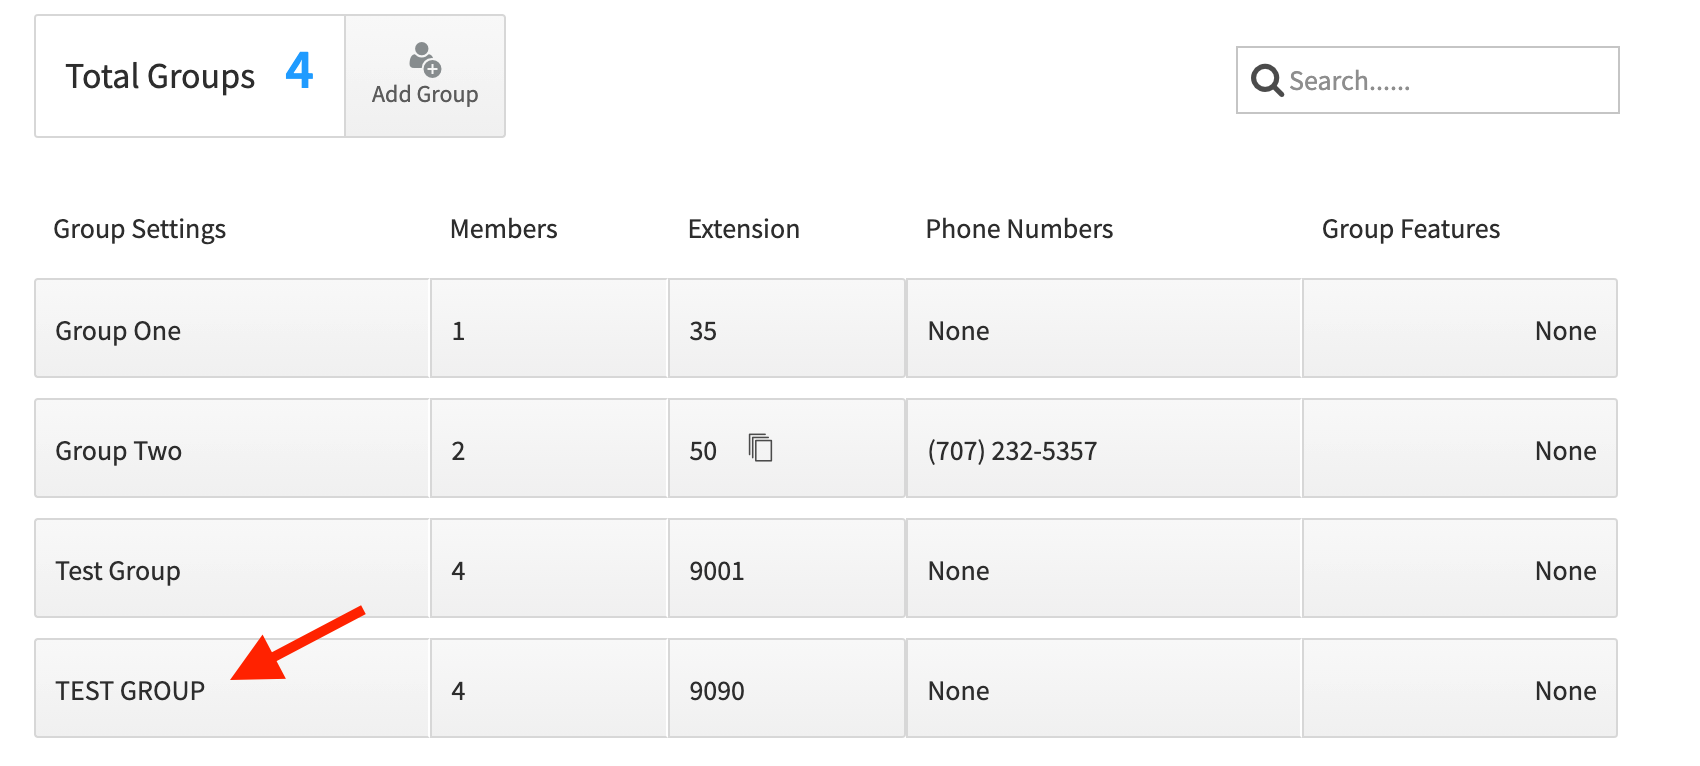
You should now see your newly created group in the list.
Ring Group Settings
There are a variety of settings you can apply to each ring group. To view them, click on the space under the column header to the right of your group.
-
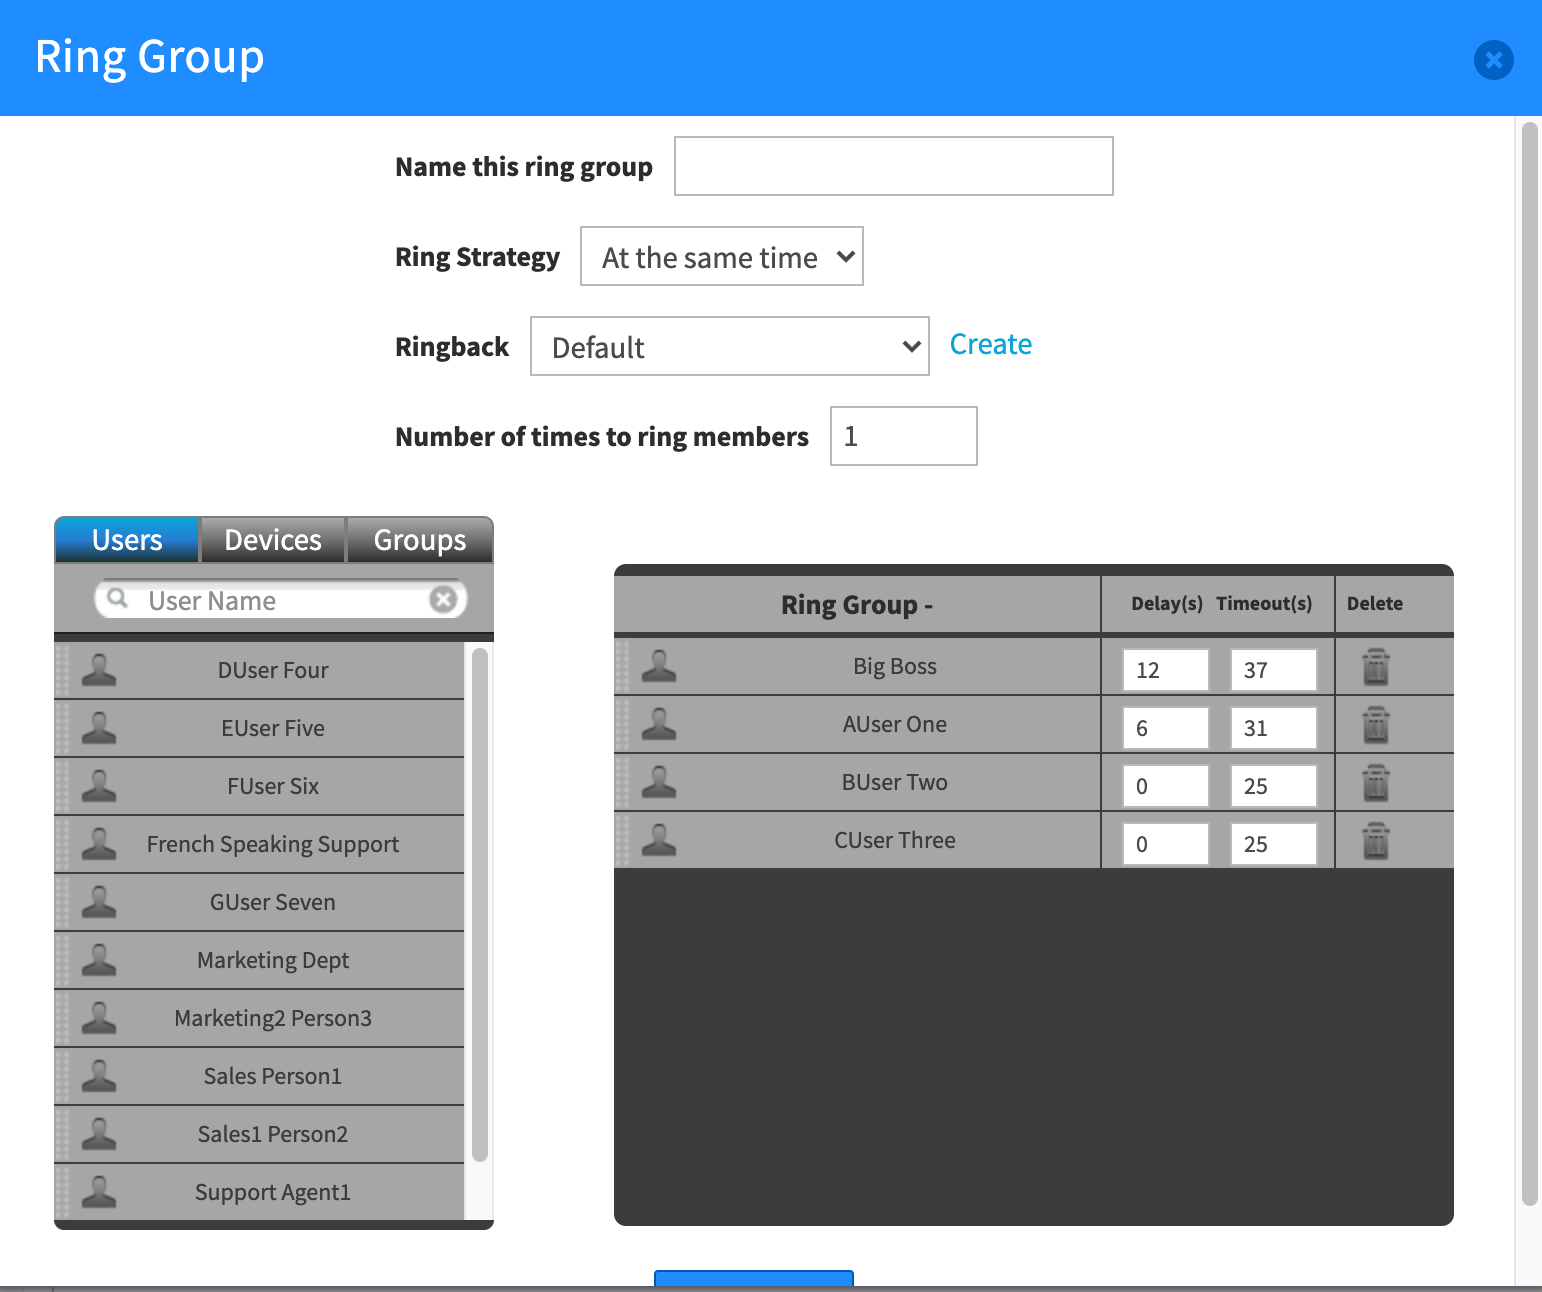
Members
Click on members to further define when a member in the ring group will start to receive the call, and for how long. Change the slider after each member to define this
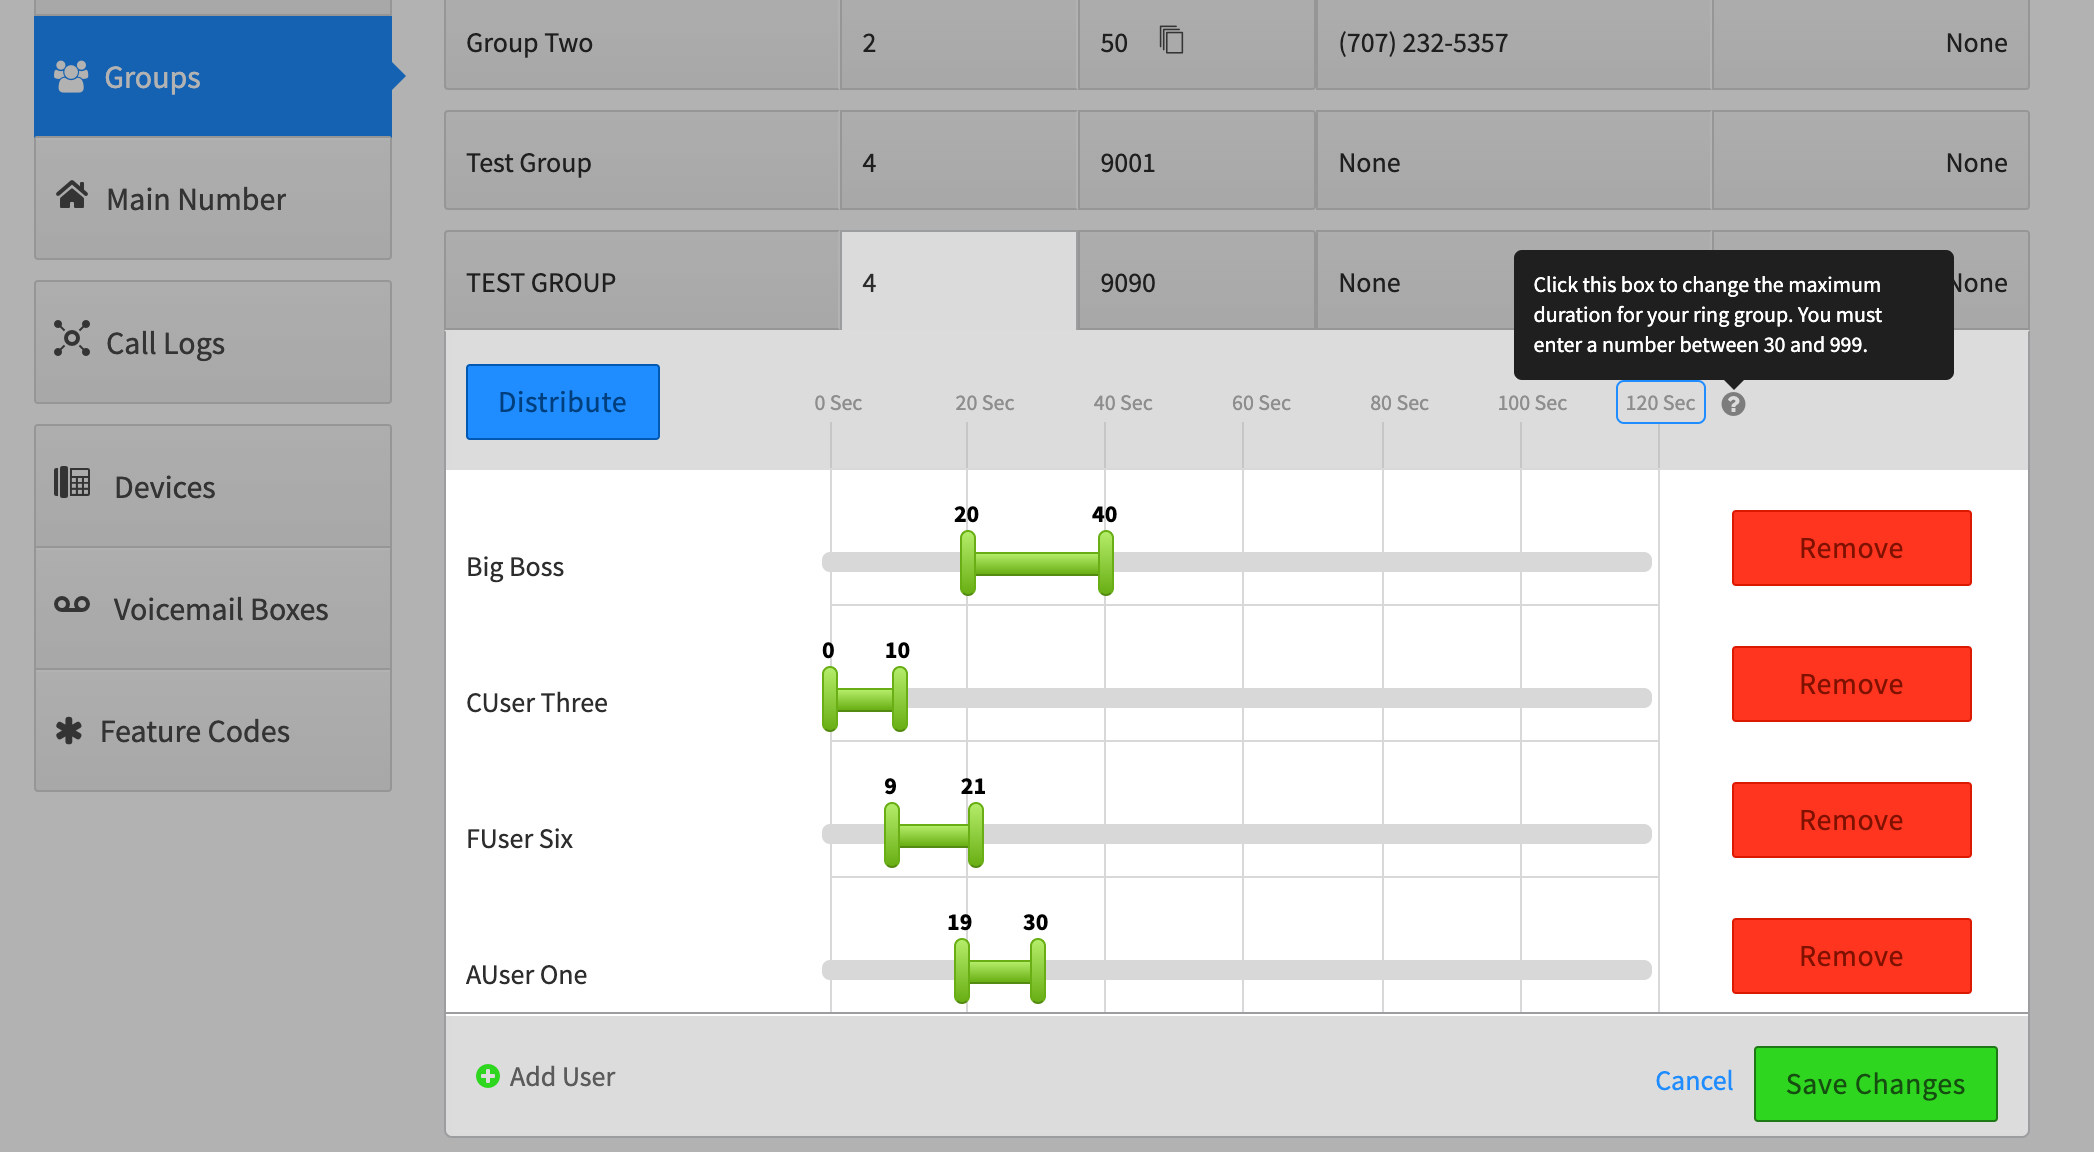
Some considerations:
- Budget about 6 seconds for each Ring initially, then test. This can vary based on your account settings.
- The blue Distribute button will automatically sequence each member equally. In this case no ring will be set for more than one user.
- Big Boss may not want to be hearing the first call, and may be set as a last option.
- Overlapping sliders mean both extensions will ring for that call
- The far-right value is the longest a ring will last, past this value it will proceed as you define under the Group Features setting. To change the maximum time, select the value (defaults at 120 sec.) and enter a new value.
- You can Add a user to the group from this screen by selecting “Add User” at the bottom left.
- You can Remove a user by selecting the Remove button.
-
SAVE! your changes
-
Extension
You can add a second extension here, and/or unassign the existing one and change it.
-
Phone Numbers
You can assign a specific phone # to this ring group instead of an extension. You will be giving the option of assigning a spare number already in the system or of purchasing a new number. Make sure you understand your pricing model before you purchase!
-
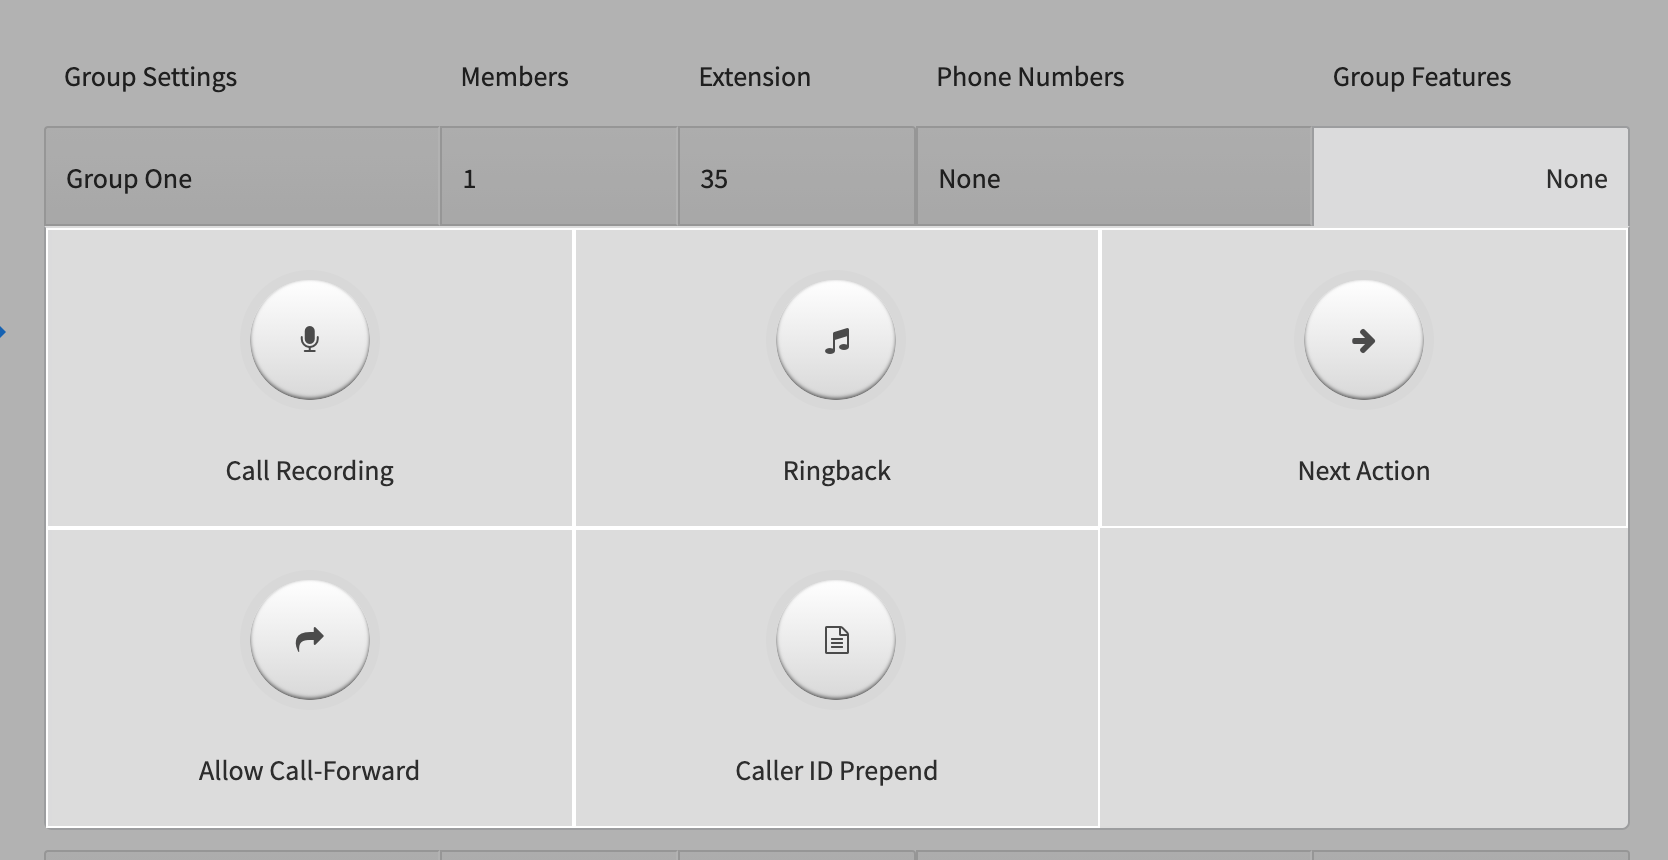
Group Features
This option provides several options for the ring group extension.
-
Call Recording
This will set a localized call recording feature to on. You will assign a path to save it and indicate its format and a time limit.
NOTES:-
Call recording is subject to privacy and HIPAA laws. Please make sure you understand these issues before you enable this. Refer to our guidelines on HIPAA compliance HERE.
-
The newer call recording application is a more robust solution for this, and sets up a 3rd party hosting process that is more secure. We recommend you manage all call recordings through this instead. The user guide for Call Recording is HERE.
-
-
Ringback Settings
Enabling this option allows you to upload a media file to play back to the caller in lieu of rings. Hold music is a common to use here. -
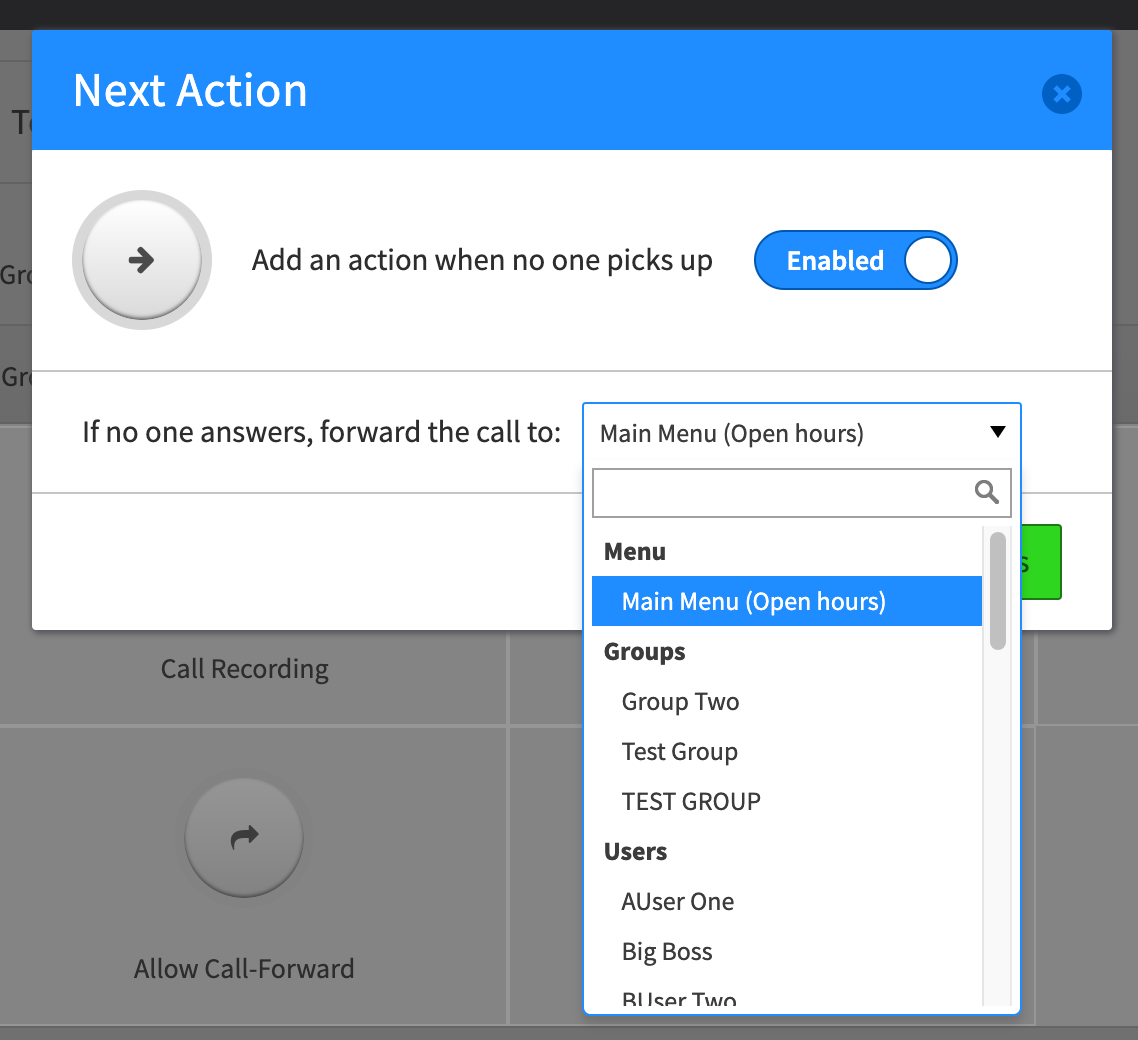
Next Action
This is an important feature that sets a follow-up action for the call if no-one in the ring group can answer it, including sending the call to a voice mailbox.
-
Allow Call-Forward
When enabled, this will allow the group’s users to press their device’s “Forward” settings to forward an incoming call to a different extension outside the ring group. If this is disabled, the ring group settings will be the expected behavior. -
Caller ID Prepend
This allows you to add a prefix to the Caller ID, either a number or a Name. An example might be "Sales - xxxx" or "Spanish - xxx"
-
 Managing a Ring Group in Callflows
We recommend you create your initial Ring Groups in SmartPBX as it has a newer user interface. Administrators with a programming background who use Callflows for advanced call routing can access the same settings within Callflows as shown below, and use the Ring Group as part of a more complex Callflow.
The screen below shows the same Ring Group that was created in SmartPBX.
You can add and delete users from this screen, however to define the Ring Strategy, Ringback, and number of times to ring members, you will need to add the Ring Group to a callflow and then edit it.
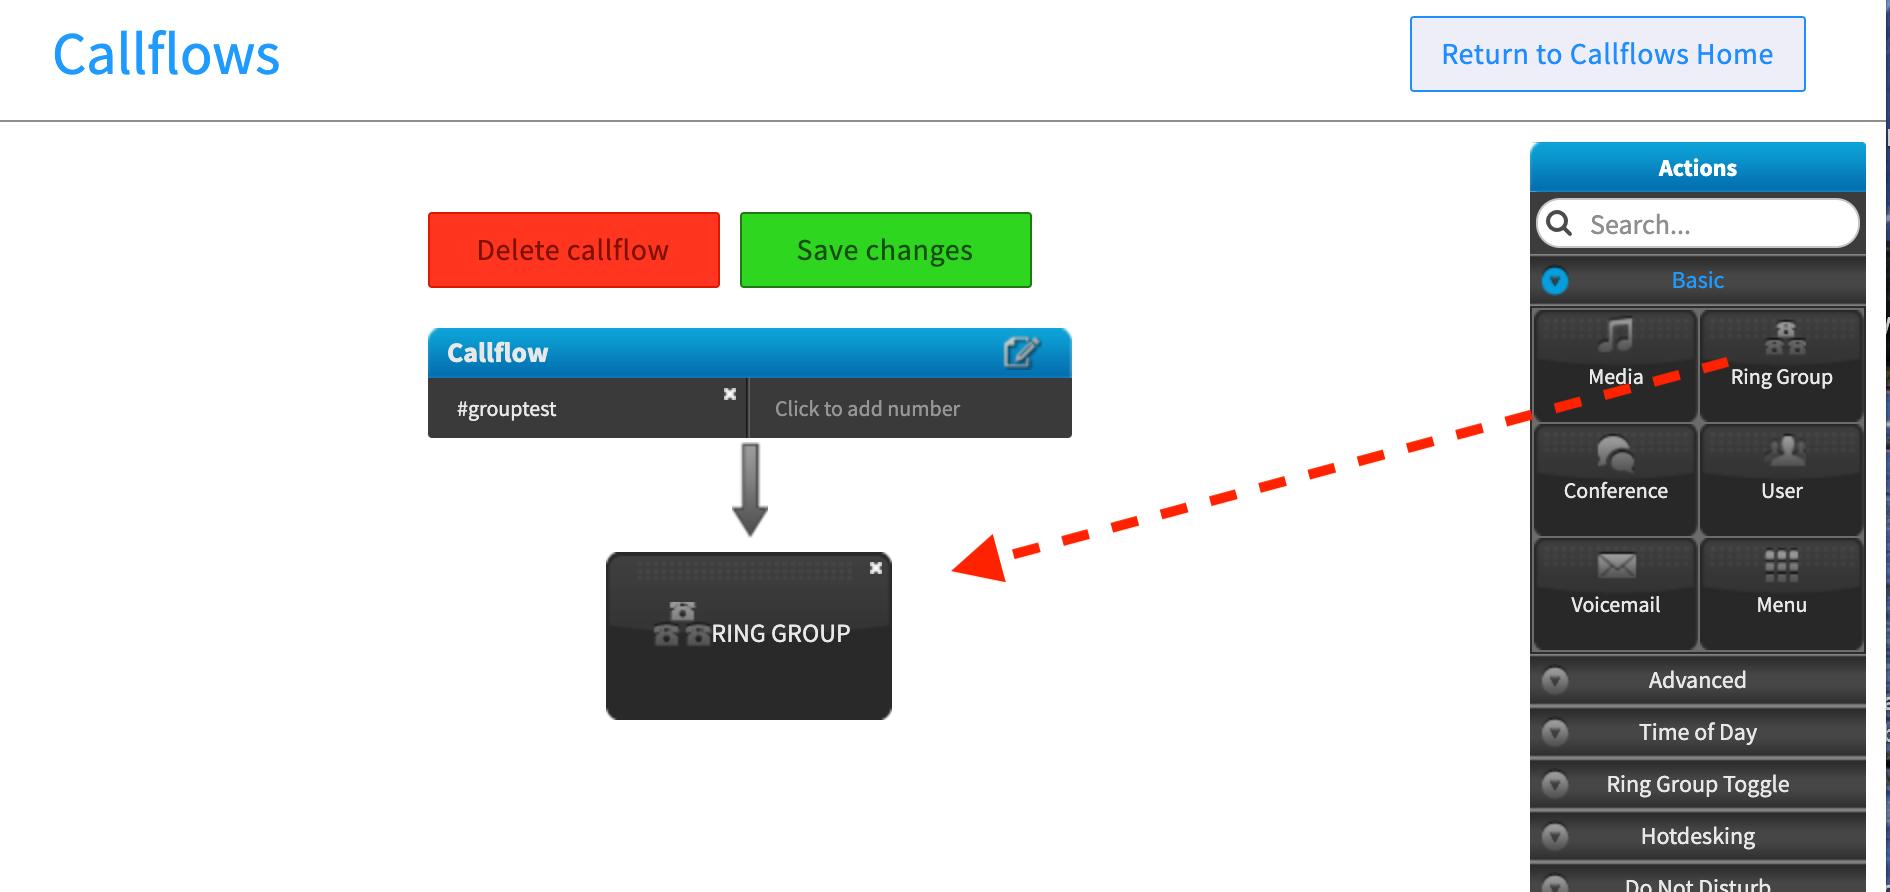
Drag the Ring Group Block to the flow area.
Additional Resources

|
SmartPBX Step Guide |
 |
|
 |
|
Call Recording User Guide |
API References
Edited by Emily R (show revisions)
Recommended Comments
There are no comments to display.