


User Story
- An account manager wants to add, update or delete a phone number related to an agent within an existing account.
- An account manager wants to move a phone number from one sub-account to another.
- An account manager wants to manage the e911 emergency call feature.
The Number Manager Application
The Number Manager App is an essential component of any VoIP service, unifying sourcing, activation and management of DID resources across multiple providers. Purchase and manage a base set of phone numbers in a master account. From there, numbers can be distributed to accounts. When the numbers are no longer needed, they can be reclaimed easily and re-assigned to accounts at any time.
Before you start
-
Know your source for acquiring numbers.
As an account manager you will have identified whether you are using the Hosted version of KAZOO and the 2600Hz supported carriers and phone numbers or you have chosen the BYOC (Bring Your Own Carrier) path.
Notes:- BYOC customers cannot use he Number Manger to buy new numbers. You will buy your numbers from your carrier portal, and then add the DID to KAZOO using the Number Manager app.
-
BYOC customers will see the "Add" option in addition to buy, port, and Sync. in some dialog boxes.
-
Complete the number porting process if you plan to use existing numbers from a different system.
If you are just setting up your office and plan to use existing phone numbers, use the Porting Manager application to move the bulk of your numbers to KAZOO. The application allows you to port numbers into the system. It pre-validates number portability and splits numbers into appropriate orders as needed. Support for managing CNAM Database Updates, Inbound Caller ID Name lookups and Emergency 911 services are also provided.
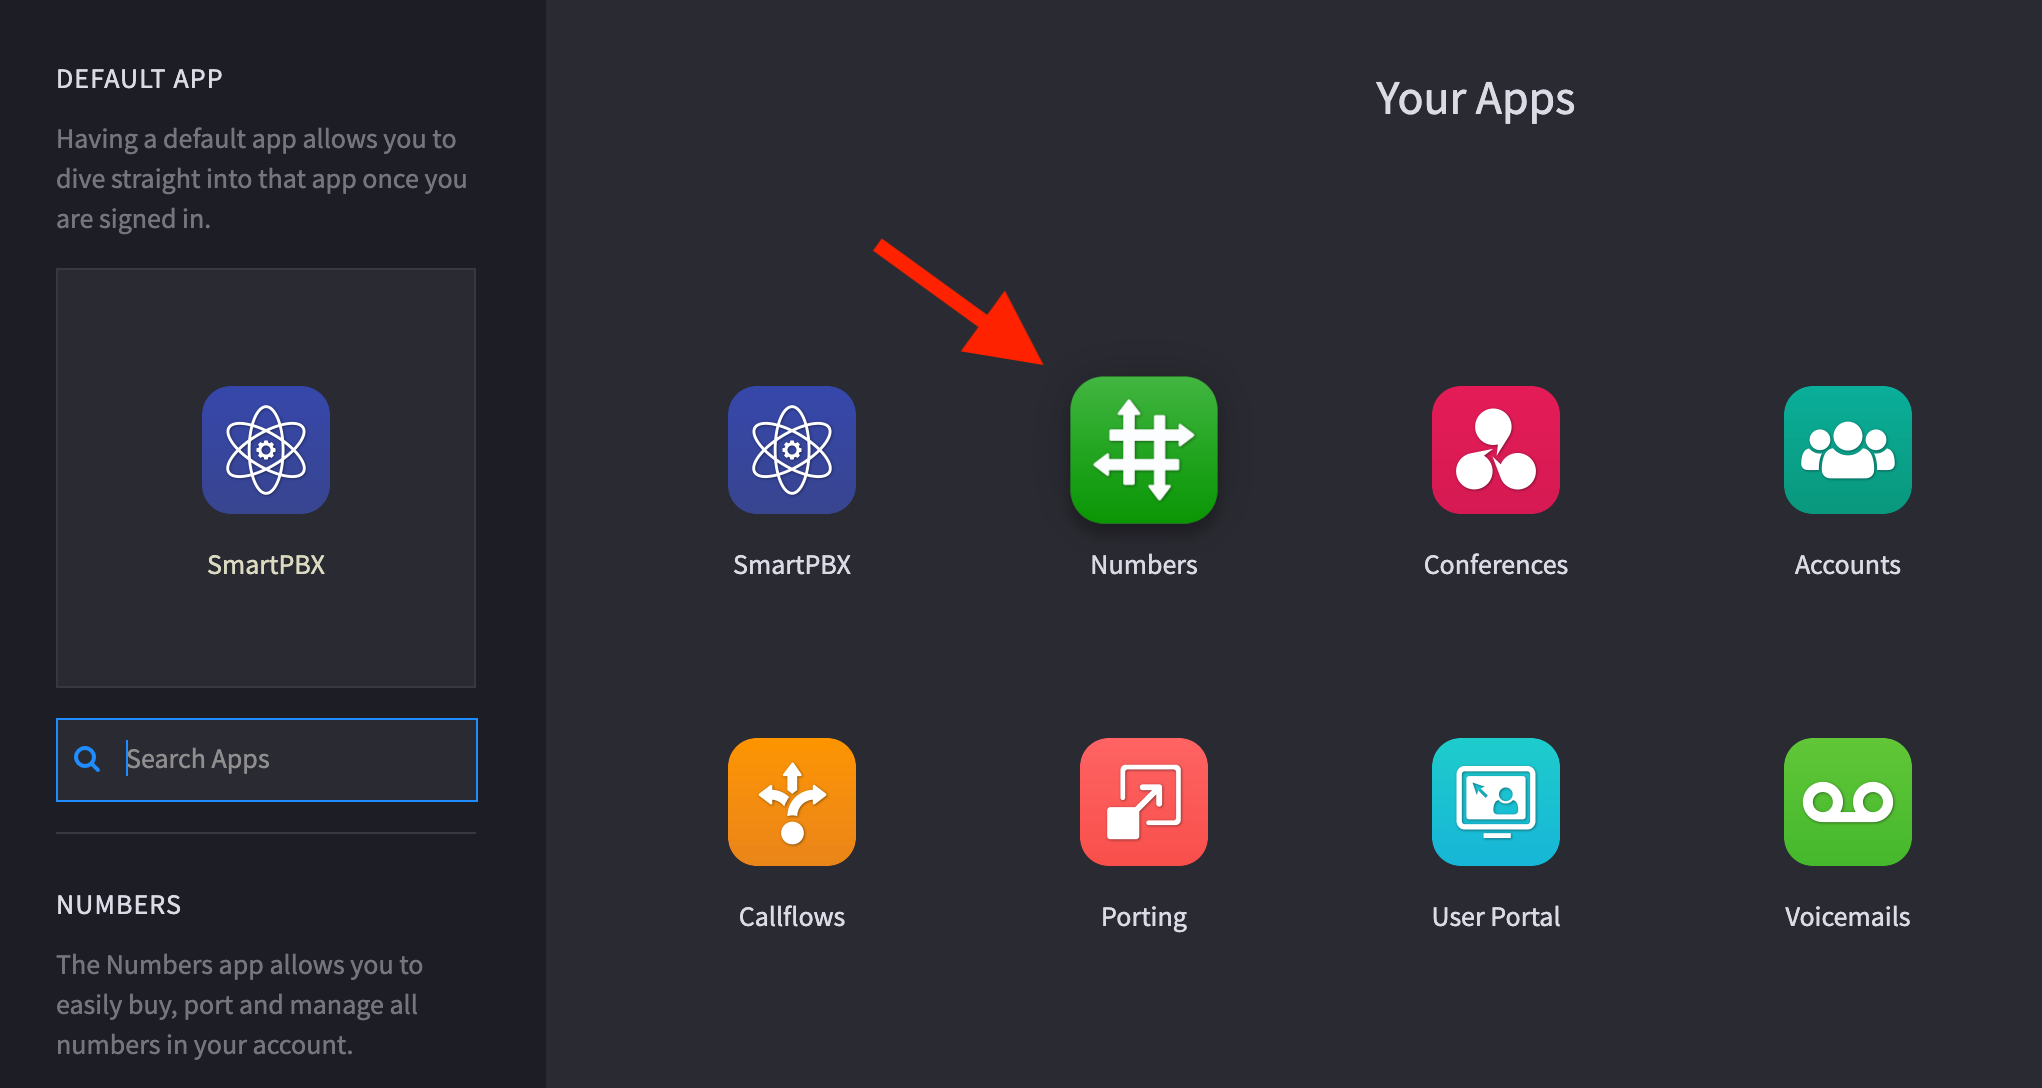
Getting Started
Access the Number Manager app from your application desktop. If you don't see it, ask your admin to enable it.
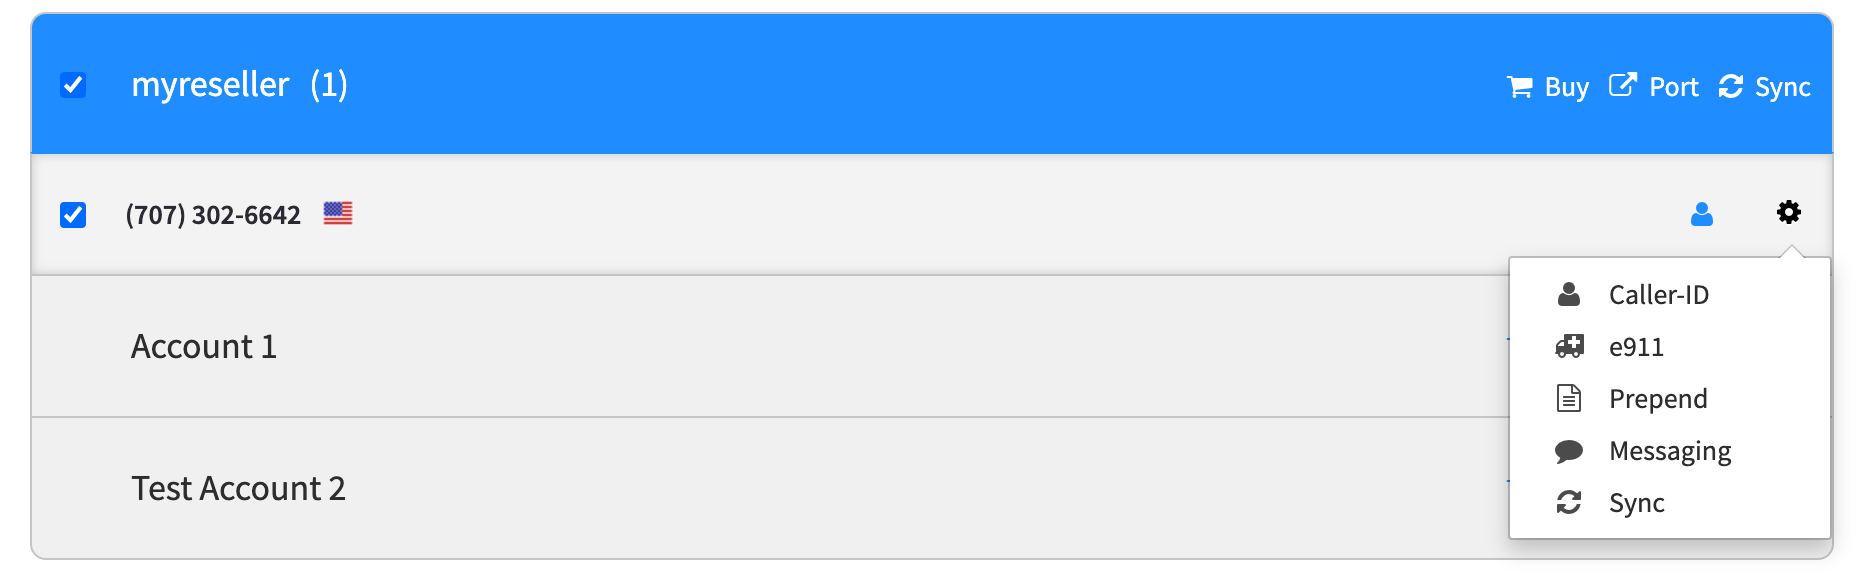
When you open the app, you will see the Numbers home screen as below.
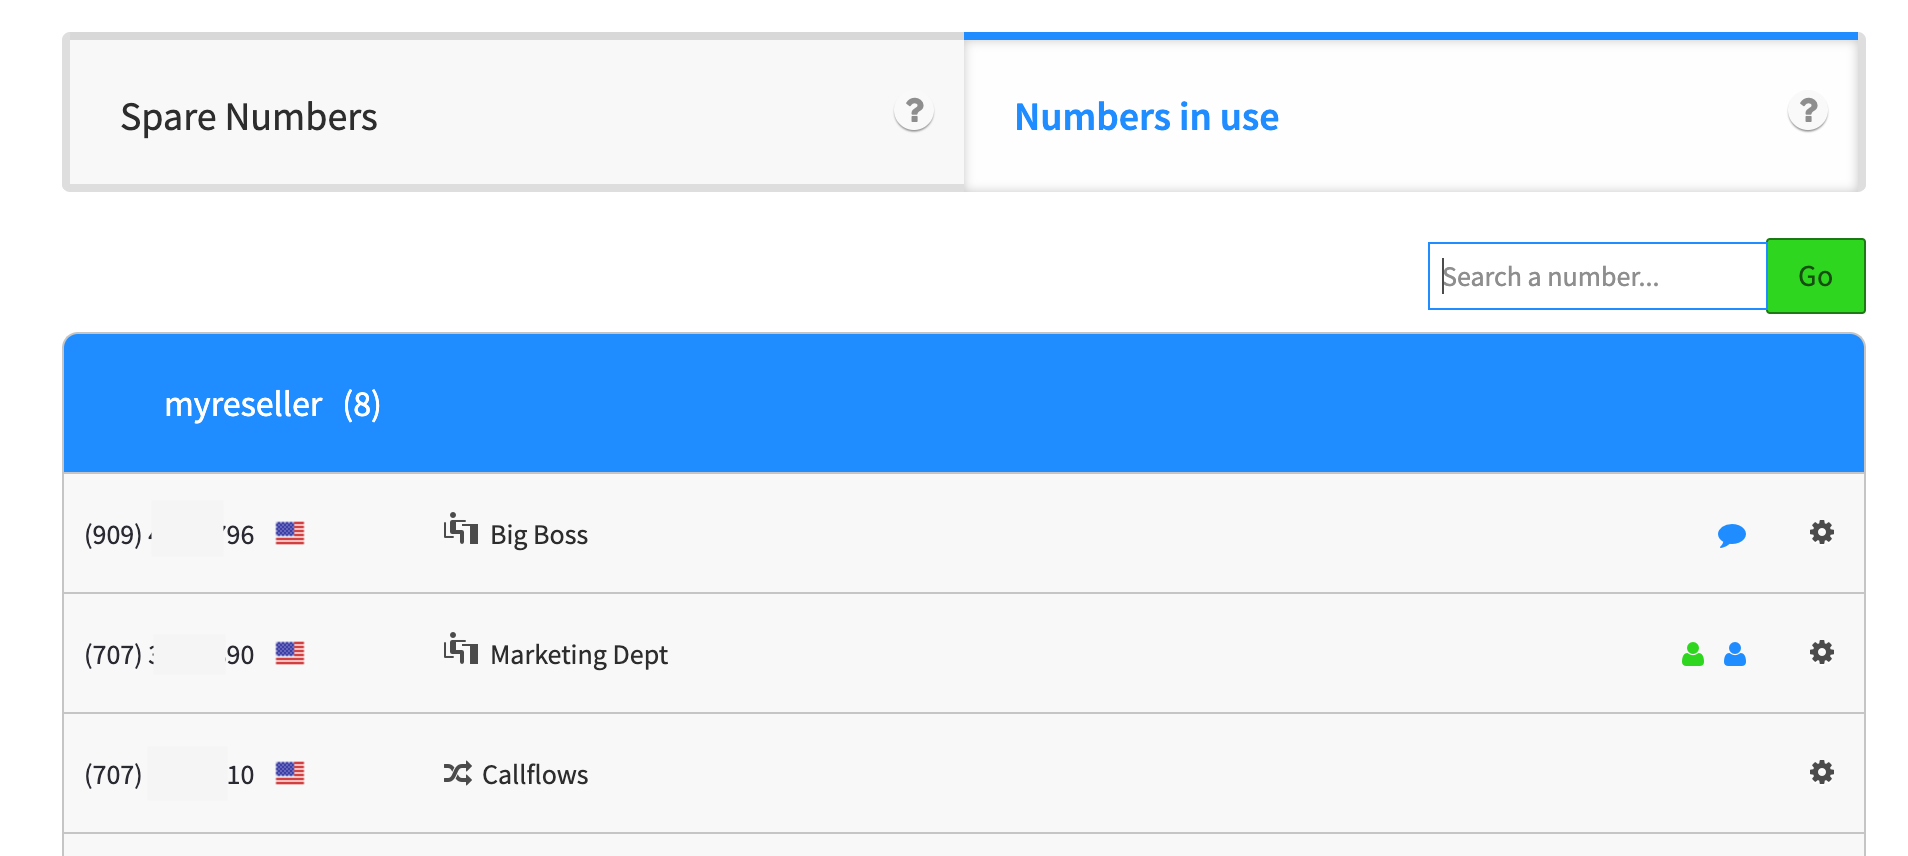
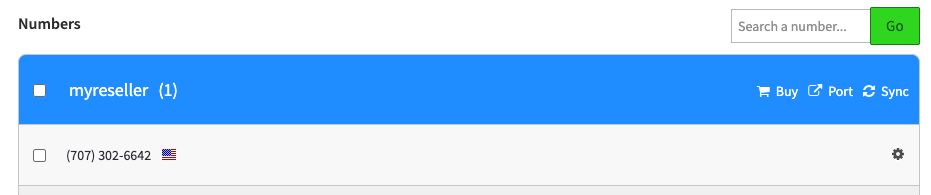
Numbers in Use
If you have already imported any numbers using the CSV uploader or through SmartPBX It will show a list of numbers in your main account and a list of sub accounts if you have any set up. If you have already added some settings to the number, you'll see an icon displayed for that setting. If not, select the gear icon and step through the settings you want to update.
NOTE:
 For details on how to set these variables, refer to our SmartPBX user guide.
Assign Spare Numbers
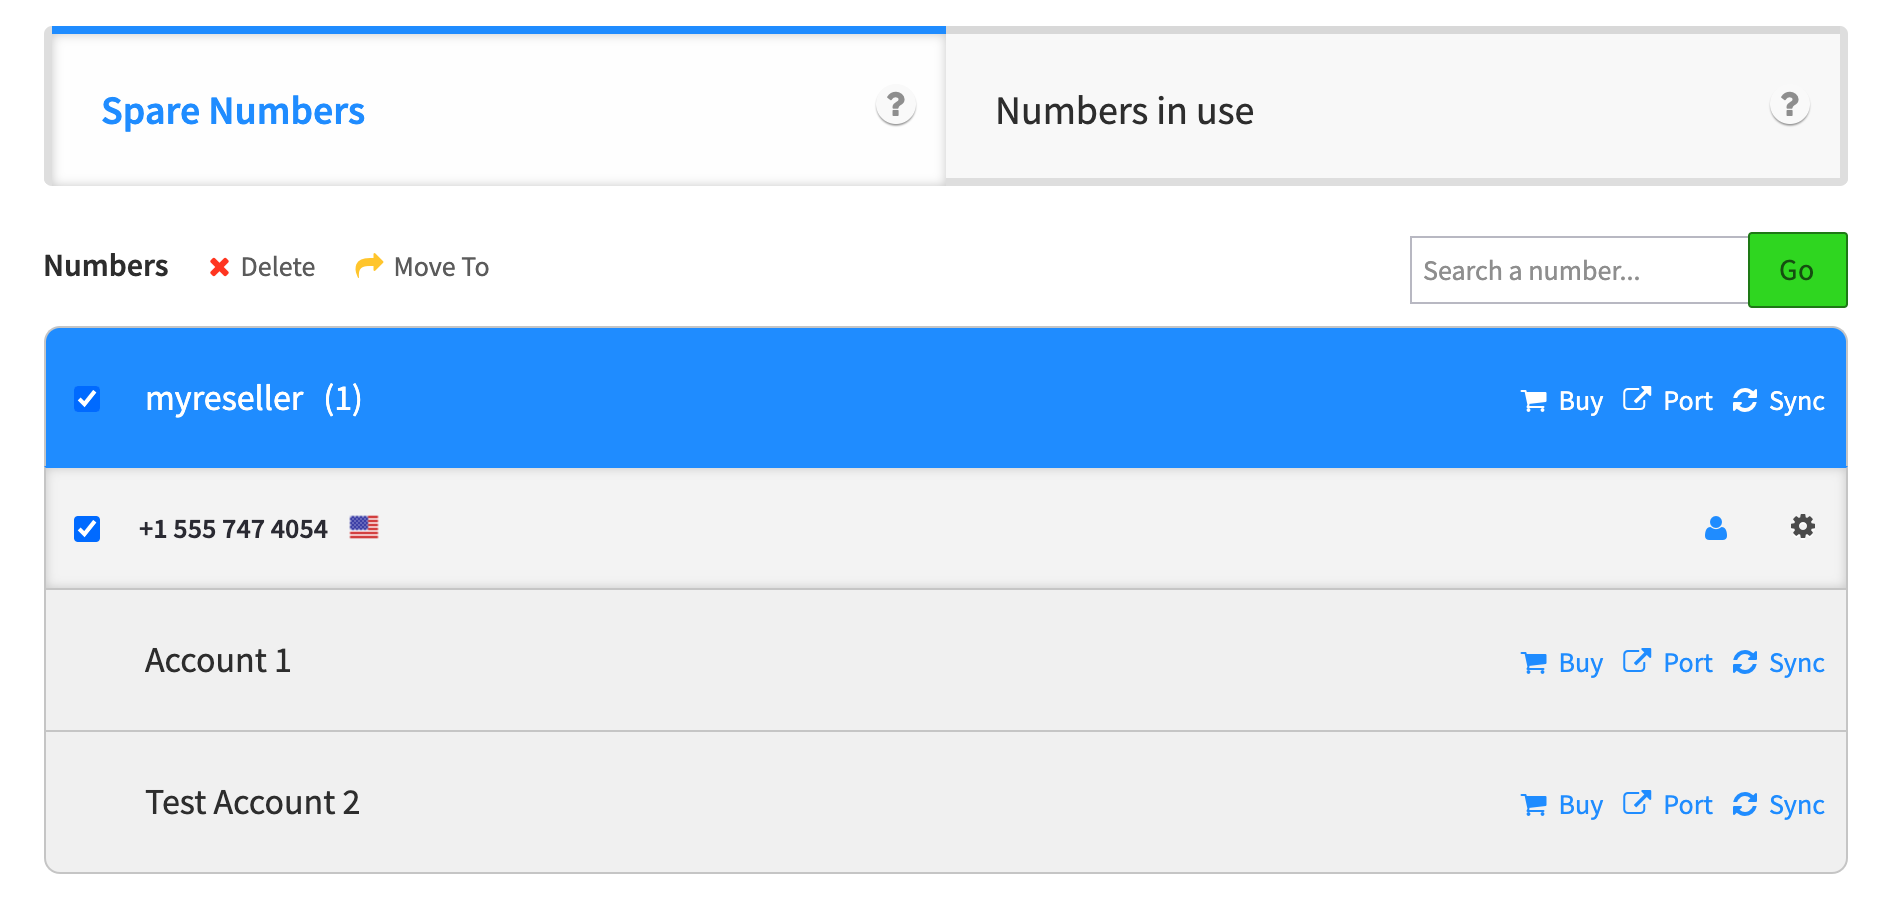
The Spare Numbers tab will show any numbers you have already purchased and are available to assign to a account and agent.
- To move use the selection box to identify the number(s) and then select the Move To icon at the top of the list. Once it is moved to the correct account, you can view it in the account list and assign a user to it.
- To delete use the selection box to identify the number(s) and then select the Move To icon at the top of the list.
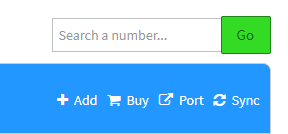
To Purchase a Phone Number
Hosted Customers
If you are a hosted customer and need to buy a new number or series of numbers, you can select the Buy icon to the right of your account name, and select Local or Toll Free.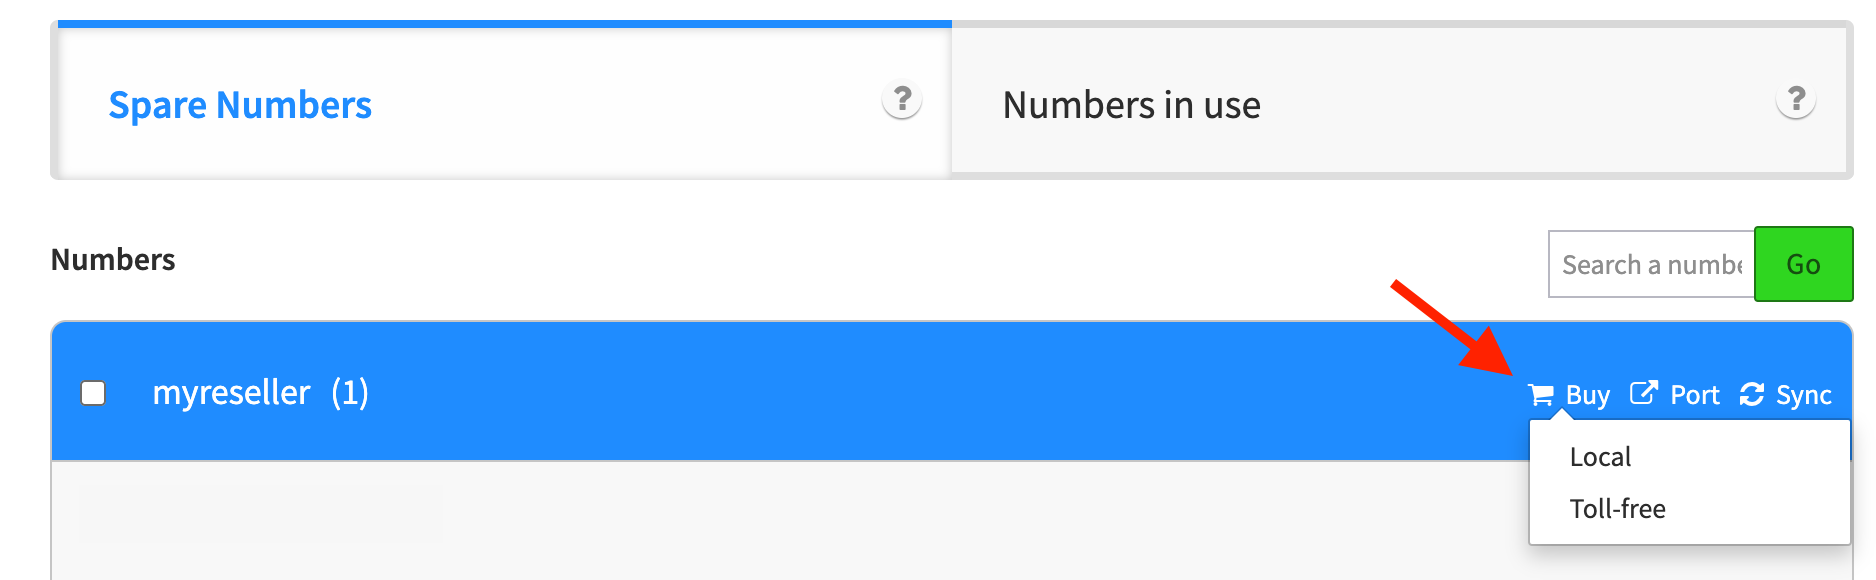
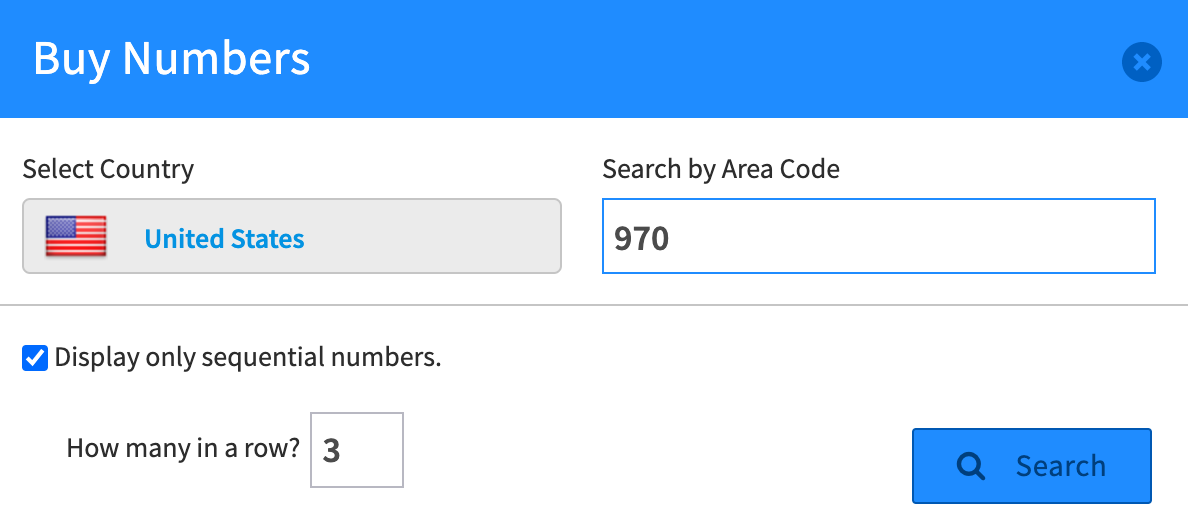
Then select:
- Your country
- An area code you wish the number to use
- If you are looking for sequential numbers, and how many
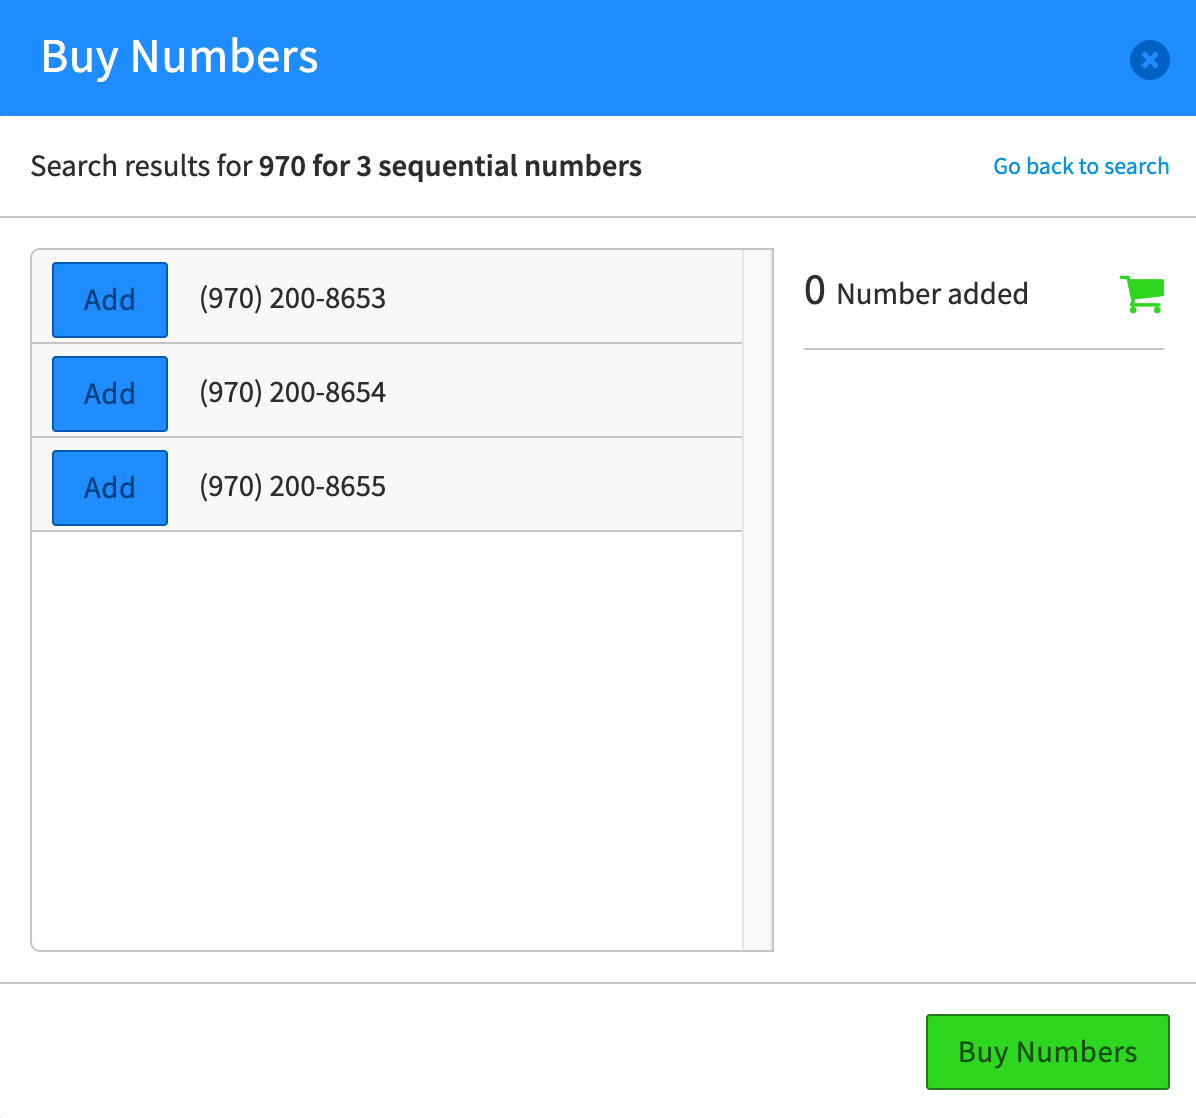
The app will search for appropriate numbers that our platform can provide. You can select them and add them, or return to the search and modify your request.
NOTE: In popular area code regions it is almost impossible to find a sequential phone numbers. There are services you can use to search outside of the KAZOO platform on a daily basis and see if new options become available. If you do this, then you will need to purchase the number from that service and then go through the porting process using Porting Manager.
Your screen should now display the numbers you have selected.
NOTE to BYOC Customers
BYOC customers cannot use he Number Manger to buy numbers. You will buy your numbers from your carrier portal, and then add the DID to KAZOO using the Number Manger app. BYOC customers will see the "Add" option in addition to buy, port, and Sync. in some dialog boxes as shown below.
You will then see a dialog box where you can enter the phone numbers to be imported from your BYOC inventory.

Caller ID Name Selection CNAM Line Information Database (LIDB) Update Tool
Allow users to update the United States LIDB using an intuitive, graphical interface. This sets the Caller ID Name for landline services.
To port an existing number to your new account
The port icon provided in the Numbers application is a link to the Porting Manager application.
 For details on how to submit a port request, refer to our Port Manager User Guide.
Assign Spare Numbers and Numbers in Use
Provide each user with their unique direct-dial phone and extension numbers. You can find unassigned numbers within the Interface, or buy or port numbers in. Assign to any user purchased and unused numbers within the Spare Numbers tab.
Assign Numbers to a User:
- Click on the "Spare Numbers Tab" tab of Number Manager, just above the dashboard.
- Within the "Spare Numbers Tab" tab, click on the Numbers checkbox within for the specific user. Select "Move To."
- A drop down will appear with a search bar at the top. Select the account you’d like to move the number to.
- Go to the account, and assign the settings to your number, including the Caller-ID name
- Confirm "Move Number" and you are all set.
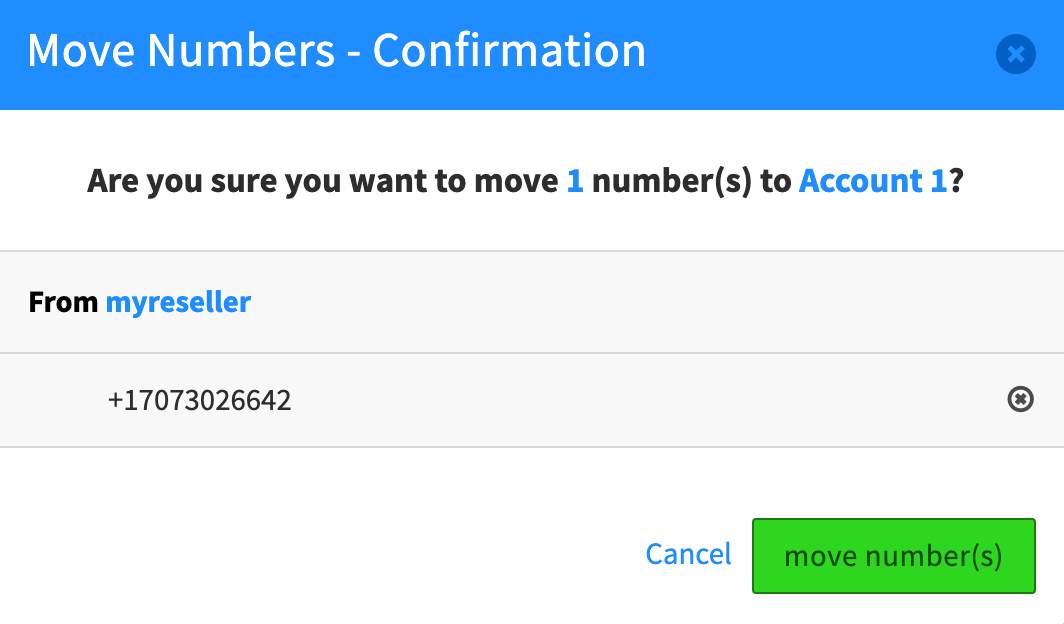
To Move Numbers Across Accounts:
- From the Number Manager homepage, click on a number in your current account that you would like to move.
- Click on the Move To link
- A Search Bar should appear with a drop down. Click on the Account in the dropdown or enter the Account name.
- Click on the "Move Number(s)" button
- In the Number Manager homepage, look for the number you just moved under the account you previously selected.
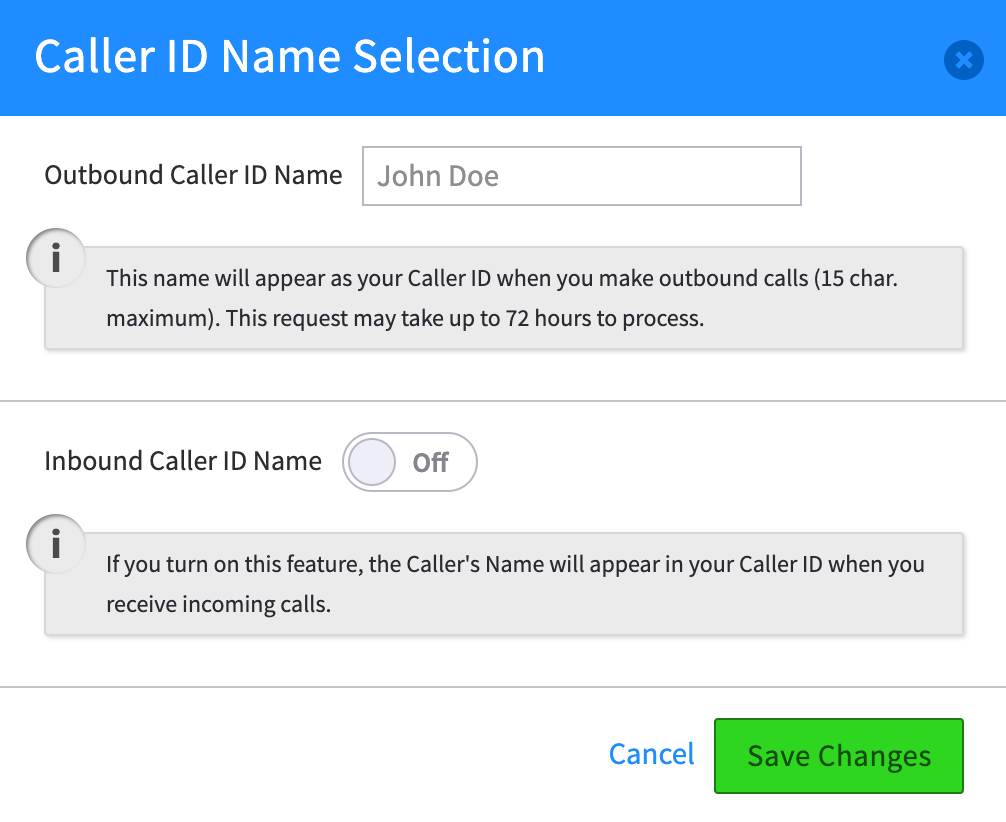
To Manage Inbound & Outbound Caller ID:
- Click on the "Numbers in use" tab in Number Manager, then click on the cog icon and the Caller-ID option will drop down.
- Click on the Caller-ID option.
- Type in a name for the Outbound Caller ID and toggle on the Inbound caller ID, then click on "Save Changes".
- Click "OK" on the confirmation popup.
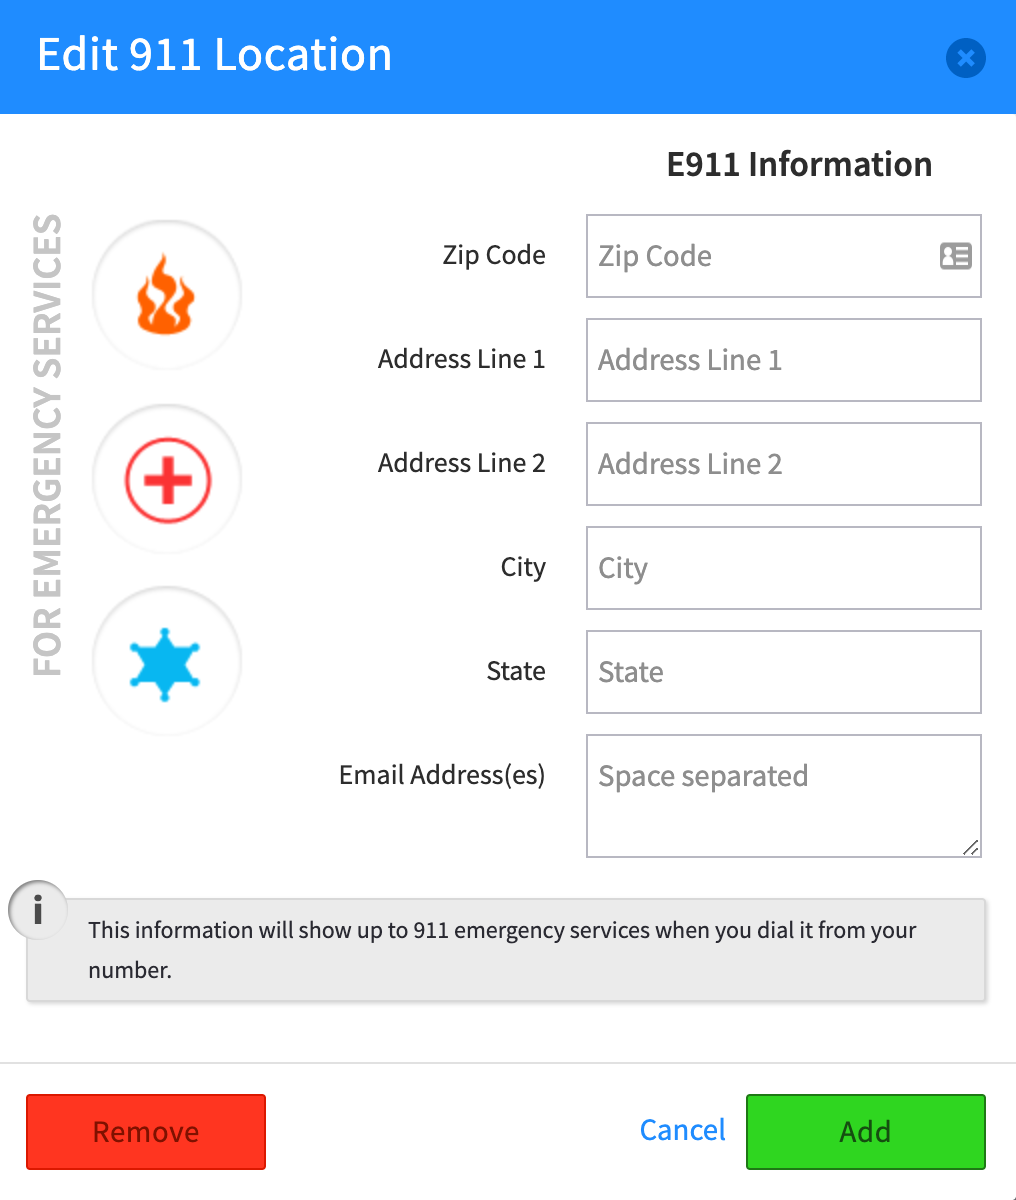
To Manage E911:
NOTE: Please review our document describing the new Kari's Law and its 911 compliance requirements HERE.
- Click on the "Numbers in use" tab in Number Manager, and then click on the cog icon and the E911 option will drop down.
- Click on the "E911" option.
- Fill in the Zip Code and the Street address (line 2 is optional), then click on "ADD".
- Click "OK" on the confirmation popup.
Related Articles
 |
|
|
|
Porting Manager User Guide |
|
|

API Reference Docs
####


Edited by Emily R (show revisions)
Recommended Comments
There are no comments to display.