Search the Community
Showing results for tags 'softphone'.
-
comm.land 2.1 User Guide (5.0 only) NOTE: To install your comm.land application, please review the separate comm.land guide called Installation & Setup, HERE. Once you launch your application, you will see an opening dashboard similar to the screen shot below: Home Pages Without a webphone enabled (side menu minimized) With a webphone enabled (side menu expanded) NOTES: If you are using CallThru.us, this should be very similar to your phone screen. The Top row will display a summary of your missed calls, voicemails and faxes. When you have a webphone enabled, you will see a phone icon to the top right, as shown in the second screen shot. The next quadrants will show as follows: Today's Calls List of both incoming and outgoing calls for the day, including the Caller ID, phone #, time and length of call Numbers The Numbers quadrant breaks down your calls based on the phone numbers assigned to you for sending / receiving calls. Devices This quadrant displays the device types that are associated with your login name and credentials. If there are more devices registered than fit in the window, look for the > arrow to scroll or use the scroll bar. In the upper right corner of each box you will see an icon indicating the answer setting that has been assigned by you in your PBX. An unregistered device will display as a red icon. If your device is displaying as unregistered, talk with your administrator. The comm.land features will still work if your device is unregistered. Today's Faxes The faxes quadrant shows a list of faxes received and sent for the day. NOTE: If you are not seeing today's faxes listed, check with your date range settings under the Faxes tab. This at times does not update to the current date, it is on our list to resolve. Webphone access If your administrator has enabled webphone access for you, you will see the phone icon to the top right of your screen, and it will also show as a device in the devices area (see image above). For a detailed overview of how to use the webphone we have created a separate support document HERE. Additionally you can access it from the tray icon at the top right of your browser window header, here: If you do not see either of these access points, it's most likely because you are not logged in and if you are logged in and still don't see these access points, please contact your administrator. Voicemails The voicemail page previews your voicemails, shows who called, to what number (if you have more than one number registered) the date and time, and the length of the message. You can filter the list, listen to the voicemails, and/or download its media file to your computer. Top Summary, Total Voicemails Is a quick reference to total voicemails still saved in your list. Voicemail Status The voicemail status column shows if the call is New or Listened. Once you delete a voice mail, you cannot undelete it from within comm.land. You can move a deleted voicemail back to Listened or New status from within Monster UI Voicemails App or by contacting your admin. Filter drop downs You can use the filter dropdown under the New Voicemail block to bulk-manage files. For example, you can ask it to select "All New", then click on "Mark as Listened" . Play Voicemail To play your voicemail, select the voicemail you want to hear, then from the drop down, select the Play button to the far right. Once a voicemail is played, the status button will change from New to Listened. Using the icons below the play option, you can: Ring your device Download that specific voice mail Delete the voicemail NOTE: By choosing "Delete" you are actually marking the VM to be deleted. It can be recovered by your admin if requested. Call History This page displays a chronological list of calls sent and received, the associated phone number, the time, date and duration of the call. Filter these calls by entering a date range and the top and selecting the Filter button. Search for specific calls using the search field. You can also select the row in call history, it will ring your devices and call the received caller back. Devices and Numbers This page displays the devices assigned to your account. NOTES: If the phone icon is red, this indicates that phone is currently set as "unregistered." This is currently expected for Call-Thru devices, and will not affect its behavior. To re-register a different kind of device, contact your administrator. Faxes The fax page provides information on fax activity associated with your account. The following options are available from this page: Send a fax Click on the blue Send Fax button at the top right of the screen to send a fax. A dialog box like the one below will display. NOTES: You MUST include the country code in ALL outbound faxes. Select the "Choose File" button to upload files from your computer. Currently faxes support .pdf and .tiff file formats as attachments. There is a maximum file size limit of 15mb per fax. The fax "Send From" field is automatically populated based on settings defined by your administrator. Download the fax To download a fax, select the download icon to the right of the fax you want to review. Filter your list of faxes You can filter your listing of faxes using the Filter option to the left of the Search window. It will show a dialog box like the one below: Bulk Delete your faxes If you want to delete list of faxes such as "Delete all Failed Faxes" you can use the filter button above the status column. Click on the arrow, and you will see the options below. Once they are selected, pick the Trash button. Video Conferencing Video conferences are implemented for use only among members in your account. Quick steps for using this feature are below; a more detailed user guide is available HERE. Before You Start Check to make sure a conference call ID has been created by your administrator in the Conferences app. If you have already used the conferencing app in Monster UI, these conferences will display. If not, a quick reference to how to set this up is available at the end of the video conferencing user guide. Quick Overview / Steps Confirm there is a conference ID available in the Conferences tab in comm.land Join your conference! You should see a screen something like this: Adjust settings as needed. Details are provided HERE. Settings Page To access the settings page, click on your user name at the bottom left corner of the left menu, OR from the tray icon listing. Call Handling Enable Call Forwarding This allows you to forward your calls to another phone number, and to retain the Caller ID. Voice Mails This will send a message to the email you define that you have received a voice mail Do Not Disturb Use this toggle to turn OFF your ringer if you do not wish to receive calls to these devices. This is often where users manage when they do not want to be reached for office related calls. Software Access + Info Here you can choose whether or not to automatically launch comm.land when you start your computer. Version # This will indicate the version number of comm.land you are using. This can be helpful if you need to troubleshoot an issue. comm.land Application Updates Once you have downloaded comm.land to your desktop, you will receive automatic application updates. When this happens you will see a notification asking if you want to restart comm.land and launch the update immediately or later. ######
-
- setup guide
- desktop app
-
(and 5 more)
Tagged with:
-
To download a .pdf, click on the link below: 2600Hz-Doc_Comm.land One Pager_Apr 2022.pdf
-
- desktop app
- users
-
(and 5 more)
Tagged with:
-
To download a .pdf, click on the link below: 2600Hz-Doc_Comm.land One Pager_Apr 2022.pdf View full File
-
- desktop app
- users
-
(and 5 more)
Tagged with:
-
To download a .pdf, click on the link below: 2600Hz-Commio-Overview_24April20.pdf View full File
-
- desktop app
- comm.io
-
(and 4 more)
Tagged with:
-
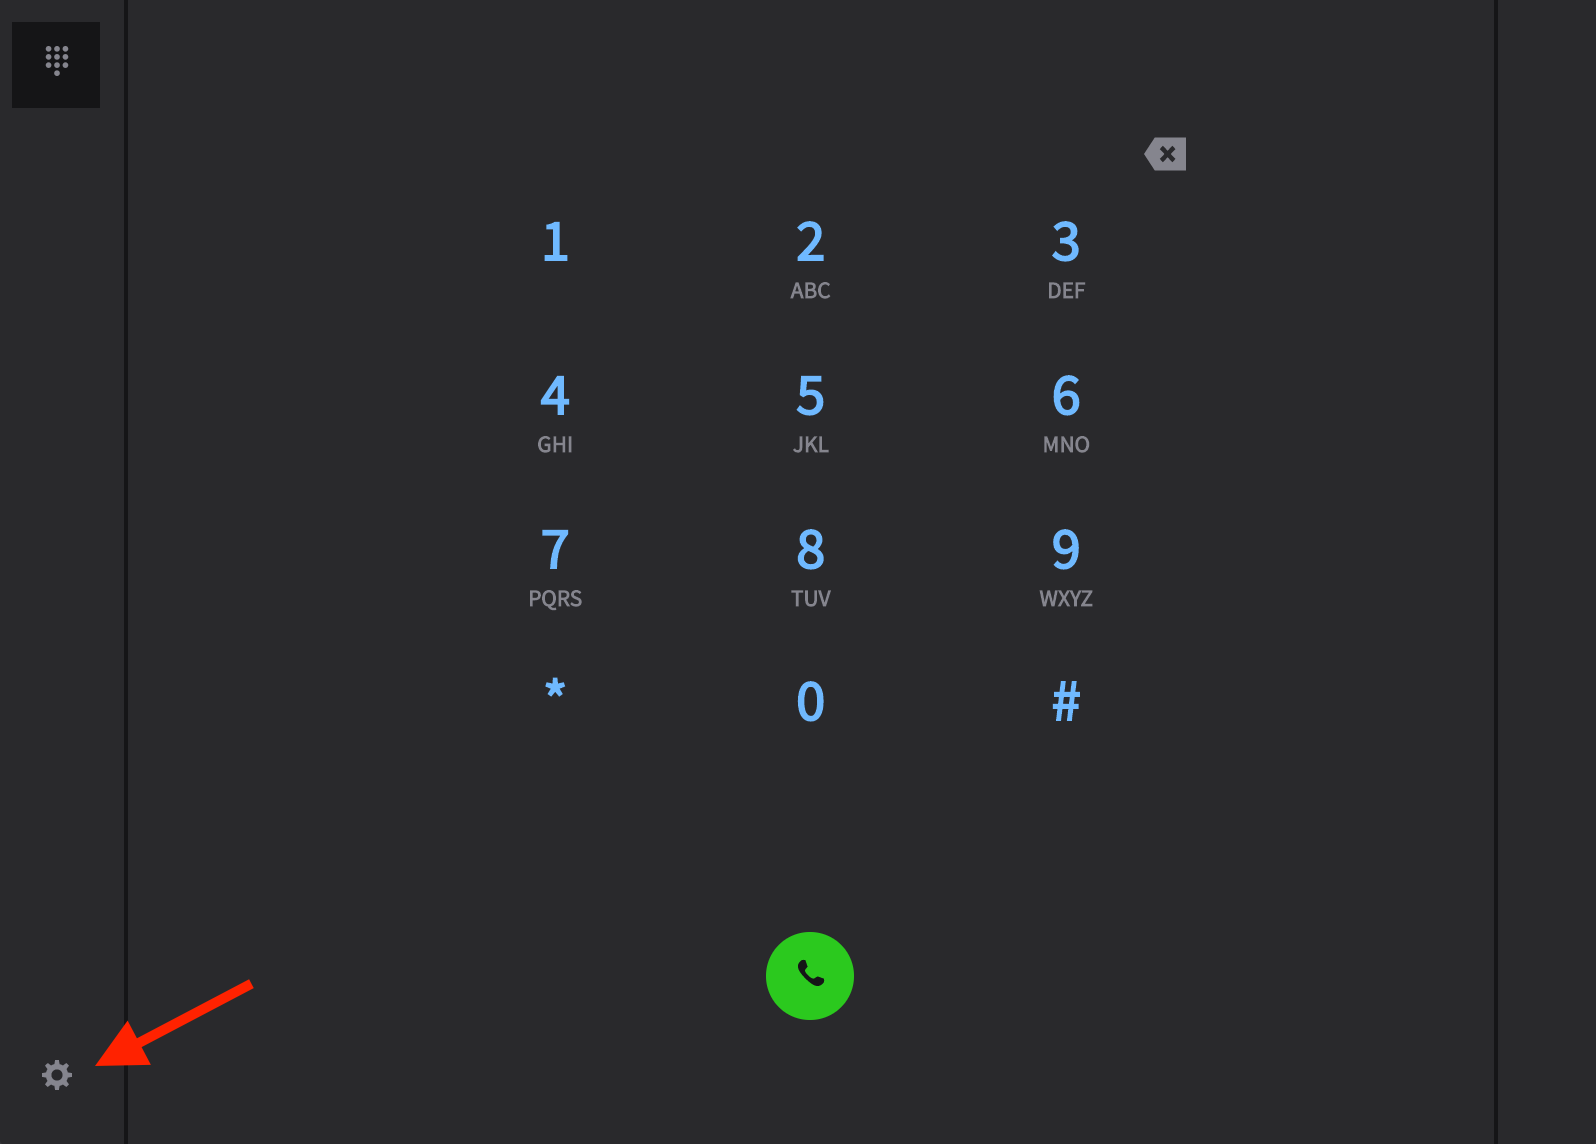
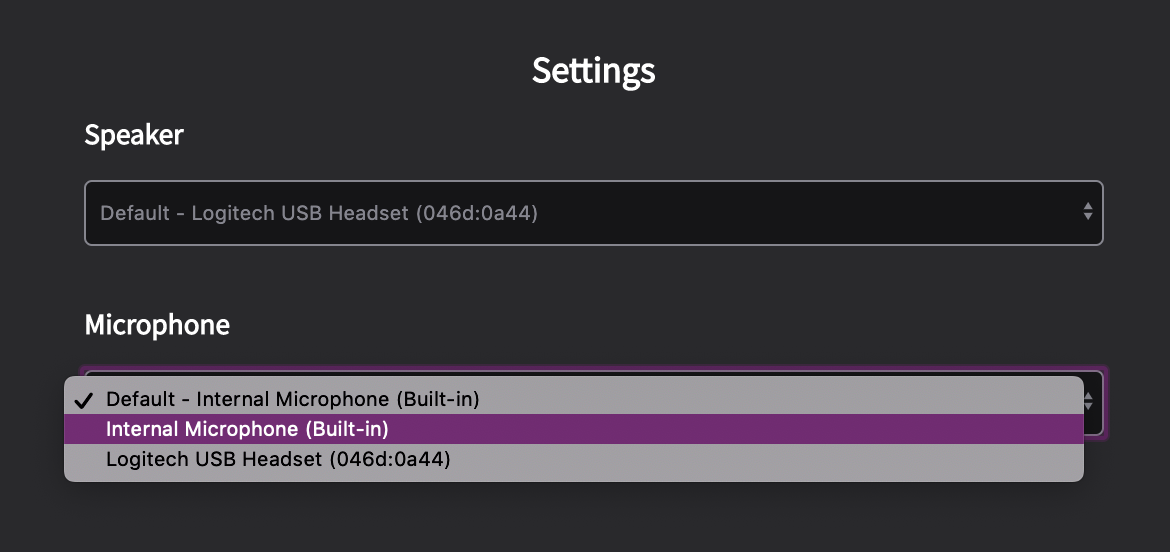
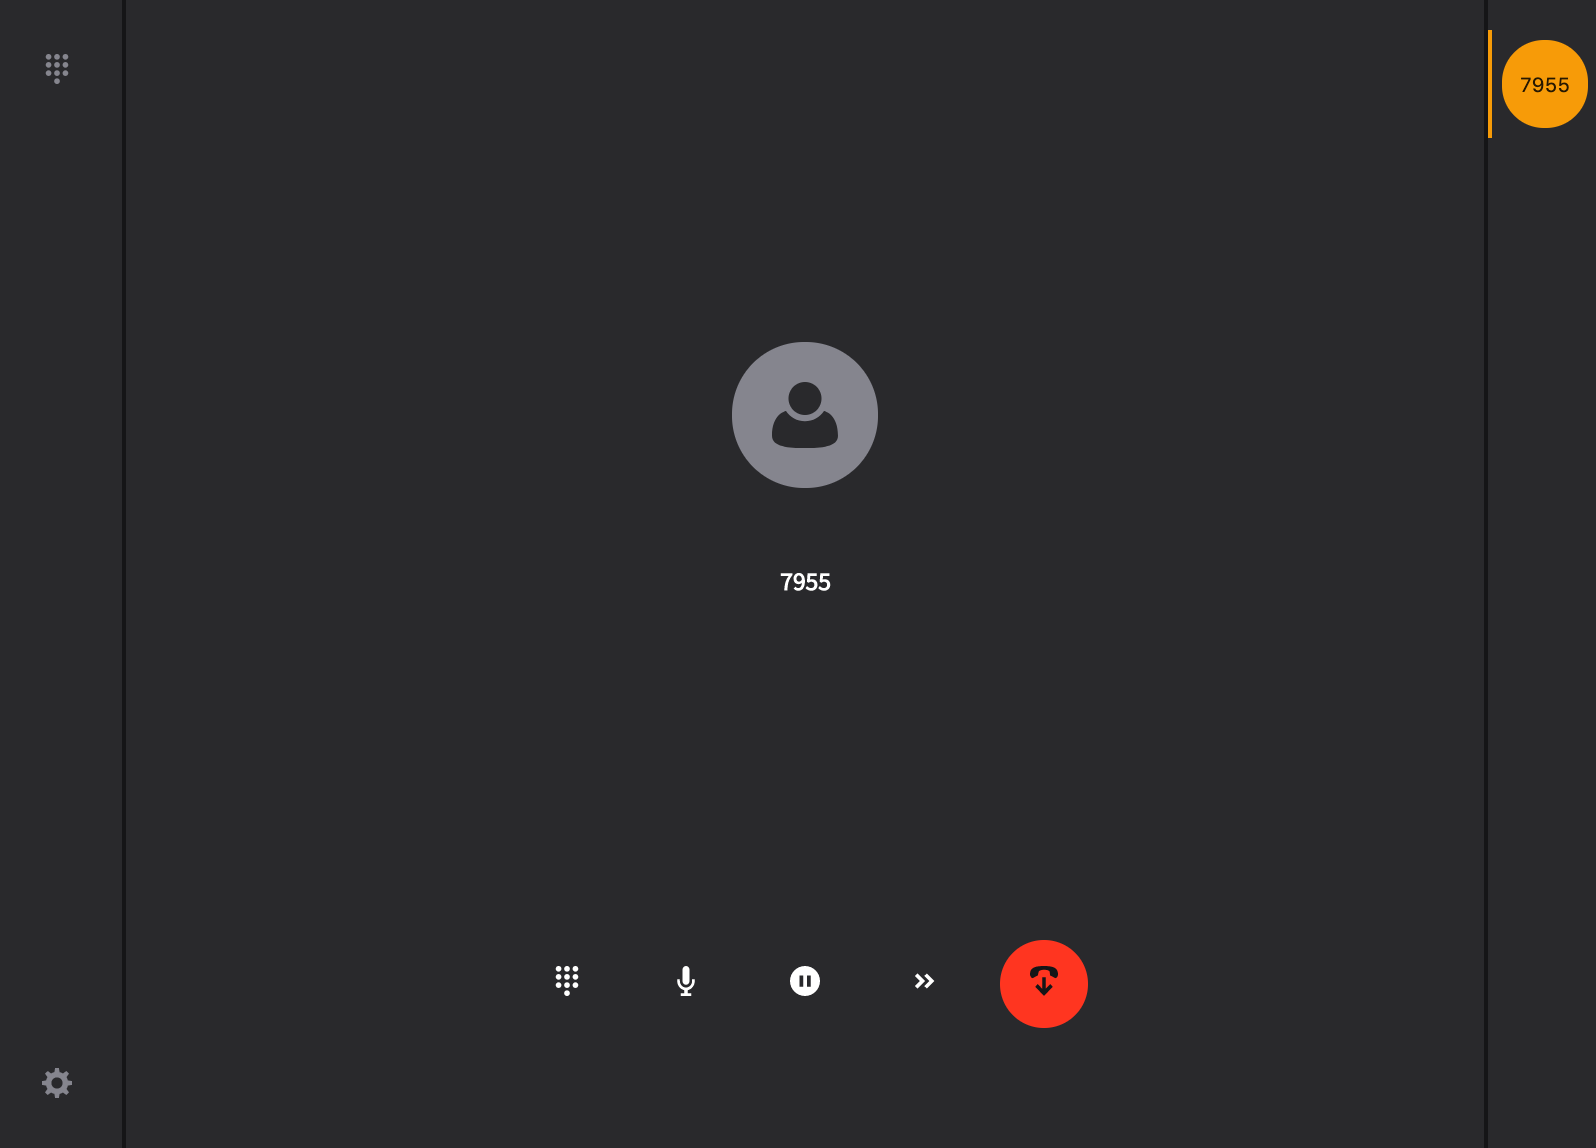
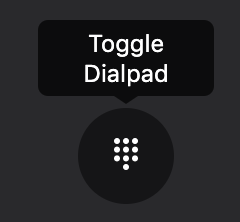
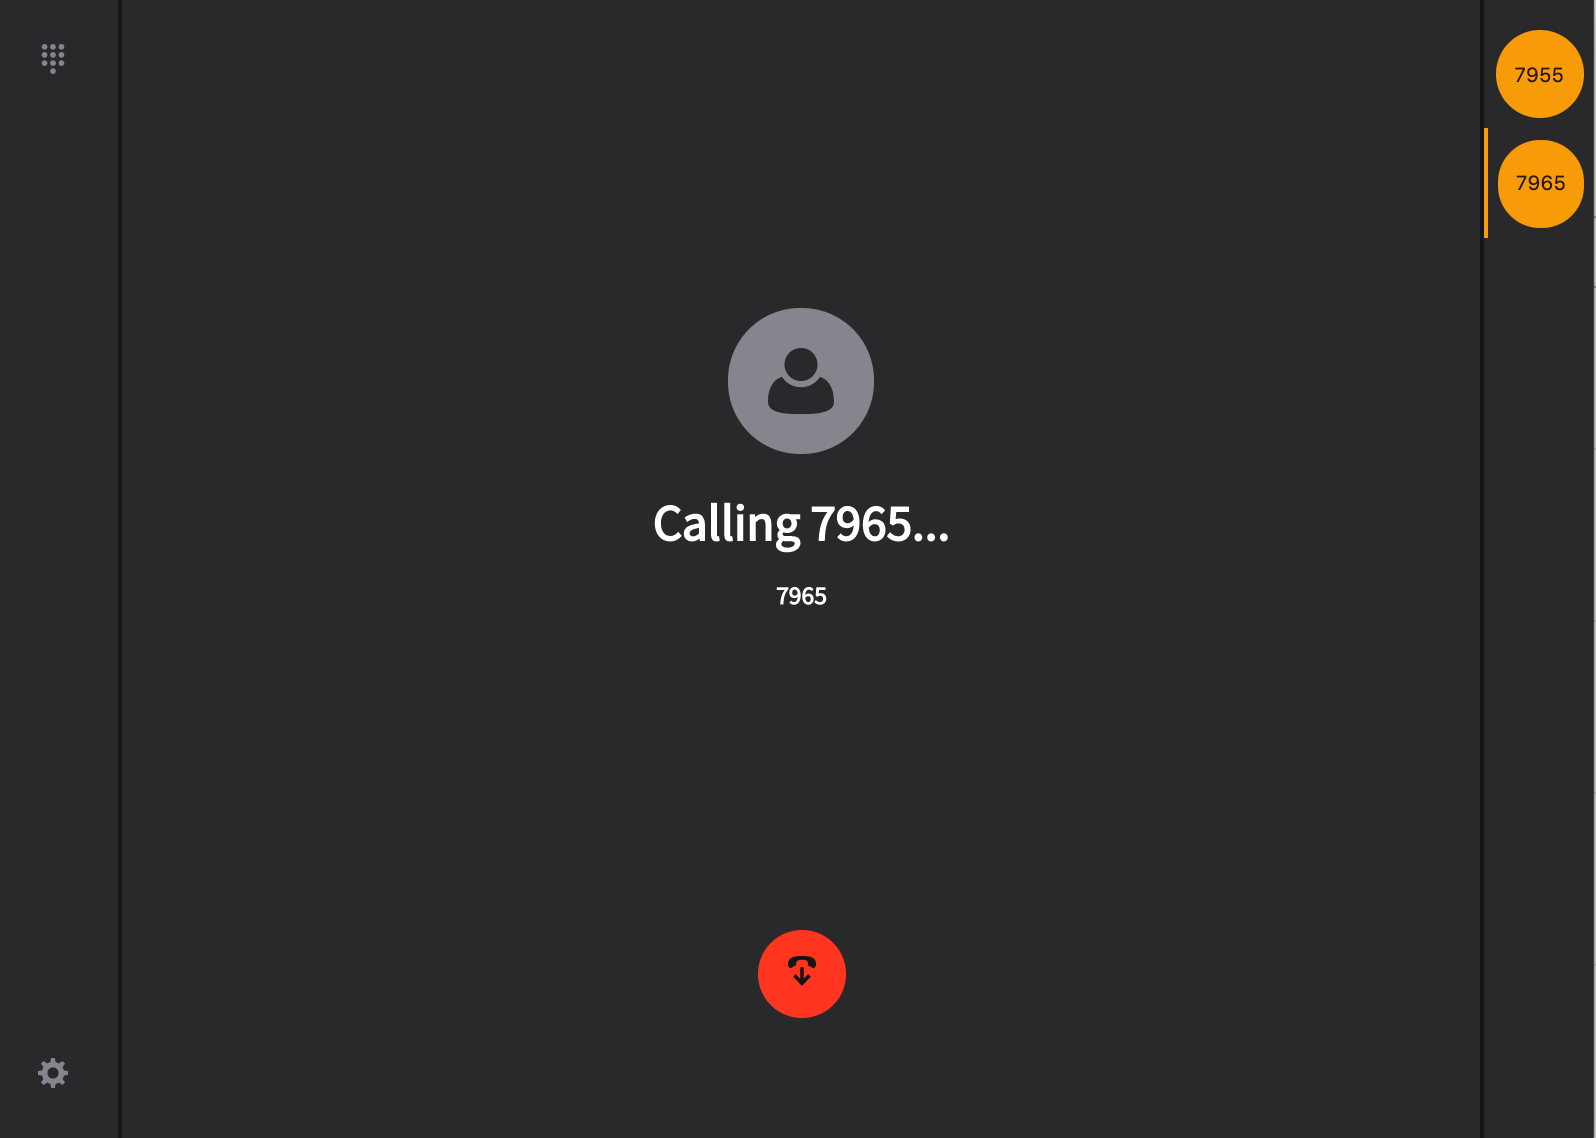
USER GUIDE – comm.land Webphone setup and user notes User Story This guide is for understanding the setup and use of the webphone available in the comm.land Integration Monster application. A business user has installed comm.land on his or her desktop and wants to Make business calls using VOIP services available through comm.land. Ensure these calls are tracked via the comm.land application as part of their business phone system. Before You Start This guide assumes the following basic setup has already been established comm.land has been downloaded to a local computer and is associated with a business account. If you are not sure, contact your administrator. You should see this comm.land icon in your applications folder and be able to launch it. Your account administrator should also have enabled a webphone to your user name in the User Portal account. If so, when you launch comm.land your header should display the phone icon, as below: Enabling the webphone If your webphone is not yet enabled, follow these steps: Go to the comm.land Integration app in Monster UI. If the icon is not showing, click on the App Exchange and turn it on. Select the User Access tab Turn on the Webphone toggle next to your user name. NOTE: The "Enable" toggle enables the general comm.land app, the "Webphone" toggle enables the webphone in addition to the app. This must be turned on for the webphone to work correctly. Once this is updated, you should automatically see the phone icon at the top right of your home screen in comm.land You should also see a “webphone” display under your devices & numbers tab. Using the webphone 1. Access the webphone dialer Once the webphone is visible and active. you can access it several ways: You can select the phone icon from any comm.land page OR If you do not have comm.land open, you can access it from the drop down tray icon at the top right of your browser (Mac Users), or the bottom right icon list (PC Users). 2. Open the webphone dialer 3. Review and Select your speaker and microphone settings Click on the settings gear at the bottom left of the screen. You will be able to select any options that are enabled by your browser. 4. Dial a number and press the green Call Button. NOTES: If you do not see a green call button, it is likely the webphone toggle was not assigned to your user name in the comm.land application. Please. check with your account manager to get this enabled (see steps above). If you have internal business extensions you can dial just the extension If you have another softphone installed on your desktop, it may conflict with the outgoing calls, and calls will not connect. Please disable your other phone from your user and then “disable” it in the device section. That should make the webphone work properly. We are working on how to let them co-exist. As the number dials and connects, you will see the screen below. The orange button at the top right is your "extension button". If you were to put this call on hold and call another extension, you can return to the original call by selecting the extension "button". The orange vertical line displays which extension is active (see right screen shot) The icons below are actions available to you during your call. They are as follows: This allows you to toggle to a dialpad to enter extensions prompted by your call. This allows you to mute / unmute your call This allows you to put your call on hold, and initiate a second call This provides a way to transfer your call to another extension Terminate your call. Receiving a call If you have your comm.land app installed and you receive a call to your extension, you will see the following window display. We expect to be able to assign a ringtone shortly. Webphone Frequently Asked Questions How do I set up my webphone? To add a webphone within comm.land you must enable it within the comm.land Integration app. Ask your administrator to help you with this. If you have already downloaded the comm.land app, in short the added steps are: Go to the comm.land Integration app in Monster UI as an administrator Select the User Access tab Make sure the enable toggle is ON for your user name Turn on the “Webphone” toggle as well. This will set up a virtual webphone to be used in comm.land Once this is updated, you should automatically see the phone icon at the top right of your home screen in comm.land You should also see a “webphone” display under your devices & numbers tab. If you are just getting started and need to download comm.land as well, Ask your administrator to enable the webphone (step 4 above) at the same time they are enabling your comm.land access. Then refer to the step guide for downloading the comm.land app. Your phone should automatically display. You should also see a “webphone” display under your devices & numbers tab. I do not see a green "call" button on my webphone dialpad If you are missing the green "call" button when you initiate the dialpad within comm.land it is likely that the user you are logged in as has not been "webphone activated." To do this, you will need to have your account manager go into the comm.land application and toggle the webphone swtich that is next to your user name. See the notes above. I dial a number and press the green button and nothing happens. If no connection is made once you dial a number, it could be you are experiencing a conflict with another softphone installed on your desktop. If you can, remove the other phone from your user and then “disable” it in the device section. That should make the webphone work properly. We are working on a solution to circumvent this in a future release. Once my webphone is set up do I need to also set up voicemail and call forwarding, etc. for that phone? No, the phone will adopt the settings from your device/phone number as defined in SmartPBX. Can I use my headset for these calls? Yes, you can define both your speaker and microphone sources. To access these settings, click on the gear at the bottom left of your keypad screen. How does the “blind transfer” work? The blind transfer forwards a call to a different number without answering the call first. It maintains the initial caller ID. Select this button and enter an extension # to transfer the call to. Where do I define / manage my caller ID information for this phone? This is controlled in SmartPBX, navigate to your Users screen and selecting User Features for your devices. If you are using a callThru.us device, some of those settings are defined on your phone. How is this comm.land webphone different than the WebRTC phone app available in Monster UI? The comm.land webphone is available only as part of the comm.land application. All calls and voicemails made and received will be tracked and included in the comm.land dashboard so users can easily manage them there. The WebRTC phone is installed independently from the comm.land application and can be used in conjunction with other Monster applications when comm.land is not installed. View full File
-
- webphone setup
- webphone
-
(and 3 more)
Tagged with:
-
STEP GUIDE – How to set up your web phone OVERVIEW Here's an overview of the steps needed to set up a soft phone within your PBX environment using WebRTC. STEP 1: In Smart PBX Add and/or enable a SIP "device" to your user listing in. This can be a softphone, a SIP desk phone, or a SIP Smartphone. NOTE: If you have a device already set up and wish to use that, you can skip the first part of this STEP guide and go directly to "Activating your webphone". STEP 2: In WebRTC Activate / assign which "device" you want to use as your WebRTC phone. -------------------------------------------------------------------------------------------------------------------------------- DETAILED STEPS Adding a device to your user device list. NOTE: You may need to request step 1 be completed by your system admin, depending on the access and permissions assigned to you as a user. Go to your Smart PBX application. Pick Devices from the menu at the left Pick Add Device from the top of the menu, and Soft Phone from the drop down. NOTE you can create any type of SIP phone or use one you have already added. Add your information in this dialog box. BASIC SETTINGS NOTES: Give your softphone a device name that is easily recognizable. A password is generated and saved automatically. If you want to change it make sure to write it down. Assign the softphone to an existing user. Review Advanced Settings If you want to control additional settings here, select the Advanced tab. You will see the options below. NOTE: These can also be set and edited within SmartPBX at a later time; Advanced Settings notes Audio: Set a ring tone from a list of pre-installed codecs. Drag your selection from "Available" to "Selected." Video: Set a ring tone from a list of pre-installed codecs. Drag your selection from "Available" to "Selected." Restrictions: See above. This allows. you to control the outgoing call this softphone can make. Emergency Caller ID: This assigns a physical phone number to this softphone. If 911 is called from this softphone the dispatcher will see the phone number assigned. NOTE: Please review the new settings and guidelines here for complying with Kari's Law in reference to e911 calling. Miscellaneous: See the information below related to additional settings. Miscellaneous Ignore Completed Elsewhere When checked, supporting phones will show a call missed if it was part of a ring group answered elsewhere. Notify when Unregistered Will notify the administrator if phone is unregistered Caller-ID Privacy Set your preferences for Caller-ID WebRTC If checked, forces a WebRTC comaptible SDC on INVITE Encrypt Audio Select either SRTP or ZRTP encryption SAVE your new device! Confirm your device is enabled in the device list Once you have saved your device in Smart PBX, you will be returned to the device listing page. Search for your new device and confirm it is enabled. Confirm the Softphone is assigned to the correct user If the setup is successful, you should see this phone listed next to your user name as shown below. Activating your Webphone Once your device is assigned in SmartPBX, you can manage its use in the WebRTC application. From your main applications screen, Launch the WebRTC app NOTE: You can choose to select the WebRTC app by double-clicking on the icon AND/OR you can move the icon to make it the default application for your desktop. As default, this will mean your Softphone will automatically be enabled when you log in. If you choose NOT to set WebRTC as your default app, you must Assign your webphone You should see a screen similar to below. Select the softphone you want to enable and pick save. NOTE: If you do not see the softphone you expect, return to SmartPBX and verify it is enabled there. If you do not have access, check with your administrator. Once your SIP Username is assigned and saved, you should see the WebRTC phone dialer on your screen. You can minimize it by picking the icon at the bottom right corner. The "minimized" phone will display as an icon, shown to the right. Minimized phone icon NOTES: The WebRTC phone will appear on any screen you have open for your PBX. You can set your default audio settings (in and out) within the virtual dialer. All settings can be edited from the SmartPBX application. View full File
-
comm.land 2.1 User Guide (5.0 only) NOTE: To install your comm.land application, please review the separate comm.land guide called Installation & Setup, HERE. Once you launch your application, you will see an opening dashboard similar to the screen shot below: Home Pages Without a webphone enabled (side menu minimized) With a webphone enabled (side menu expanded) NOTES: If you are using CallThru.us, this should be very similar to your phone screen. The Top row will display a summary of your missed calls, voicemails and faxes. When you have a webphone enabled, you will see a phone icon to the top right, as shown in the second screen shot. The next quadrants will show as follows: Today's Calls List of both incoming and outgoing calls for the day, including the Caller ID, phone #, time and length of call Numbers The Numbers quadrant breaks down your calls based on the phone numbers assigned to you for sending / receiving calls. Devices This quadrant displays the device types that are associated with your login name and credentials. If there are more devices registered than fit in the window, look for the > arrow to scroll or use the scroll bar. In the upper right corner of each box you will see an icon indicating the answer setting that has been assigned by you in your PBX. An unregistered device will display as a red icon. If your device is displaying as unregistered, talk with your administrator. The comm.land features will still work if your device is unregistered. Today's Faxes The faxes quadrant shows a list of faxes received and sent for the day. NOTE: If you are not seeing today's faxes listed, check with your date range settings under the Faxes tab. This at times does not update to the current date, it is on our list to resolve. Webphone access If your administrator has enabled webphone access for you, you will see the phone icon to the top right of your screen, and it will also show as a device in the devices area (see image above). For a detailed overview of how to use the webphone we have created a separate support document HERE. Additionally you can access it from the tray icon at the top right of your browser window header, here: If you do not see either of these access points, it's most likely because you are not logged in and if you are logged in and still don't see these access points, please contact your administrator. Voicemails The voicemail page previews your voicemails, shows who called, to what number (if you have more than one number registered) the date and time, and the length of the message. You can filter the list, listen to the voicemails, and/or download its media file to your computer. Top Summary, Total Voicemails Is a quick reference to total voicemails still saved in your list. Voicemail Status The voicemail status column shows if the call is New or Listened. Once you delete a voice mail, you cannot undelete it from within comm.land. You can move a deleted voicemail back to Listened or New status from within Monster UI Voicemails App or by contacting your admin. Filter drop downs You can use the filter dropdown under the New Voicemail block to bulk-manage files. For example, you can ask it to select "All New", then click on "Mark as Listened" . Play Voicemail To play your voicemail, select the voicemail you want to hear, then from the drop down, select the Play button to the far right. Once a voicemail is played, the status button will change from New to Listened. Using the icons below the play option, you can: Ring your device Download that specific voice mail Delete the voicemail NOTE: By choosing "Delete" you are actually marking the VM to be deleted. It can be recovered by your admin if requested. Call History This page displays a chronological list of calls sent and received, the associated phone number, the time, date and duration of the call. Filter these calls by entering a date range and the top and selecting the Filter button. Search for specific calls using the search field. You can also select the row in call history, it will ring your devices and call the received caller back. Devices and Numbers This page displays the devices assigned to your account. NOTES: If the phone icon is red, this indicates that phone is currently set as "unregistered." This is currently expected for Call-Thru devices, and will not affect its behavior. To re-register a different kind of device, contact your administrator. Faxes The fax page provides information on fax activity associated with your account. The following options are available from this page: Send a fax Click on the blue Send Fax button at the top right of the screen to send a fax. A dialog box like the one below will display. NOTES: You MUST include the country code in ALL outbound faxes. Select the "Choose File" button to upload files from your computer. Currently faxes support .pdf and .tiff file formats as attachments. There is a maximum file size limit of 15mb per fax. The fax "Send From" field is automatically populated based on settings defined by your administrator. Download the fax To download a fax, select the download icon to the right of the fax you want to review. Filter your list of faxes You can filter your listing of faxes using the Filter option to the left of the Search window. It will show a dialog box like the one below: Bulk Delete your faxes If you want to delete list of faxes such as "Delete all Failed Faxes" you can use the filter button above the status column. Click on the arrow, and you will see the options below. Once they are selected, pick the Trash button. Video Conferencing Video conferences are implemented for use only among members in your account. Quick steps for using this feature are below; a more detailed user guide is available HERE. Before You Start Check to make sure a conference call ID has been created by your administrator in the Conferences app. If you have already used the conferencing app in Monster UI, these conferences will display. If not, a quick reference to how to set this up is available at the end of the video conferencing user guide. Quick Overview / Steps Confirm there is a conference ID available in the Conferences tab in comm.land Join your conference! You should see a screen something like this: Adjust settings as needed. Details are provided HERE. Settings Page To access the settings page, click on your user name at the bottom left corner of the left menu, OR from the tray icon listing. Call Handling Enable Call Forwarding This allows you to forward your calls to another phone number, and to retain the Caller ID. Voice Mails This will send a message to the email you define that you have received a voice mail Do Not Disturb Use this toggle to turn OFF your ringer if you do not wish to receive calls to these devices. This is often where users manage when they do not want to be reached for office related calls. Software Access + Info Here you can choose whether or not to automatically launch comm.land when you start your computer. Version # This will indicate the version number of comm.land you are using. This can be helpful if you need to troubleshoot an issue. comm.land Application Updates Once you have downloaded comm.land to your desktop, you will receive automatic application updates. When this happens you will see a notification asking if you want to restart comm.land and launch the update immediately or later. ###### View full File
-
- setup guide
- desktop app
-
(and 5 more)
Tagged with:


