Search the Community
Showing results for tags 'callflows'.
Found 19 results
-
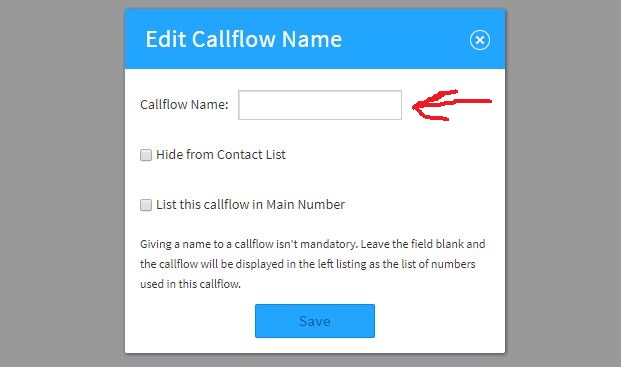
 About Callflows Callflows is an application that exposes our APIs in a GUI format, enabling very complex and custom call routing plans when needed. It is used in addition to the SmartPBX app to supplement the basic call routing configurations available there. See the user stories below as examples: User Stories An account has multiple geographic locations and needs to create Unique office hours and holiday schedules Different language defaults Different answering notices depending on incoming call source and time of day A series of sub-menus and selections (press 1 for support, then 2 for apps and 3 for service issues) An account wants to set up multiple call center queues (for support and sales for example) An account wants to customize incoming call sequences based on unique variables, such as phone number, holidays, etc. An account wants to route incoming fax calls based on time of day or prepend number Before You Start Before you start to implement custom callflows, confirm your settings in SmartPBX. This will ensure you have the newest fields and settings configured for your account. In addition the Callflows application accesses and writes settings data that can affect many other applications. It is important the manager working with Callflows has a strong knowledge of how these applications work together and what ripple effects can occur when working with and changing these settings. Accessing Callflows Once your account is created in SmartPBX, go to the applications menu and select Callflows. If it’s not displayed, Try searching for it in the Search Apps field to your left. Select the App Exchange button, find Callflows there, and select it. Then use the toggle to enable it. If you still don’t see it, contact your system administrator. Your Callflows Dashboard The “home page” to the Callflows dashboard will look like this. The large Callflows selection brings you to the home screen where you can build a callflow. The smaller selections help define attributes for each “flow.” You can access them here, or when you select one of these actions, by picking Edit / Advanced options. Building a Callflow When you click on Callflows you will see a brief tutorial for creating a new process and to the left a list of existing callflows assigned to your account and the option to add a new one. It outlines the following steps: Add a Callflow (create new) Enter phone number / extension(s) tied to this process Drag your action into the diagram Save your changes A more detailed look at these steps is outlined below: Add a Callflow Select the Add callflow button in the left menu bar. You will see a “blank screen” waiting to be filled, and the Actions menu to the right. Click the black bar to assign a number to your callflow. NOTE: if you want to edit an existing callflow, select the edit pencil in the blue bar, upper right. Select either a phone number in your account (you can buy one also) an existing extension shown in the dropdown enter a new extension Your selection(s) will display in the black title bar and you are ready to add your actions! NOTES: Your callflow cannot be saved until you add at least one action. When first saved, your callflow will display its name as the first extension number you have entered. If you want to change the name, select the edit icon at the top right of the blue callflow bar. Enter a unique name, and decide if you want it displayed as a “contact” and in SmartPBX’s main number list options. Next, review the Actions shown on the right menu bar. NOTES: The Basic Menu, with the most popular actions is displayed and open by default. To view additional actions available click on the drop down arrow of the eight additional topics. For a complete listing of the Actions available in this menu and the parameters they request, see below. Drag the actions to your “palette” in the order you want the callflow to take. “Drop” it onto the last action you have identified, and it will connect below. Depending on the action you choose, you will need to enter additional information to a dialog box that will pop up. Some actions trigger dual dialog boxes to display, for example the “Menu” action allows you to enter several menu items. Make sure to save each dialog box entry! See notes above on how to name your callflow. To remove a block, click on the x at the top right. Sample Callflow Below is a sample that uses basic actions only. It provides a submenu set of options to go to a ring group, to a generic Support Voicemail box, or to a “home” voicemail box. Callflows Actions Available An overview of all the possible callflow actions that are available to use is below. NOTES: Many of the Settings and Advanced settings values can be defined in SmartPBX; those values will display here. If you change the settings in callflows as part of your configuration the changes will also appear in SmartPBX. Make sure your changes will not affect what has already been defined there (such as Time of Day and Holidays). Menu Action What it does Initial Settings Dialog Advanced Settings Dialogs (accessible from Callflows home page) Media Play an audio file such as a greeting Can create, upload, or Text to Speech files Can assign Persona for TTS voice Can set stream option Settings also available in SmartPBX Ring Group Assign Users, Devices, and Groups to a Ring Group Set ring strategy to concurrent or sequential Set Ringback destination Set number of times to ring members before ringback Conference Connect caller to a conference call Set conference name, extension, PIN #s, Join & Exit conference tones Enable Video Conferencing (added costs) User Connect a call to a User Define how many rings to try before moving on. set email notification for voicemails Inbound/outbound Caller ID Shows devices currently assigned Allows assigning new devices Full advanced menu Voicemail Direct a caller to leave a voicemail message. Assign mailbox Advanced settings for accessing voicemail: auto-login, voicemail usage options Menu Ask a caller to select a menu option or dial an extension Device Ring a cell phone, VoIP, or other device Distinctive Ring Sets distinctive ring for incoming call Callflow Transfers call to another saved callflow Page Group “Page” or Ring several VoIP or cell groups Set audio one or two-way Add users, devices or groups to list Set CAV Allows you to provide key variables as custom application variables Missed Call Alert Allows you to assign users receive email notification for unanswered inbound calls that do not result in a voicemail message. Enter a list of emails separated by commas, or select users from the list below. and SAVE! Manual Presence Text to Speech Allows you to enter a text that will be converted to speech. Select voice and language Sleep Set a pause before the next action Define length in seconds Language Assign a language Group Pickup set Group pickup feature to a user, a group, or a device Pivot enable a pivot routine (common uses are to access data from another source) Dynamically route calls based on external data as provided by a 3rd party server Receives Fax Sends a fax to a specific user Enable T.387 option for faxes on devices Accesses User Options to review fax settings Collect DTMF Enables the collection of a DTMF for following steps. Timeouts are measured in milliseconds Collection name is to store as a key. If empty default back end is used. Interdigit Timeout is how long to wait between entries Max digits defines how many to wait for Terminator key to enter when finished Timeout is how long to wait for first entry DISA Settings to allow outbound calls to be made from an external source as if it were coming from the business account. Time settings are in seconds. PIN enter the code for enabling DISA Retries set how many tries to enter the correct PIN Interdigit is the time allowed between digit entries Max Digits is the maximum amount of digits allowed to be dialed as the external #. Preconnect Audio is what the caller hears after entering # before connection Keep original Caller-ID If checked, the originating Caller ID will be preserved. Response Return a custom SIP error code for troubleshooting and/or for announcing error to caller. Any media added will be played when an error occurs. e.g. “that extension is no longer in service” Conference Service Transfer the caller to the conference call service, asks for conference # and PIN #. Check Voicemail Sets option to check a group or personal voicemail. Fax Boxes connects to fax box Global Carrier Route calls to the phone network through pre-configured service providers Common use is for fully hosted environment where reseller doesn’t have to use their own carriers. Account Carrier Route calls to the phone network through a configured SIP provider, Google Voice or a physical digital/analog line Directory Ask callers to enter the first 3 letters of the person they’re trying to reach. Assign specific directory; rules for # input; Sort options Webhook Trigger a webhook call at any level of the callflow to get “real time” info on the callflow behavior. Time of Day Actions Select a Timezone Enable Time of Day Rules Select a Time of Day “rule”, e.g. a specific holiday or holiday type. Disable Time of Day Rules Reset Time of Day Ring Group Toggle Allows caller to login and logout of ringroups dynamically Hot Desk Toggle Enable / Disable Hotdesking, and Toggle. DND Dynamic Caller ID Enables you to set your caller ID on your phone and it will read that. Prepend Caller ID Add some text in front of your caller ID Reset Prepend Resets all your prepended text before the Caller ID Call Recording Starts and stops Call Recording Frequently Asked Questions What is the difference between these two applications? They are the same. Advanced Callflows was introduced as a newer version of Callflows. The code has since been merged, and the name simplified. Mentions of Advanced Callflows are only due to legacy habits. Can one callflow call another callflow? Yes! One of the action buttons in the Basic menu is “Callflow” which lets you define an existing callflow to connect to. Is there a limit to the number of steps I can add to a callflow? No, however the more steps there are the more time will lapse as the steps progress. We recommend shorter Callflow configurations. This way each callflow can be reused as sub-flows for different instances. You will want to test the callflow once you’ve created it to make sure it isn’t too slow. I tried to create a callflow using our main number, and it says the number is already in use. How can you make a callflow for your main phone line?? (not using the SmartPBX, but by using the Advanced Callflow app). Advanced Callflows provides added flexibility in setting where your calls go based on the incoming call number or extension. If your number is showing "Already in Use", try the following: Look to see if SmartPBX automatically created a callflow from your main number when it was installed. Look for the "Used_by" attribute next to the number for a clue to its assignments Most people will create a new callflow with an extension to direct calls. If you do this, Make sure the checkbox on the menu screen is checked for "Allow caller to dial extensions." When you create the callflow, click on the bar at the top of the callflow name, with the little edit button Check the box that says "Make this callflow available to the Main Number" Return to SmartPBX and navigate tot he Main Number Incoming Call Routing option. You should see the new callflow option. I created an IVR call flow in SmartPBX and now want to edit that using some of the more advanced Callflows features. Where can I access the SmartPBX callflow? ”Callflows” developed in SmartPBX are currently not accessible within callflows. If you want to create a more detailed callflow than SmartPBX offers, you will need to create it from scratch in the Callflows app and point your SmartPBX (holiday hours greetings for example) to the callflow you create. Is there any way to manually override a Main Number callflow if, for example we want to hold an impromptu all-hands meeting for a quick half hour during the day? There are several suggestions for achieving this discussed in our community forum here. How can I set up a system where one option in my menu is to “repeat the menu options?” Earlier versions of KAZOO allowed you to point to the same callflow as an option. This however caused unfriendly infinite loops and has been disabled. The current best option is to create another callflow that points back to the original callflow (call it a loopback callflow) then reference the loopback in the original. How can I create a callflow using extension 0? The SmartPBX automatically creates the Main Callflow with extension 0; it is not configurable for other callflows. When I have a horizontal list of callflow options, what order does the callflow take? The callflow will process the options from Left to Right. If for example you have a Time of Day process and list Morning hours | Evening hours | Holidays the flow will not take advance to Holidays if the other flow options apply. We recommend putting your Holiday option first. Note also in this example, these values can be set in SmartPBX, and the precedence for holidays is already set. What happens if a caller doesn’t select an option in the menu system? By default the menu system is set to allow 3 “misdials” (or no entry) and will replay the menu after 10 seconds. To change these settings, go to the menu action, and select Advanced Options. You can manage the threshold for the amount of retries and the length of time between tries there. What does “Require Key Press” mean in the Advanced User menu? Requiring the key press is the mechanism that prevents the forwarded call from terminating in the forwarded number's voicemail box. It is the same trigger or setting as “Leave voicemail on forwarded numbers.” where by turning this off you enable an option for voicemail at a separate station. So, disabled “require key press” = leave voicemail on forwarded numbers”. When I set up my user profile in Callflows it does not associate a “Main Extension” to my user. How do I add one? The association for “main extension” to a user is a new field in SmartPBX and is not captured in Callflows. This can cause an error when setting up comm.io that says “Cannot read properties “Numbers” of undefined.” If you get this error message while setting up comm.io, follow these steps: Launch your SmartPBX application Click on Users tab in the left menu bar Find the name you want to use comm.io with. It will likely show "None" in the field. Add your extension and save your setting. Return to the comm.io setup and the error should be gone. Related Articles SmartPBX User Guide Setting up a Virtual Receptionist Advanced Callflow configurations and setup API References docs.2600hz.com Callflows - Kazoo API Reference REST API Reference for Kazoo Crossbar API ###
 -
 2600HZ USER GUIDE - BLOCK LISTING NUMBERS Within the Call Flows App, you will find the Blocklist set up. The Blocklist is used to block calls from a particular number. Note this does not blocklist outgoing calls. Create your Blocklist List of Numbers Click into the Advanced Callflows App and select Blocklist 2. Once in the Blocklist submenu, click 3. add a Name (for reference), and add the number. NOTES: You can also block all Anonymous calls by switching the “Block Anonymous” to On. It is important you add the exact number sequence you want to block, which in most cases includes a country code. (including the US +1). To verify the number(s) match, you can view your call log in SmartPBX. See the section below for details. Activate your list Once you've created the set of numbers, you will need to Activate that list for your specific account. Select the Return to Callflows Home button at the top right of your screen Go to the Account Settings block Select the Blocklist tab Drag your newly named Blocklist list from "Available" to "Selected and select the green UPDATE button at the bottom. To confirm the correct Number entry If you want to make sure you are including the exact number as the blocklist routine will see it, you can view your call log and retrieve it there. Follow these steps Access SmartPBX Go to the Call Logs menu item Search for the call you've identified, and expand its listing. Select the gear to the right for a detail of the call routing and number. You will see something like below: Use the "caller_id_number" as displayed here on your blocklist entry. Frequently Asked Questions How do I block / blocklist Anonymous calls? To blocklist Anonymous calls you will need to follow these steps: Create a blocklist and name it (e.g. Block Anonymous) Toggle the switch saying "Block Anonymous" on Return to Callflows / Account Settings and assign that blocklist file to the list Select the green Update button to Save. NOTES: This provides a first-level screening for calls where caller-IDs are tagged as anonymous. If this is not filtering calls as expected, it's likely some added layers of configuration settings need to be reviewed: The caller may have added a layer of deception about the call, using techie-geeky strategies such as using a zero phone number 000000000 to a marking a SIP flag as "privacy=true". If these kinds of calls persist, follow the steps above for "to confirm the correct number" from your SmartPBX log and manually blocklist the specific number. If you are a Private Cloud or Global Infrastructure client and use your own carrier, your carrier may have a unique strategy for dealing with anonymous calls that KAZOO doesn't anticipate. Check with support to help review your call logs. If your blocklist assignment is still letting calls come through, you may need to contact support so they can analyze your SIP call logs and Carrier settings at a more detailed level. Related Articles Advanced Callflow configurations and setup API Reference Docs docs.2600hz.com Blocklists - Kazoo API Reference REST API Reference for Kazoo Crossbar API #####
 -
 Monster App Choices SmartPBX vs Advanced Callflows vs APIs User Story A new user wants to understand what application to use for getting started with and managing and maintaining their account. They are confused about whether to use SmartPBX, Advanced Callflows or system APIs. A new user is looking to understand how these applications interact with each other. Overview It’s important to understand both SmartPBX and Callflows access the same back end database and use the same APIs to transfer data. Edits from one app will reflect in the others the next time you load it. Some apps however, do not provide access to certain settings, either because it is considered more complex and requires admin level understanding, or the setting was added as a new feature not yet updated in an older app. This document will share recommendations on when to use each configuration method. In addition it will review some 2600Hz history to give context to the applications and how they evolved. In short Your administrator will likely use Account Manager for your initial account setup. Once your account is accessible, Smart PBX is often set as the default application you see when logging in. Use SmartPBX for account maintenance and management whenever possible. It is the most current and most user friendly app for your initial setup. Use Callflows if you are an administrator and want to set up some more advanced, complex features for your client. Use KAZOO’s powerful API library if none of the options above provide a feature you require, if your process is a back-end calculation or for automation needs that do not need user input. Note: API use requires a developer who is comfortable using JSON APIs in their preferred programming language, is familiar with Kazoo configurations and reading Kazoo docs. A summary chart of what functionality can be managed in each app is available at the end of this document. For a detailed overview comparing access to each setting in Callflows v. SmartPBX, go HERE. Set up your Initial Account with Account Manager This will be accomplished with your Account administrator. Once your initial account has been set up, you will want to personalize it according to your office requirements. Get Started with your personalizations with SmartPBX Once your account has been set up by an administrator it’s best for as much configuration to be exposed in SmartPBX as possible for End Users to see. Spend some time stepping through the application and working with the features available for you. We have a series of User Guides available also, HERE NOTE: Make sure you associate a “Main Extension” to your user name in SmartPBX. This is required for the comm.io app, and is not available to add in Callflows. (This is an example of the newer app supporting newer features). If you have set up your user in Callflows already and want to use the comm.io softphone, refer to the comm.io installation and setup document, HERE. Advanced Functions using Callflows If it’s not possible to complete your objectives using SmartPBX, use Advanced Callflows. Some common advanced functions callflows excels at include: Creating sub-menus for incoming calls (e.g. Spanish speaking and English speaking). We have a document HERE that outlines this setup. Creating secondary, tertiary, etc. callflows. For example for multiple locations/companies in a single account. Creating custom feature codes Using APIs to develop further customizations Both SmartPBX and Advanced Callflows ultimately use the same APIs, they are just viewed in different ways. If there’s some function in the Kazoo GUI that you need to do very often, often enough that it’s not efficient to use the GUI, this is an occasion where you use APIs. Some common uses for accessing the API directly include: Processes not supported by SmartPBX or Callflows Integrations with other programs that also use APIs. Examples include billing programs, integration with Salesforce or web pages, etc. Repetitive processes that can run in the background and do not need user input (for example, some billing functions). To start learning the API syntax, watch the network tab and see what APIs are being called while you complete your task in the GUI. Then check the documentation to be sure you fully understand what the API call is actually doing. And write your code to replicate it. All the documentation for our APIs is available HERE. Anything that can be done in our GUI can be done via API as well. Simply open your browser’s development tools feature, watch the network tab and see what APIs are being called while you complete your task in the GUI. Reconcile this with the API the documentation to be sure you fully understand what the API call is actually doing. And write your code to replicate it. Notes: Not all APIs are considered stable and available for end user use. Please be sure your API is supported before using them. Please take special care and do extensive testing if you want your application to work with SmartPBX. When developing using the API always develop against a sandbox environment. Never code against a production cluster. An example configuration using multiple KAZOO applications Below are some example configurations where more than one application is accessed. These include helpful tips on the most efficient ways to achieve this. Build a sub-menu into your main number incoming call routing If you want to build a sub-menu into your main number config (for example to support multiple languages or departments), this is not possible to do in SmartPBX. Here’s a trick we use to streamline this process: First, in SmartPBX. build all your ring groups for the sub-menu Second, in Callflows, build the callflow for the sub-menu. Instead of building the menu options all from scratch, use the SmartPBX ring groups you just made. Third, while still in Callflows, name the callflow and enable the “List this callflow in Main Number” check box. This will allow you to use the advanced callflow as an option back in SmartPBX’s main number section. With this example, your end users will be able to change the members and order of the sub-menu’s options via the SmartPBX groups section. This keeps the complexity of Advanced Callflows abstracted away from user, and allows them to manage the details of the process using a familiar interface, SmartPBX. Sample of application best uses Account Mgr SmartPBX Callflows APIs Initial Setup ✔ Add/Edit Users and Devices Global Setup User Edits Basic Settings: Office / Holiday Hrs Hold music Incoming call routing Default language interface Billing settings Global Setup User Edits Ring Groups Create Here Trunking Controls Admin Setup Admin Edits Sub menus for incoming calls Create Ring Group First Attach sub menus to Ring Group Background of KAZOO’s development and updates When the KAZOO project first started over 10 years ago, everything was done via json APIs -- there was no GUI (Graphic User Interface). The expectation was the KAZOO platform would serve as a robust engine for companies to use as their back-end and that those companies would build their own GUI to best fit their customer’s needs. KAZOO is extremely robust and with this comes complexity however, and many of our clients didn’t want to spend time diving into API docs before they even knew if a project would work for them. They wanted a quick and easy way to set up an account to test our wares. To support these developers 2600Hz made a very basic GUI for the APIs to enable a quick and easy setup for a testing environment. This original GUI didn’t expose all of the APIs or even all the features of the APIs but it gave developers a head start. Once they felt confident in the platform, developers used it to enable them to build custom GUIs. This served our clients who are sophisticated programmers in their own right well, and they created unique applications as we imagined, and still do. Their solutions are elegant overlays to the KAZOO engine. As we grew however, resellers started using the original tool to set up and maintain end user accounts; they requested we provide a more friendly way to enable their end users to personalize and change their account details without constant support. This was the driving force behind our Monster-UI framework and SmartPBX application. SmartPBX was built as a general use GUI for Kazoo, one that resellers could hand off to end users. In making the system more friendly to non-programmers however, we reduced the configuration offerings to a core that most accounts need. To continue to keep some more complex features accessible for advanced administrator use we ported in the old UI as the Callflows app. Some challenges remain with this multi-tiered approach. Because SmartPBX and Advanced Callflows share the same APIs, you could see callflows created by SmartPBX in the Callflows app, setting an expectation that users could also edit them. We needed a way to track where the input came from and how to edit it. To solve this, 2600Hz added metadata to the json API indicating what app that created the callflow. And elements made in SmartPBX were hidden from Advanced Callflows. This is the state the system exists in today. While most now use Monster UI and SmartPBX, some companies still use Kazoo strictly as a back-end system and use their own GUIs. Developers are still welcome to use the APIs to build their own GUIs. For those developers wanting to use the APIs, but also wanting to use Advanced Callflows, SmartPBX and other Monster UI apps. This is possible as well. When doing this, however, please take great care in your code to match the formatting that Monster UI apps use as closely as possible. Remember not every single feature of the APIs is available in SmartPBX or even in Advanced Callflows, and SmartPBX expects very particular formatting to work correctly. In all scenarios, thoroughly test your code against a sandbox environment before deploying to production systems. Additional Resources SmartPBX User Guide Account Settings Access: Callflows v. SmartPBX Advanced Callflow configurations and setup API References docs.2600hz.com Callflows - Kazoo API Reference REST API Reference for Kazoo Crossbar API
 -
About Callflows Callflows is an application that exposes our APIs in a GUI format, enabling very complex and custom call routing plans when needed. It is used in addition to the SmartPBX app to supplement the basic call routing configurations available there. See the user stories below as examples: User Stories An account has multiple geographic locations and needs to create Unique office hours and holiday schedules Different language defaults Different answering notices depending on incoming call source and time of day A series of sub-menus and selections (press 1 for support, then 2 for apps and 3 for service issues) An account wants to set up multiple call center queues (for support and sales for example) An account wants to customize incoming call sequences based on unique variables, such as phone number, holidays, etc. An account wants to route incoming fax calls based on time of day or prepend number Before You Start Before you start to implement custom callflows, confirm your settings in SmartPBX. This will ensure you have the newest fields and settings configured for your account. In addition the Callflows application accesses and writes settings data that can affect many other applications. It is important the manager working with Callflows has a strong knowledge of how these applications work together and what ripple effects can occur when working with and changing these settings. Accessing Callflows Once your account is created in SmartPBX, go to the applications menu and select Callflows. If it’s not displayed, Try searching for it in the Search Apps field to your left. Select the App Exchange button, find Callflows there, and select it. Then use the toggle to enable it. If you still don’t see it, contact your system administrator. Your Callflows Dashboard The “home page” to the Callflows dashboard will look like this. The large Callflows selection brings you to the home screen where you can build a callflow. The smaller selections help define attributes for each “flow.” You can access them here, or when you select one of these actions, by picking Edit / Advanced options. Building a Callflow When you click on Callflows you will see a brief tutorial for creating a new process and to the left a list of existing callflows assigned to your account and the option to add a new one. It outlines the following steps: Add a Callflow (create new) Enter phone number / extension(s) tied to this process Drag your action into the diagram Save your changes A more detailed look at these steps is outlined below: Add a Callflow Select the Add callflow button in the left menu bar. You will see a “blank screen” waiting to be filled, and the Actions menu to the right. Click the black bar to assign a number to your callflow. NOTE: if you want to edit an existing callflow, select the edit pencil in the blue bar, upper right. Select either a phone number in your account (you can buy one also) an existing extension shown in the dropdown enter a new extension Your selection(s) will display in the black title bar and you are ready to add your actions! NOTES: Your callflow cannot be saved until you add at least one action. When first saved, your callflow will display its name as the first extension number you have entered. If you want to change the name, select the edit icon at the top right of the blue callflow bar. Enter a unique name, and decide if you want it displayed as a “contact” and in SmartPBX’s main number list options. Next, review the Actions shown on the right menu bar. NOTES: The Basic Menu, with the most popular actions is displayed and open by default. To view additional actions available click on the drop down arrow of the eight additional topics. For a complete listing of the Actions available in this menu and the parameters they request, see below. Drag the actions to your “palette” in the order you want the callflow to take. “Drop” it onto the last action you have identified, and it will connect below. Depending on the action you choose, you will need to enter additional information to a dialog box that will pop up. Some actions trigger dual dialog boxes to display, for example the “Menu” action allows you to enter several menu items. Make sure to save each dialog box entry! See notes above on how to name your callflow. To remove a block, click on the x at the top right. Sample Callflow Below is a sample that uses basic actions only. It provides a submenu set of options to go to a ring group, to a generic Support Voicemail box, or to a “home” voicemail box. Callflows Actions Available An overview of all the possible callflow actions that are available to use is below. NOTES: Many of the Settings and Advanced settings values can be defined in SmartPBX; those values will display here. If you change the settings in callflows as part of your configuration the changes will also appear in SmartPBX. Make sure your changes will not affect what has already been defined there (such as Time of Day and Holidays). Menu Action What it does Initial Settings Dialog Advanced Settings Dialogs (accessible from Callflows home page) Media Play an audio file such as a greeting Can create, upload, or Text to Speech files Can assign Persona for TTS voice Can set stream option Settings also available in SmartPBX Ring Group Assign Users, Devices, and Groups to a Ring Group Set ring strategy to concurrent or sequential Set Ringback destination Set number of times to ring members before ringback Conference Connect caller to a conference call Set conference name, extension, PIN #s, Join & Exit conference tones Enable Video Conferencing (added costs) User Connect a call to a User Define how many rings to try before moving on. set email notification for voicemails Inbound/outbound Caller ID Shows devices currently assigned Allows assigning new devices Full advanced menu Voicemail Direct a caller to leave a voicemail message. Assign mailbox Advanced settings for accessing voicemail: auto-login, voicemail usage options Menu Ask a caller to select a menu option or dial an extension Device Ring a cell phone, VoIP, or other device Distinctive Ring Sets distinctive ring for incoming call Callflow Transfers call to another saved callflow Page Group “Page” or Ring several VoIP or cell groups Set audio one or two-way Add users, devices or groups to list Set CAV Allows you to provide key variables as custom application variables Missed Call Alert Allows you to assign users receive email notification for unanswered inbound calls that do not result in a voicemail message. Enter a list of emails separated by commas, or select users from the list below. and SAVE! Manual Presence Text to Speech Allows you to enter a text that will be converted to speech. Select voice and language Sleep Set a pause before the next action Define length in seconds Language Assign a language Group Pickup set Group pickup feature to a user, a group, or a device Pivot enable a pivot routine (common uses are to access data from another source) Dynamically route calls based on external data as provided by a 3rd party server Receives Fax Sends a fax to a specific user Enable T.387 option for faxes on devices Accesses User Options to review fax settings Collect DTMF Enables the collection of a DTMF for following steps. Timeouts are measured in milliseconds Collection name is to store as a key. If empty default back end is used. Interdigit Timeout is how long to wait between entries Max digits defines how many to wait for Terminator key to enter when finished Timeout is how long to wait for first entry DISA Settings to allow outbound calls to be made from an external source as if it were coming from the business account. Time settings are in seconds. PIN enter the code for enabling DISA Retries set how many tries to enter the correct PIN Interdigit is the time allowed between digit entries Max Digits is the maximum amount of digits allowed to be dialed as the external #. Preconnect Audio is what the caller hears after entering # before connection Keep original Caller-ID If checked, the originating Caller ID will be preserved. Response Return a custom SIP error code for troubleshooting and/or for announcing error to caller. Any media added will be played when an error occurs. e.g. “that extension is no longer in service” Conference Service Transfer the caller to the conference call service, asks for conference # and PIN #. Check Voicemail Sets option to check a group or personal voicemail. Fax Boxes connects to fax box Global Carrier Route calls to the phone network through pre-configured service providers Common use is for fully hosted environment where reseller doesn’t have to use their own carriers. Account Carrier Route calls to the phone network through a configured SIP provider, Google Voice or a physical digital/analog line Directory Ask callers to enter the first 3 letters of the person they’re trying to reach. Assign specific directory; rules for # input; Sort options Webhook Trigger a webhook call at any level of the callflow to get “real time” info on the callflow behavior. Time of Day Actions Select a Timezone Enable Time of Day Rules Select a Time of Day “rule”, e.g. a specific holiday or holiday type. Disable Time of Day Rules Reset Time of Day Ring Group Toggle Allows caller to login and logout of ringroups dynamically Hot Desk Toggle Enable / Disable Hotdesking, and Toggle. DND Dynamic Caller ID Enables you to set your caller ID on your phone and it will read that. Prepend Caller ID Add some text in front of your caller ID Reset Prepend Resets all your prepended text before the Caller ID Call Recording Starts and stops Call Recording Frequently Asked Questions What is the difference between these two applications? They are the same. Advanced Callflows was introduced as a newer version of Callflows. The code has since been merged, and the name simplified. Mentions of Advanced Callflows are only due to legacy habits. Can one callflow call another callflow? Yes! One of the action buttons in the Basic menu is “Callflow” which lets you define an existing callflow to connect to. Is there a limit to the number of steps I can add to a callflow? No, however the more steps there are the more time will lapse as the steps progress. We recommend shorter Callflow configurations. This way each callflow can be reused as sub-flows for different instances. You will want to test the callflow once you’ve created it to make sure it isn’t too slow. I tried to create a callflow using our main number, and it says the number is already in use. How can you make a callflow for your main phone line?? (not using the SmartPBX, but by using the Advanced Callflow app). Advanced Callflows provides added flexibility in setting where your calls go based on the incoming call number or extension. If your number is showing "Already in Use", try the following: Look to see if SmartPBX automatically created a callflow from your main number when it was installed. Look for the "Used_by" attribute next to the number for a clue to its assignments Most people will create a new callflow with an extension to direct calls. If you do this, Make sure the checkbox on the menu screen is checked for "Allow caller to dial extensions." When you create the callflow, click on the bar at the top of the callflow name, with the little edit button Check the box that says "Make this callflow available to the Main Number" Return to SmartPBX and navigate tot he Main Number Incoming Call Routing option. You should see the new callflow option. I created an IVR call flow in SmartPBX and now want to edit that using some of the more advanced Callflows features. Where can I access the SmartPBX callflow? ”Callflows” developed in SmartPBX are currently not accessible within callflows. If you want to create a more detailed callflow than SmartPBX offers, you will need to create it from scratch in the Callflows app and point your SmartPBX (holiday hours greetings for example) to the callflow you create. Is there any way to manually override a Main Number callflow if, for example we want to hold an impromptu all-hands meeting for a quick half hour during the day? There are several suggestions for achieving this discussed in our community forum here. How can I set up a system where one option in my menu is to “repeat the menu options?” Earlier versions of KAZOO allowed you to point to the same callflow as an option. This however caused unfriendly infinite loops and has been disabled. The current best option is to create another callflow that points back to the original callflow (call it a loopback callflow) then reference the loopback in the original. How can I create a callflow using extension 0? The SmartPBX automatically creates the Main Callflow with extension 0; it is not configurable for other callflows. When I have a horizontal list of callflow options, what order does the callflow take? The callflow will process the options from Left to Right. If for example you have a Time of Day process and list Morning hours | Evening hours | Holidays the flow will not take advance to Holidays if the other flow options apply. We recommend putting your Holiday option first. Note also in this example, these values can be set in SmartPBX, and the precedence for holidays is already set. What happens if a caller doesn’t select an option in the menu system? By default the menu system is set to allow 3 “misdials” (or no entry) and will replay the menu after 10 seconds. To change these settings, go to the menu action, and select Advanced Options. You can manage the threshold for the amount of retries and the length of time between tries there. What does “Require Key Press” mean in the Advanced User menu? Requiring the key press is the mechanism that prevents the forwarded call from terminating in the forwarded number's voicemail box. It is the same trigger or setting as “Leave voicemail on forwarded numbers.” where by turning this off you enable an option for voicemail at a separate station. So, disabled “require key press” = leave voicemail on forwarded numbers”. When I set up my user profile in Callflows it does not associate a “Main Extension” to my user. How do I add one? The association for “main extension” to a user is a new field in SmartPBX and is not captured in Callflows. This can cause an error when setting up comm.io that says “Cannot read properties “Numbers” of undefined.” If you get this error message while setting up comm.io, follow these steps: Launch your SmartPBX application Click on Users tab in the left menu bar Find the name you want to use comm.io with. It will likely show "None" in the field. Add your extension and save your setting. Return to the comm.io setup and the error should be gone. Related Articles SmartPBX User Guide Setting up a Virtual Receptionist Advanced Callflow configurations and setup API References docs.2600hz.com Callflows - Kazoo API Reference REST API Reference for Kazoo Crossbar API ### View full File
-
 USER GUIDE – BUILD A VIRTUAL RECEPTIONIST IN SMART PBX (also called an IVR) User Story An office wants to set up a system on their PBX where the caller selects different extensions/options for: Receptionist Directory / List of Extensions Sales group Voicemails for Users and Groups Answering Service or 3rd party number Spanish language menu This is often called a “Virtual Receptionist” or an “IVR” (for "Interactive Voice Response") setting. You will be able to guide your callers to different extensions depending on their purpose. Overview This guide is set up in two parts. Part 1 steps through an initial setup for a main menu using SmartPBX. Part 2 steps through how to add sub-menus and additional features to the standard virtual receptionist process. This addresses our initial user story item for adding a Spanish language menu. To achieve this we will leverage our powerful Callflows application and create a “submenu” there, and then reference it in SmartPBX. The process looks something like this: Before you start Part 1 will take you through setting up a basic Virtual Receptionist, or call directing menu. This guide assumes you have gone through basic SmartPBX setup steps (add link for setup reference) and have: Configured a Company main number and emergency / 911 address Added users to a directory and assigned their extensions Added/enabled devices and phone numbers to the device tab. NOTE: If you use an external answering service, you will want to add their phone # and landline as a device. Added/enabled a group of users (such as sales, billing, appointments, etc) if that will be an option for your Virtual Receptionist List of your office hours and holidays Part 1: Create an initial Virtual Receptionist Menu in SmartPBX Open SmartPBX Quick steps include as follows: Go to the Main Number / Incoming Call Handling menu Enter office hours, and vacation and holiday times that may affect your Virtual Receptionist response For each “setting” -- Open Hours, Lunch Hours, After Hours, and Holidays, choose an initial Callflow and click on its Virtual Receptionist link. Add menu number item and attach its destination Add Greetings for each extension if desired Save Save as part of the Company Directory for future access Detailed Steps STEP GUIDE – BUILD A VIRTUAL RECEPTIONIST IN SMART PBX (also called an IVR) 1. Select Main Number tab from the left menu. You will see this screen: 2. Enter Office Hours Strategy This is important as you will likely have different call routing options when your office is closed, either for lunch, after hours or a holiday. NOTES: Verify your time zone Enter your “lunch hour” if you send calls to a different number during that time SAVE your edits! 3. Enter Office Holidays Again, these notes will trigger different call routing procedures. NOTES: Once you add holidays, you will need to make sure you create an Incoming Call Handling scenario for holiday routing. SAVE your changes! 4. Configure your Virtual Receptionist routing for each time setting There are four different settings to configure for incoming calls: Open Hours, Lunch Hours (if you define this separately), After Hours, and Holidays. With each tab, you will see the menu choices shown below. The first box will send calls directly to the Virtual receptionist. The second box will provide a single option, and then forward to the Virtual Receptionist. For this session we'll work with option 1. Check to see that Open Hours is selected in green. Note: if you don't see the "Lunch Hours" or other options to the right, it is because you have not defined these in the dialog boxes above - they are optional. Select the first box, and click on the Virtual Receptionist link. You will see a dialog box like below: 5. For each menu item number, assign an extension or a device. NOTES: You should see all the users, devices and messages assigned to this account in your drop down. If you do not, return to the main SmartPBX menu and add the connections you need. If you do not see your “Account Directory” as a top level choice in the drop down, you will need to go back to your Users tab, select each user and check the box “Include User in the Company Directory". (See dialog box below) SAVE! your settings so far. Return to your Main Menu / Incoming Call Handling / Virtual Receptionist - Open Hours menu and 6. Add a Greeting If you want to add a greeting before you offer menu choices, choose from one of the options for creating that greeting shown on the right. You can: Type a text that converts to speech Upload a pre-recorded .mp3 file Choose from existing recordings 7. Step through the same process for Lunch Hours, After Hours, and Holidays. This is important! If you do not add your preferences for the different hours and holidays, your callers will only hear your first setup option. 8. AND SAVE! Part 2: Advanced Virtual Receptionist Setup using Callflows This section is optional. It demonstrates how to use Callflows to add more complex steps to the Virtual Receptionist process. This includes: Adding sub-menus for different languages Adding call routing options to groups Add a Spanish Speaking menu option If you want to add a second menu option, for example in a different language, you will need to set up a Callflow that directs the caller to a separate menu. Quick Steps Open Callflows Create and build a new Callflow SAVE your Callflow EDIT your Callfllow and make sure to select “List Callflow in Main Number” option so it is displayed in SmartPBX. Open SmartPBX and assign your new Callflow to an extension in the Incoming Call menu. Detailed Steps Open the Callflow Application 1. To access this application, select the Apps icon at the top right of your screen. 2. Click on Callflows If you do not see it, enter it under “search apps”. If it is still not visible, ask your administrator to enable it for you. 3. Select Callflows from the Main menu 4. Then select Add Callflow And add the phone number or extension associated with this flow, or routine. You can choose a spare number in your inventory or define an extension to be used. NOTE This extension is what you will use as the beginning of your Spanish Speaking Callflow. 5. Add a new menu to your Callflow Find the Menu button in the Actions bar to the right, and drag it dynamically to below the Callflow block. The menu dialog box will pop up. 6. Add a greeting message using the bottom selection options. You can Type in a message that will be converted to speech (TTS) and define the “profile” of the speaker (e.g. female/male, etc.) Upload a pre-recorded .mp3 file NOTES: A “Not set” option will mean no greeting is played and the menu options begin. “TTS” is short for Text to Speech. Enter text and it will be spoken for you. You can edit your media file using the edit option; this includes defining the “speaker” profile. 7. Add extensions to the Spanish Menu Callflow Once you have the Spanish menu set up, you will want to attach the extensions that you had defined in SmartPBX, basically copying the same navigation from the main menu to the Spanish menu. To do this, drag the user, ring group, directory, and device buttons from the Actions menu to the Callflow diagram. TIP: A quick way to find the device button: enter the word device in the search box at the top. NOTES When you save this callflow, it will re-arrange the blocks in the correct extension order, 1,2,3,4, etc. When assigning a remote call forwarding device, it's recommended you increase the time setting for "Ring this device for ... " It defaults at 20 seconds, you may want to increase to as much as 120 seconds to allow enough time to reach the forwarding/destination phone number. See image below. Once you drag an action to its place, it will prompt you to assign a user, a phone extension or voicemail box, depending on the action you’ve selected. . 8. SAVE your Callflow 9. List your Callflow in Main Number Confirm it is set to “List this Callflow in Main Number.” This will flag the Callflow and enable it to display as an option in SmartPBX. To verify this is checked, select Edit at the Callflow name level, and check the “List …” box 10. Return to SmartPBX to assign your new Callflow! Go back to your SmartPBX Main Number menu / Incoming Call Handling, and re-select Virtual Receptionist. Note you will now see a 4th option in your configuration screen that is pulled in from the Advanced Callflows application. Unless you want to only use a callflow you have set up that includes multiple menus, etc., you can ignore this. We will add the menu we created in our original Virtual Receptionist navigation. Here, you are now able to select your newly created Spanish Menu options under the Advanced Callflows category. 11. Step through the same process for Lunch Hours, After Hours, and Holidays. This is important! If you do not add your preferences for the different hours and holidays, your callers will only hear your first setup option. NOTE: If you do not see these options, it means you have not defined settings for these options. Use the Main Menu drop-down options and fill out the details. 12. Test your Magic! #####
 -
 Click the link below to download a .pdf file Call Flows 2019-09-26.pdf
 -
 2600HZ STEP GUIDE – CALL FLOW FEATURE CODES Within the Call Flows App, you will find the Feature Code set up. We highly recommend you do not change the default feature codes, but in the event they conflict with your numbering scheme, or at the insistence of the customer, we understand the need can arise. Below is an explanation of how to change them, as well as the explanation of each code. Click into the Advanced Callflows App and select Feature Codes You will see 4 sections: Call Forwarding, Hot-Desking, Miscellaneous, and Parking. All codes are automatically preceded by a “*” since the star is mandatory for a feature code. To disable any feature code from being used, simply uncheck the box to the right of the code. To change the code simply overwrite the existing number and click the Save button at the bottom of the page when finished. Call Forwarding Enable Call Forward – enables calls to be forwarded to another location Disable Call Forward – cancels any forwarding that has been set Toggle Call Forward – allows forwarding to be switched on or off to an extension or number Update Call Forward – updates the number for the forwarding Hot Desking (IDs must be configured in SmartPBX) Enable Hot Desking – allows calls to be brought to a device via the ID Disable Hot Desking – logs the user out of the device Toggle Hot Desking – allows hot desking to be turned on/off at one device Miscellaneous Check Voicemail – provides the option to designate the desired mailbox Check Voicemail (auto login) – if enabled, no password needs to be entered Direct to Voicemail – sends the call directly to the VM box Intercom – allows hands-free two-way communication (must be supported by the device) Privacy – blocks the outbound Caller ID Move Directed Ext Pickup Parking Park and Retrieve – user provides “parking spot” Valet – “parking spot” is automatically assigned/provided Retrieve – pulls parked call to where you are API Reference Docs docs.2600hz.com https://docs.2600hz.com/supported/applications/crossbar/doc/callflows/
 -
 2600HZ STEP GUIDE –CALLFLOWS -- CREATING CONFERENCE BRIDGES Within the Call Flows App, you have the ability to create, edit or delete Conference bridges. The SmartPBX App should be used to set the conference number as well as provide conference bridges for users, but certain advanced options can be provisioned here. Click into the Advanced Callflows App and select Conference As noted above, bridges should be created in the SmartPBX App. (If necessary, once in the Conference submenu, click the +Add button to add a conference bridge.) Once the conference bridges have been created in SmartPBX, you will see the list on the left side in the Conference submenu. Click on the one you want to edit, and the details will pre-populate. This is the information created in SmartPBX. A pin can be created on this page if needed. Click the Advanced tab in the upper right corner. Three tabs will appear. Basic – the information entered in SmartPBX Options – these must be added here (not available to provision in SmartPBX) Conference Server – the bridge number Click Save when changes have been made.
 -
 User Story A user wants to add a device to his/her name in an existing account. Steps This can be achieved in the SmartPBX or Advanced Callflows app. It is recommended you us SmartPBX unlesss you are an administrator, as the Callflows setup may trigger additional reactions in the callflows application. Associate a device with its user in SmartPBX Open Smart PBX Select the User Tab to the left Find the user you want to assign a device to Under the devices column, select the area where devices will display - if there are no devices attached yet you will see the word None. You will be given a choice to: Add from Spare Devices. This will display a list of devices your system admin has already added to the system. Add New Device If you do not see your device listed, you can add it as a new device. Select New Device, and choose the type of device you have. NOTE: each device type also will show “Advanced” Settings, unique to that device’s characteristics.characteristics. Make sure to review those settings in addition before you select the “Create Device” button. Common settings include: Allow use of the device’s voicemail Keep (or not) Original Caller ID Hide from Contact List The screen shot below shows the Advanced settings for adding a Smartphone. SAVE your new device! Once it is added, you will see its icon in the devices area next to your name. Associate a device with its user in Callflows We recommend you assign devices in SmartPBX as it has a newer user interface. Administrators with a programming background who use Callflows for advanced call routing can access the same settings within Callflows as shown below. Select the user from your dropdown Once you assign the correct user, make sure to check the “enabled” checkbox! Review the additional settings tabs for both WiFi and Call Restrictions. Make sure an admin helps with these details. Related Articles SmartPBX -- Adding a User SmartPBX Step Guide Advanced Callflows Set up Feature Codes API Reference Docs docs.2600hz.com Devices - Kazoo API Reference REST API Reference for Kazoo Crossbar API docs.2600hz.com Users - Kazoo API Reference REST API Reference for Kazoo Crossbar API ####
 -
User Story A user wants to add a device to his/her name in an existing account. Steps This can be achieved in the SmartPBX or Advanced Callflows app. It is recommended you us SmartPBX unlesss you are an administrator, as the Callflows setup may trigger additional reactions in the callflows application. Associate a device with its user in SmartPBX Open Smart PBX Select the User Tab to the left Find the user you want to assign a device to Under the devices column, select the area where devices will display - if there are no devices attached yet you will see the word None. You will be given a choice to: Add from Spare Devices. This will display a list of devices your system admin has already added to the system. Add New Device If you do not see your device listed, you can add it as a new device. Select New Device, and choose the type of device you have. NOTE: each device type also will show “Advanced” Settings, unique to that device’s characteristics.characteristics. Make sure to review those settings in addition before you select the “Create Device” button. Common settings include: Allow use of the device’s voicemail Keep (or not) Original Caller ID Hide from Contact List The screen shot below shows the Advanced settings for adding a Smartphone. SAVE your new device! Once it is added, you will see its icon in the devices area next to your name. Associate a device with its user in Callflows We recommend you assign devices in SmartPBX as it has a newer user interface. Administrators with a programming background who use Callflows for advanced call routing can access the same settings within Callflows as shown below. Select the user from your dropdown Once you assign the correct user, make sure to check the “enabled” checkbox! Review the additional settings tabs for both WiFi and Call Restrictions. Make sure an admin helps with these details. Related Articles SmartPBX -- Adding a User SmartPBX Step Guide Advanced Callflows Set up Feature Codes API Reference Docs docs.2600hz.com Devices - Kazoo API Reference REST API Reference for Kazoo Crossbar API docs.2600hz.com Users - Kazoo API Reference REST API Reference for Kazoo Crossbar API #### View full File
-
 Monster App Choices SmartPBX vs Advanced Callflows vs APIs User Story A new user wants to understand what application to use for getting started with and managing and maintaining their account. They are confused about whether to use SmartPBX, Advanced Callflows or system APIs. A new user is looking to understand how these applications interact with each other. Overview It’s important to understand both SmartPBX and Callflows access the same back end database and use the same APIs to transfer data. Edits from one app will reflect in the others the next time you load it. Some apps however, do not provide access to certain settings, either because it is considered more complex and requires admin level understanding, or the setting was added as a new feature not yet updated in an older app. This document will share recommendations on when to use each configuration method. In addition it will review some 2600Hz history to give context to the applications and how they evolved. In short Your administrator will likely use Account Manager for your initial account setup. Once your account is accessible, Smart PBX is often set as the default application you see when logging in. Use SmartPBX for account maintenance and management whenever possible. It is the most current and most user friendly app for your initial setup. Use Callflows if you are an administrator and want to set up some more advanced, complex features for your client. Use KAZOO’s powerful API library if none of the options above provide a feature you require, if your process is a back-end calculation or for automation needs that do not need user input. Note: API use requires a developer who is comfortable using JSON APIs in their preferred programming language, is familiar with Kazoo configurations and reading Kazoo docs. A summary chart of what functionality can be managed in each app is available at the end of this document. For a detailed overview comparing access to each setting in Callflows v. SmartPBX, go HERE. Set up your Initial Account with Account Manager This will be accomplished with your Account administrator. Once your initial account has been set up, you will want to personalize it according to your office requirements. Get Started with your personalizations with SmartPBX Once your account has been set up by an administrator it’s best for as much configuration to be exposed in SmartPBX as possible for End Users to see. Spend some time stepping through the application and working with the features available for you. We have a series of User Guides available also, HERE NOTE: Make sure you associate a “Main Extension” to your user name in SmartPBX. This is required for the comm.io app, and is not available to add in Callflows. (This is an example of the newer app supporting newer features). If you have set up your user in Callflows already and want to use the comm.io softphone, refer to the comm.io installation and setup document, HERE. Advanced Functions using Callflows If it’s not possible to complete your objectives using SmartPBX, use Advanced Callflows. Some common advanced functions callflows excels at include: Creating sub-menus for incoming calls (e.g. Spanish speaking and English speaking). We have a document HERE that outlines this setup. Creating secondary, tertiary, etc. callflows. For example for multiple locations/companies in a single account. Creating custom feature codes Using APIs to develop further customizations Both SmartPBX and Advanced Callflows ultimately use the same APIs, they are just viewed in different ways. If there’s some function in the Kazoo GUI that you need to do very often, often enough that it’s not efficient to use the GUI, this is an occasion where you use APIs. Some common uses for accessing the API directly include: Processes not supported by SmartPBX or Callflows Integrations with other programs that also use APIs. Examples include billing programs, integration with Salesforce or web pages, etc. Repetitive processes that can run in the background and do not need user input (for example, some billing functions). To start learning the API syntax, watch the network tab and see what APIs are being called while you complete your task in the GUI. Then check the documentation to be sure you fully understand what the API call is actually doing. And write your code to replicate it. All the documentation for our APIs is available HERE. Anything that can be done in our GUI can be done via API as well. Simply open your browser’s development tools feature, watch the network tab and see what APIs are being called while you complete your task in the GUI. Reconcile this with the API the documentation to be sure you fully understand what the API call is actually doing. And write your code to replicate it. Notes: Not all APIs are considered stable and available for end user use. Please be sure your API is supported before using them. Please take special care and do extensive testing if you want your application to work with SmartPBX. When developing using the API always develop against a sandbox environment. Never code against a production cluster. An example configuration using multiple KAZOO applications Below are some example configurations where more than one application is accessed. These include helpful tips on the most efficient ways to achieve this. Build a sub-menu into your main number incoming call routing If you want to build a sub-menu into your main number config (for example to support multiple languages or departments), this is not possible to do in SmartPBX. Here’s a trick we use to streamline this process: First, in SmartPBX. build all your ring groups for the sub-menu Second, in Callflows, build the callflow for the sub-menu. Instead of building the menu options all from scratch, use the SmartPBX ring groups you just made. Third, while still in Callflows, name the callflow and enable the “List this callflow in Main Number” check box. This will allow you to use the advanced callflow as an option back in SmartPBX’s main number section. With this example, your end users will be able to change the members and order of the sub-menu’s options via the SmartPBX groups section. This keeps the complexity of Advanced Callflows abstracted away from user, and allows them to manage the details of the process using a familiar interface, SmartPBX. Sample of application best uses Account Mgr SmartPBX Callflows APIs Initial Setup ✔ Add/Edit Users and Devices Global Setup User Edits Basic Settings: Office / Holiday Hrs Hold music Incoming call routing Default language interface Billing settings Global Setup User Edits Ring Groups Create Here Trunking Controls Admin Setup Admin Edits Sub menus for incoming calls Create Ring Group First Attach sub menus to Ring Group Background of KAZOO’s development and updates When the KAZOO project first started over 10 years ago, everything was done via json APIs -- there was no GUI (Graphic User Interface). The expectation was the KAZOO platform would serve as a robust engine for companies to use as their back-end and that those companies would build their own GUI to best fit their customer’s needs. KAZOO is extremely robust and with this comes complexity however, and many of our clients didn’t want to spend time diving into API docs before they even knew if a project would work for them. They wanted a quick and easy way to set up an account to test our wares. To support these developers 2600Hz made a very basic GUI for the APIs to enable a quick and easy setup for a testing environment. This original GUI didn’t expose all of the APIs or even all the features of the APIs but it gave developers a head start. Once they felt confident in the platform, developers used it to enable them to build custom GUIs. This served our clients who are sophisticated programmers in their own right well, and they created unique applications as we imagined, and still do. Their solutions are elegant overlays to the KAZOO engine. As we grew however, resellers started using the original tool to set up and maintain end user accounts; they requested we provide a more friendly way to enable their end users to personalize and change their account details without constant support. This was the driving force behind our Monster-UI framework and SmartPBX application. SmartPBX was built as a general use GUI for Kazoo, one that resellers could hand off to end users. In making the system more friendly to non-programmers however, we reduced the configuration offerings to a core that most accounts need. To continue to keep some more complex features accessible for advanced administrator use we ported in the old UI as the Callflows app. Some challenges remain with this multi-tiered approach. Because SmartPBX and Advanced Callflows share the same APIs, you could see callflows created by SmartPBX in the Callflows app, setting an expectation that users could also edit them. We needed a way to track where the input came from and how to edit it. To solve this, 2600Hz added metadata to the json API indicating what app that created the callflow. And elements made in SmartPBX were hidden from Advanced Callflows. This is the state the system exists in today. While most now use Monster UI and SmartPBX, some companies still use Kazoo strictly as a back-end system and use their own GUIs. Developers are still welcome to use the APIs to build their own GUIs. For those developers wanting to use the APIs, but also wanting to use Advanced Callflows, SmartPBX and other Monster UI apps. This is possible as well. When doing this, however, please take great care in your code to match the formatting that Monster UI apps use as closely as possible. Remember not every single feature of the APIs is available in SmartPBX or even in Advanced Callflows, and SmartPBX expects very particular formatting to work correctly. In all scenarios, thoroughly test your code against a sandbox environment before deploying to production systems. Additional Resources SmartPBX User Guide Account Settings Access: Callflows v. SmartPBX Advanced Callflow configurations and setup API References docs.2600hz.com Callflows - Kazoo API Reference REST API Reference for Kazoo Crossbar API View full File
 -
USER GUIDE – BUILD A VIRTUAL RECEPTIONIST IN SMART PBX (also called an IVR) User Story An office wants to set up a system on their PBX where the caller selects different extensions/options for: Receptionist Directory / List of Extensions Sales group Voicemails for Users and Groups Answering Service or 3rd party number Spanish language menu This is often called a “Virtual Receptionist” or an “IVR” (for "Interactive Voice Response") setting. You will be able to guide your callers to different extensions depending on their purpose. Overview This guide is set up in two parts. Part 1 steps through an initial setup for a main menu using SmartPBX. Part 2 steps through how to add sub-menus and additional features to the standard virtual receptionist process. This addresses our initial user story item for adding a Spanish language menu. To achieve this we will leverage our powerful Callflows application and create a “submenu” there, and then reference it in SmartPBX. The process looks something like this: Before you start Part 1 will take you through setting up a basic Virtual Receptionist, or call directing menu. This guide assumes you have gone through basic SmartPBX setup steps (add link for setup reference) and have: Configured a Company main number and emergency / 911 address Added users to a directory and assigned their extensions Added/enabled devices and phone numbers to the device tab. NOTE: If you use an external answering service, you will want to add their phone # and landline as a device. Added/enabled a group of users (such as sales, billing, appointments, etc) if that will be an option for your Virtual Receptionist List of your office hours and holidays Part 1: Create an initial Virtual Receptionist Menu in SmartPBX Open SmartPBX Quick steps include as follows: Go to the Main Number / Incoming Call Handling menu Enter office hours, and vacation and holiday times that may affect your Virtual Receptionist response For each “setting” -- Open Hours, Lunch Hours, After Hours, and Holidays, choose an initial Callflow and click on its Virtual Receptionist link. Add menu number item and attach its destination Add Greetings for each extension if desired Save Save as part of the Company Directory for future access Detailed Steps STEP GUIDE – BUILD A VIRTUAL RECEPTIONIST IN SMART PBX (also called an IVR) 1. Select Main Number tab from the left menu. You will see this screen: 2. Enter Office Hours Strategy This is important as you will likely have different call routing options when your office is closed, either for lunch, after hours or a holiday. NOTES: Verify your time zone Enter your “lunch hour” if you send calls to a different number during that time SAVE your edits! 3. Enter Office Holidays Again, these notes will trigger different call routing procedures. NOTES: Once you add holidays, you will need to make sure you create an Incoming Call Handling scenario for holiday routing. SAVE your changes! 4. Configure your Virtual Receptionist routing for each time setting There are four different settings to configure for incoming calls: Open Hours, Lunch Hours (if you define this separately), After Hours, and Holidays. With each tab, you will see the menu choices shown below. The first box will send calls directly to the Virtual receptionist. The second box will provide a single option, and then forward to the Virtual Receptionist. For this session we'll work with option 1. Check to see that Open Hours is selected in green. Note: if you don't see the "Lunch Hours" or other options to the right, it is because you have not defined these in the dialog boxes above - they are optional. Select the first box, and click on the Virtual Receptionist link. You will see a dialog box like below: 5. For each menu item number, assign an extension or a device. NOTES: You should see all the users, devices and messages assigned to this account in your drop down. If you do not, return to the main SmartPBX menu and add the connections you need. If you do not see your “Account Directory” as a top level choice in the drop down, you will need to go back to your Users tab, select each user and check the box “Include User in the Company Directory". (See dialog box below) SAVE! your settings so far. Return to your Main Menu / Incoming Call Handling / Virtual Receptionist - Open Hours menu and 6. Add a Greeting If you want to add a greeting before you offer menu choices, choose from one of the options for creating that greeting shown on the right. You can: Type a text that converts to speech Upload a pre-recorded .mp3 file Choose from existing recordings 7. Step through the same process for Lunch Hours, After Hours, and Holidays. This is important! If you do not add your preferences for the different hours and holidays, your callers will only hear your first setup option. 8. AND SAVE! Part 2: Advanced Virtual Receptionist Setup using Callflows This section is optional. It demonstrates how to use Callflows to add more complex steps to the Virtual Receptionist process. This includes: Adding sub-menus for different languages Adding call routing options to groups Add a Spanish Speaking menu option If you want to add a second menu option, for example in a different language, you will need to set up a Callflow that directs the caller to a separate menu. Quick Steps Open Callflows Create and build a new Callflow SAVE your Callflow EDIT your Callfllow and make sure to select “List Callflow in Main Number” option so it is displayed in SmartPBX. Open SmartPBX and assign your new Callflow to an extension in the Incoming Call menu. Detailed Steps Open the Callflow Application 1. To access this application, select the Apps icon at the top right of your screen. 2. Click on Callflows If you do not see it, enter it under “search apps”. If it is still not visible, ask your administrator to enable it for you. 3. Select Callflows from the Main menu 4. Then select Add Callflow And add the phone number or extension associated with this flow, or routine. You can choose a spare number in your inventory or define an extension to be used. NOTE This extension is what you will use as the beginning of your Spanish Speaking Callflow. 5. Add a new menu to your Callflow Find the Menu button in the Actions bar to the right, and drag it dynamically to below the Callflow block. The menu dialog box will pop up. 6. Add a greeting message using the bottom selection options. You can Type in a message that will be converted to speech (TTS) and define the “profile” of the speaker (e.g. female/male, etc.) Upload a pre-recorded .mp3 file NOTES: A “Not set” option will mean no greeting is played and the menu options begin. “TTS” is short for Text to Speech. Enter text and it will be spoken for you. You can edit your media file using the edit option; this includes defining the “speaker” profile. 7. Add extensions to the Spanish Menu Callflow Once you have the Spanish menu set up, you will want to attach the extensions that you had defined in SmartPBX, basically copying the same navigation from the main menu to the Spanish menu. To do this, drag the user, ring group, directory, and device buttons from the Actions menu to the Callflow diagram. TIP: A quick way to find the device button: enter the word device in the search box at the top. NOTES When you save this callflow, it will re-arrange the blocks in the correct extension order, 1,2,3,4, etc. When assigning a remote call forwarding device, it's recommended you increase the time setting for "Ring this device for ... " It defaults at 20 seconds, you may want to increase to as much as 120 seconds to allow enough time to reach the forwarding/destination phone number. See image below. Once you drag an action to its place, it will prompt you to assign a user, a phone extension or voicemail box, depending on the action you’ve selected. . 8. SAVE your Callflow 9. List your Callflow in Main Number Confirm it is set to “List this Callflow in Main Number.” This will flag the Callflow and enable it to display as an option in SmartPBX. To verify this is checked, select Edit at the Callflow name level, and check the “List …” box 10. Return to SmartPBX to assign your new Callflow! Go back to your SmartPBX Main Number menu / Incoming Call Handling, and re-select Virtual Receptionist. Note you will now see a 4th option in your configuration screen that is pulled in from the Advanced Callflows application. Unless you want to only use a callflow you have set up that includes multiple menus, etc., you can ignore this. We will add the menu we created in our original Virtual Receptionist navigation. Here, you are now able to select your newly created Spanish Menu options under the Advanced Callflows category. 11. Step through the same process for Lunch Hours, After Hours, and Holidays. This is important! If you do not add your preferences for the different hours and holidays, your callers will only hear your first setup option. NOTE: If you do not see these options, it means you have not defined settings for these options. Use the Main Menu drop-down options and fill out the details. 12. Test your Magic! ##### View full File
-
2600HZ STEP GUIDE –CALLFLOWS -- CREATING CONFERENCE BRIDGES Within the Call Flows App, you have the ability to create, edit or delete Conference bridges. The SmartPBX App should be used to set the conference number as well as provide conference bridges for users, but certain advanced options can be provisioned here. Click into the Advanced Callflows App and select Conference As noted above, bridges should be created in the SmartPBX App. (If necessary, once in the Conference submenu, click the +Add button to add a conference bridge.) Once the conference bridges have been created in SmartPBX, you will see the list on the left side in the Conference submenu. Click on the one you want to edit, and the details will pre-populate. This is the information created in SmartPBX. A pin can be created on this page if needed. Click the Advanced tab in the upper right corner. Three tabs will appear. Basic – the information entered in SmartPBX Options – these must be added here (not available to provision in SmartPBX) Conference Server – the bridge number Click Save when changes have been made. View full File
-
2600HZ USER GUIDE - BLOCK LISTING NUMBERS Within the Call Flows App, you will find the Blocklist set up. The Blocklist is used to block calls from a particular number. Note this does not blocklist outgoing calls. Create your Blocklist List of Numbers Click into the Advanced Callflows App and select Blocklist 2. Once in the Blocklist submenu, click 3. add a Name (for reference), and add the number. NOTES: You can also block all Anonymous calls by switching the “Block Anonymous” to On. It is important you add the exact number sequence you want to block, which in most cases includes a country code. (including the US +1). To verify the number(s) match, you can view your call log in SmartPBX. See the section below for details. Activate your list Once you've created the set of numbers, you will need to Activate that list for your specific account. Select the Return to Callflows Home button at the top right of your screen Go to the Account Settings block Select the Blocklist tab Drag your newly named Blocklist list from "Available" to "Selected and select the green UPDATE button at the bottom. To confirm the correct Number entry If you want to make sure you are including the exact number as the blocklist routine will see it, you can view your call log and retrieve it there. Follow these steps Access SmartPBX Go to the Call Logs menu item Search for the call you've identified, and expand its listing. Select the gear to the right for a detail of the call routing and number. You will see something like below: Use the "caller_id_number" as displayed here on your blocklist entry. Frequently Asked Questions How do I block / blocklist Anonymous calls? To blocklist Anonymous calls you will need to follow these steps: Create a blocklist and name it (e.g. Block Anonymous) Toggle the switch saying "Block Anonymous" on Return to Callflows / Account Settings and assign that blocklist file to the list Select the green Update button to Save. NOTES: This provides a first-level screening for calls where caller-IDs are tagged as anonymous. If this is not filtering calls as expected, it's likely some added layers of configuration settings need to be reviewed: The caller may have added a layer of deception about the call, using techie-geeky strategies such as using a zero phone number 000000000 to a marking a SIP flag as "privacy=true". If these kinds of calls persist, follow the steps above for "to confirm the correct number" from your SmartPBX log and manually blocklist the specific number. If you are a Private Cloud or Global Infrastructure client and use your own carrier, your carrier may have a unique strategy for dealing with anonymous calls that KAZOO doesn't anticipate. Check with support to help review your call logs. If your blocklist assignment is still letting calls come through, you may need to contact support so they can analyze your SIP call logs and Carrier settings at a more detailed level. Related Articles Advanced Callflow configurations and setup API Reference Docs docs.2600hz.com Blocklists - Kazoo API Reference REST API Reference for Kazoo Crossbar API ##### View full File
-
The set_variables element data object is: "data": { "custom_application_vars": { "var_name": "var value" }, "export" : true } The documentation for the export flag states "When true the provided custom_application_vars are set on the channel and any channel bridged to it later" However, when placing this element prior to a ring_group, inspection of the outbound CDR legs to the members of the group show no difference whether export is set to true or false. I expected the variable to be present in the output legs. Is this broken?
-
Click the link below to download a .pdf file Call Flows 2019-09-26.pdf View full File
-
2600HZ STEP GUIDE – CALL FLOW FEATURE CODES Within the Call Flows App, you will find the Feature Code set up. We highly recommend you do not change the default feature codes, but in the event they conflict with your numbering scheme, or at the insistence of the customer, we understand the need can arise. Below is an explanation of how to change them, as well as the explanation of each code. Click into the Advanced Callflows App and select Feature Codes You will see 4 sections: Call Forwarding, Hot-Desking, Miscellaneous, and Parking. All codes are automatically preceded by a “*” since the star is mandatory for a feature code. To disable any feature code from being used, simply uncheck the box to the right of the code. To change the code simply overwrite the existing number and click the Save button at the bottom of the page when finished. Call Forwarding Enable Call Forward – enables calls to be forwarded to another location Disable Call Forward – cancels any forwarding that has been set Toggle Call Forward – allows forwarding to be switched on or off to an extension or number Update Call Forward – updates the number for the forwarding Hot Desking (IDs must be configured in SmartPBX) Enable Hot Desking – allows calls to be brought to a device via the ID Disable Hot Desking – logs the user out of the device Toggle Hot Desking – allows hot desking to be turned on/off at one device Miscellaneous Check Voicemail – provides the option to designate the desired mailbox Check Voicemail (auto login) – if enabled, no password needs to be entered Direct to Voicemail – sends the call directly to the VM box Intercom – allows hands-free two-way communication (must be supported by the device) Privacy – blocks the outbound Caller ID Move Directed Ext Pickup Parking Park and Retrieve – user provides “parking spot” Valet – “parking spot” is automatically assigned/provided Retrieve – pulls parked call to where you are API Reference Docs docs.2600hz.com https://docs.2600hz.com/supported/applications/crossbar/doc/callflows/ View full File
-
I recently got a client who wants to give customers access to the Smart PBX but would like to remove the ability to purchase phone numbers. I thought taking the Number Manager away was enough but the Buy button still appears within the UI. Any one have an idea how to remove this feature and I just can't find it?
-
how would i fill out the Callflow Name via API? for example i have this code, where do i put the call flow name? http://api.zzzz.com:8000/v2/accounts/xxxxxxxxxxxxxxxxxxxxxxxxx/callflows -d '{"data":{"flow":{"data":{"action":"static","caller_id":{"number":"7777777777","name":"ABC"}},"module":"dynamic_cid","children":{"_":{"data":{"pin":"","use_account_caller_id":false,"interdigit":"7000","preconnect_audio":"dialtone"},"module":"disa","children":{}}}},"numbers":["*1000"],"patterns":[],"id":""}}'